Module 4
Well.....one of the lessons learned so far working on this layout is to not make these modules in isolation, but instead consider them as just piece of the whole. On module three I made an error in alignment of the incoming tracks, a mistake that cost me a fair amount of time, frustration, and materials.
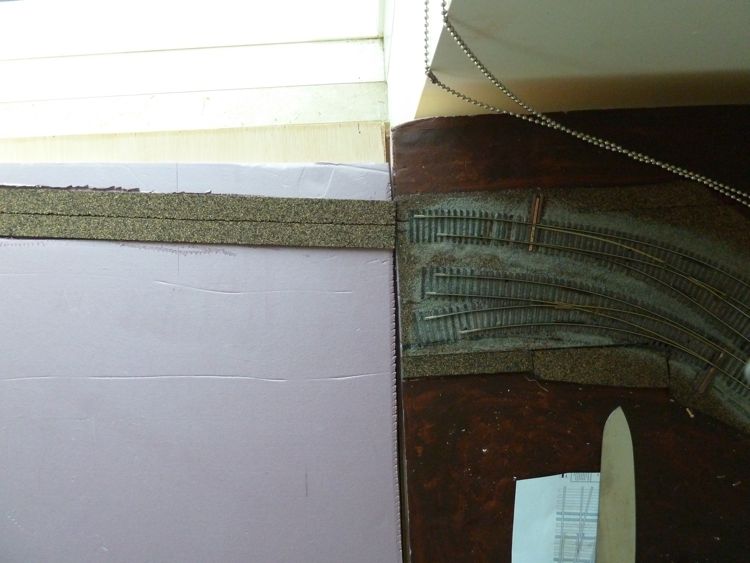
This module is the easiest one of the set — no fancy track work, not even a switch! While module three was drying, it was time to get a head start on this one.
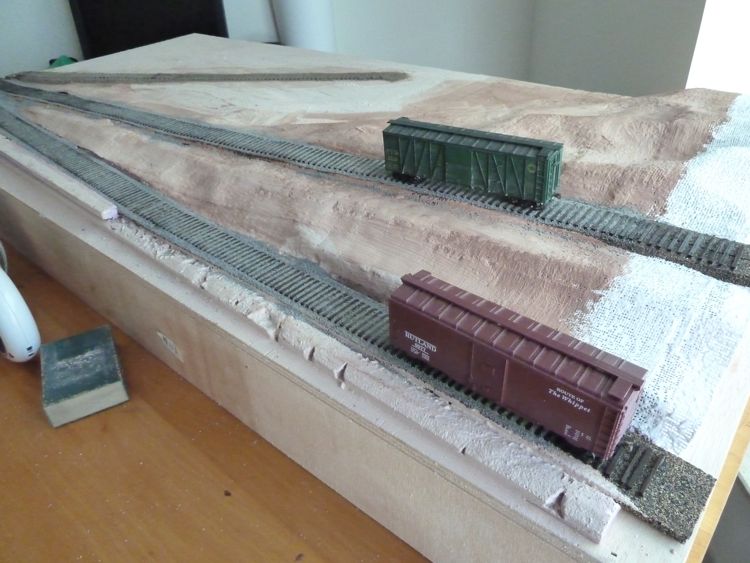
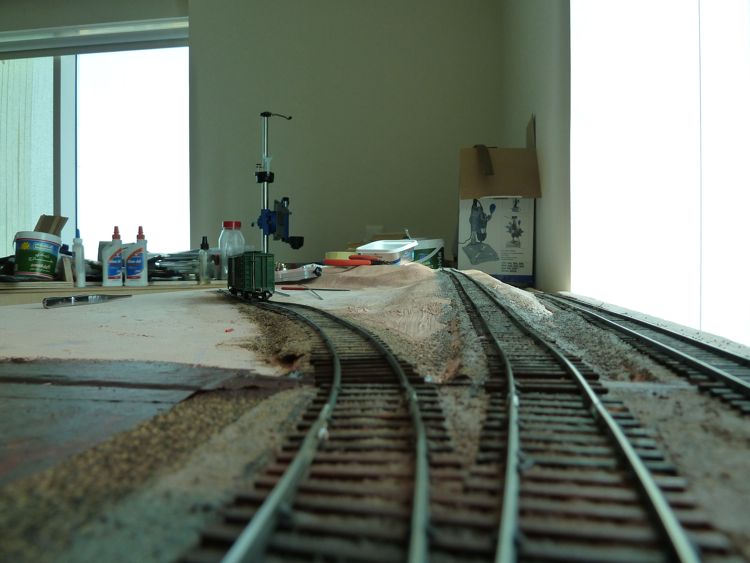
The main feature of this module are the grades (the only ones on the layout). The branch line climbs an inch while the mainline (staging) simultaneously drops an inch, hopefully allowing staging to "hide" from view without covering it from above.
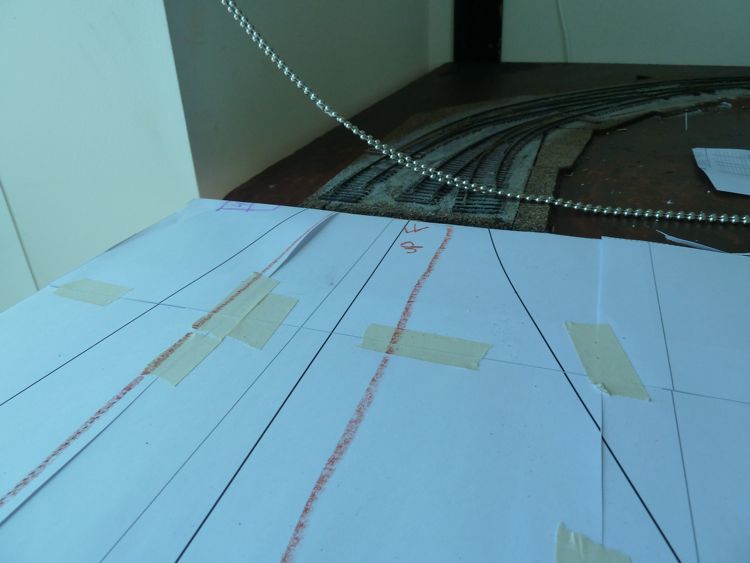
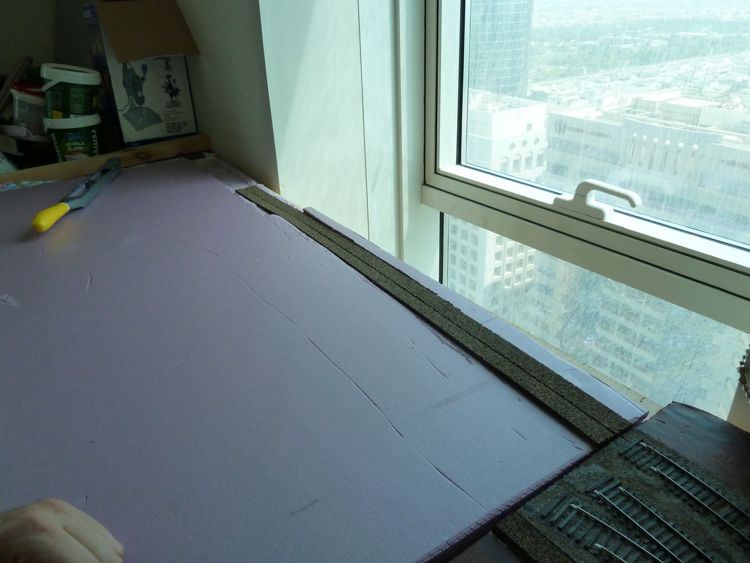
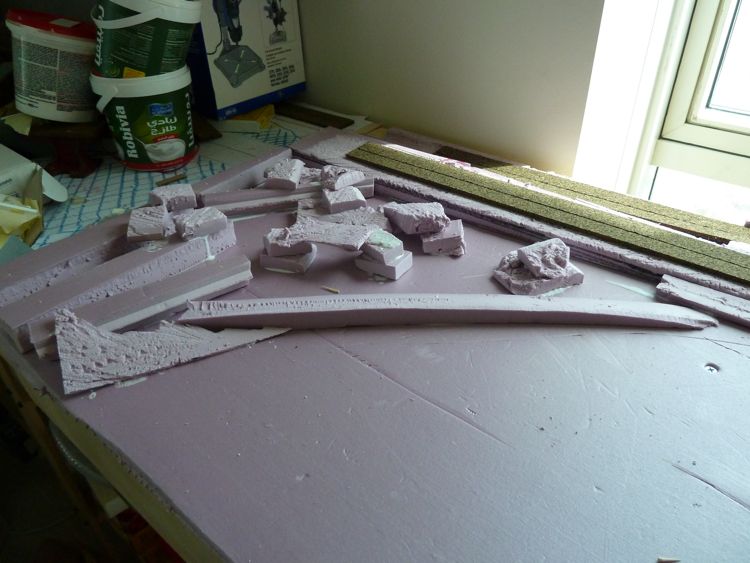
First step, as always, was clearing off the module (the unfinished ones make great workbenches!), and laying out the plan.
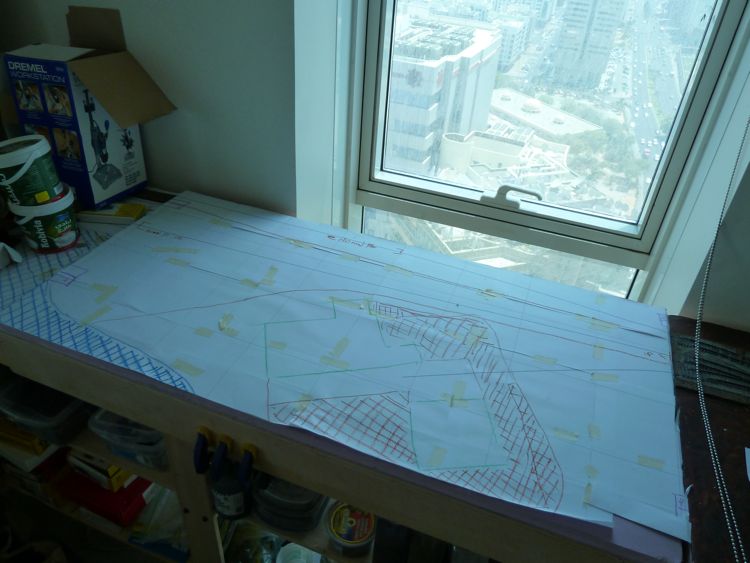
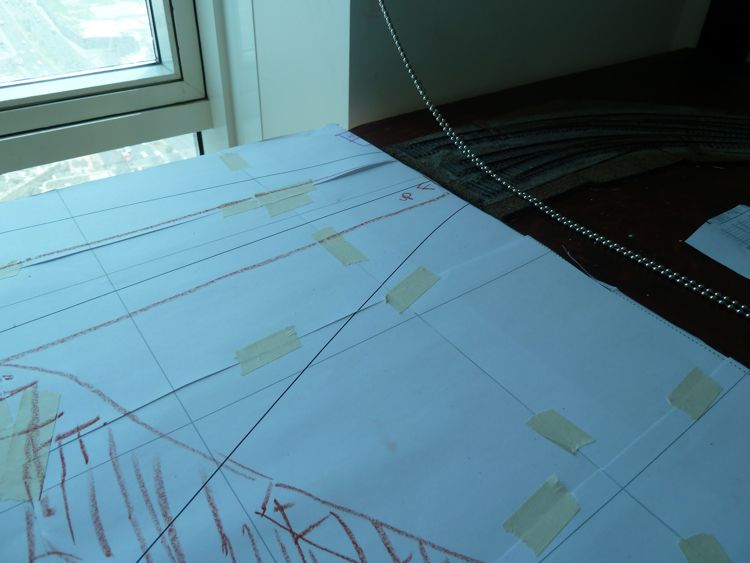
With the plan in hand, the incoming alignment on this one looks pretty good.
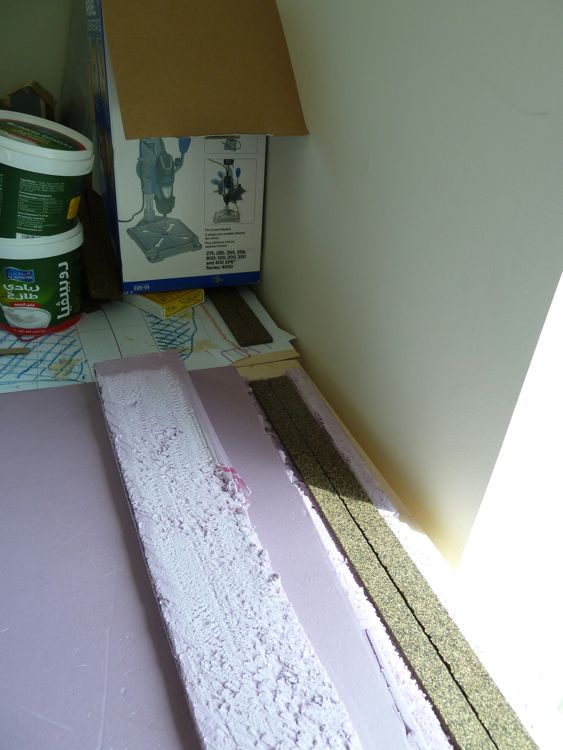
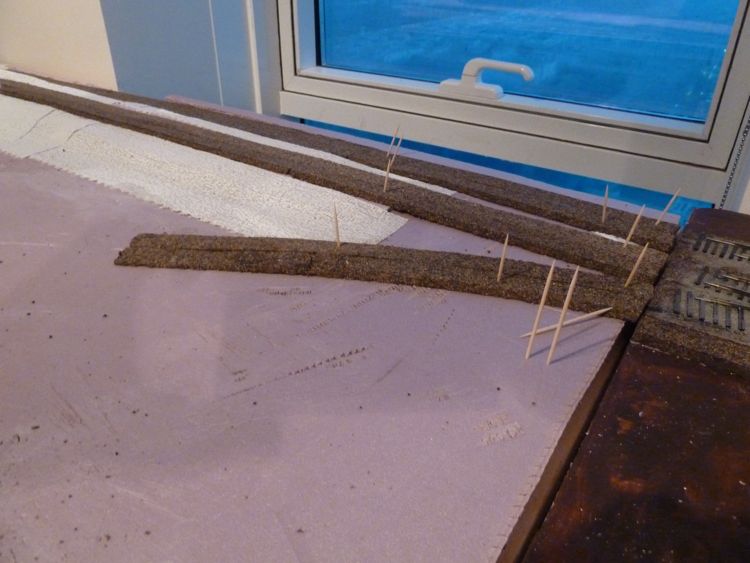
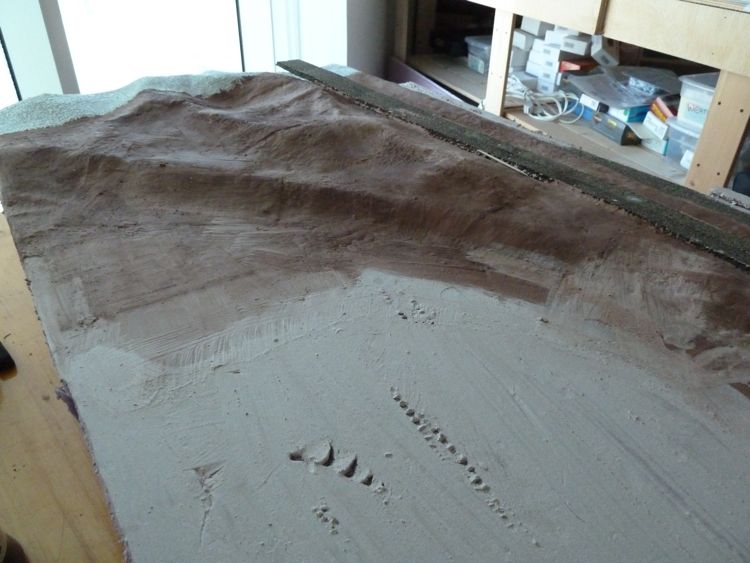
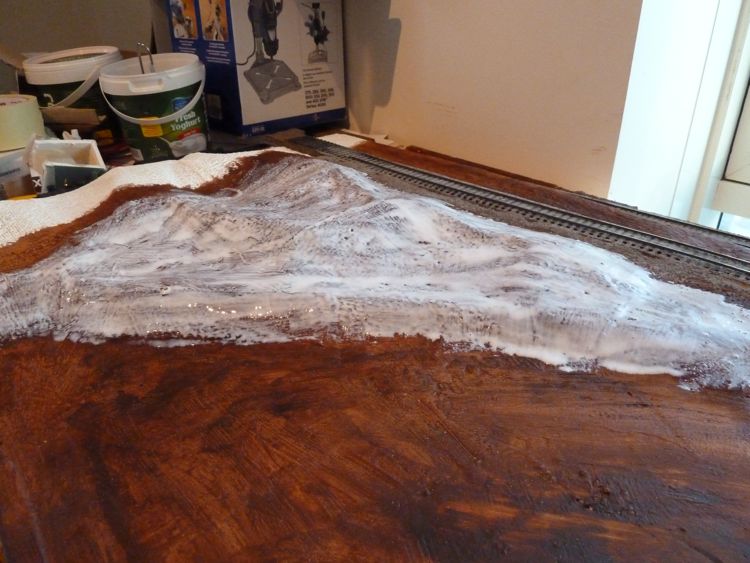
I started with the down grade to staging, and immediately wished I had ordered the Woodland Scenics foam slopes. But I didn't, so it was time to brake out the "cheese grater".
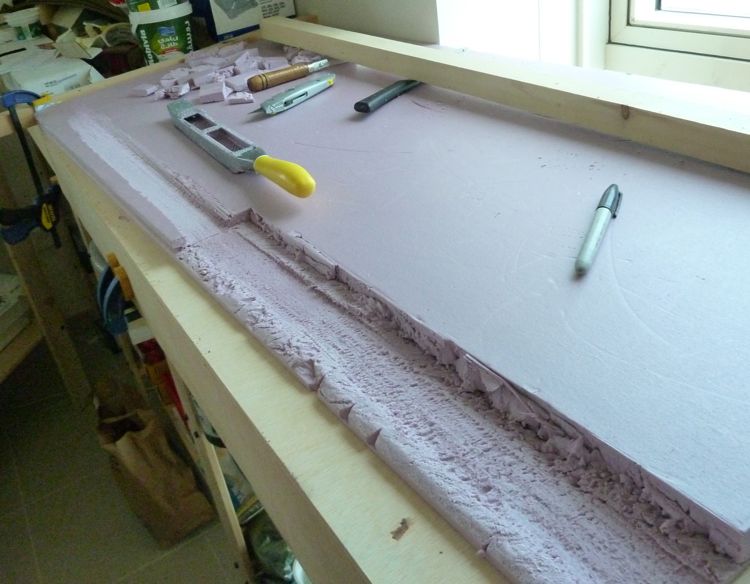
I started cutting, and used this piece of Gorm riser to check my slope. The foam is 1" thick, so it was an easy way to set my start and finish points. I just kept at it, marking high spots on the foam with a sharpie, and than ground away with the grater. Oh yeah, I kept a vacuum handy and running the whole time.
I kept checking progress both with the board, and with some cork roadbed.
I was able to play with the alignment of the foam board from above, to ensure the path would be smooth.
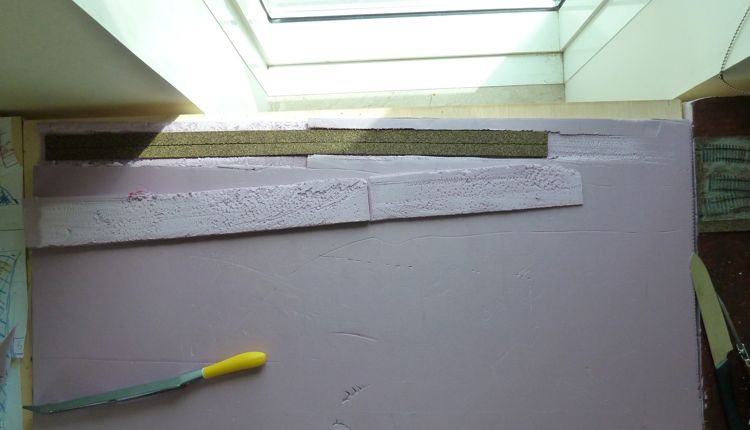
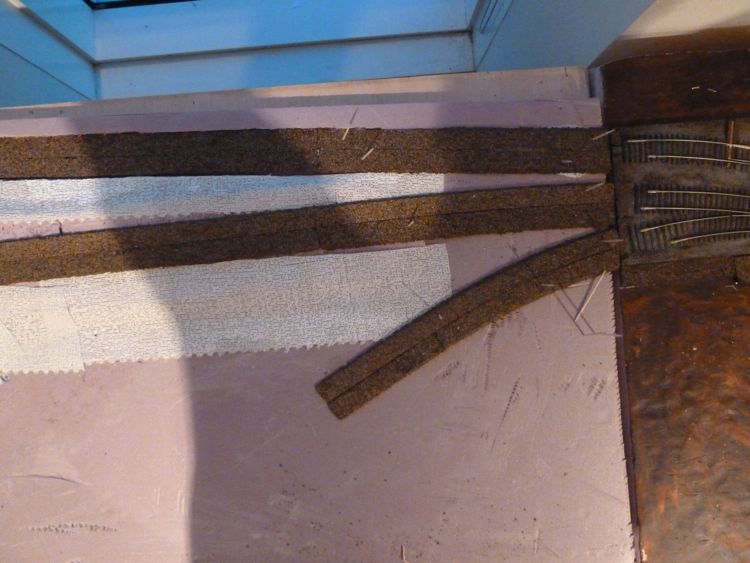
With that slope done, I started on the branch line rise. I marked the edge of a piece of foam board (again, using the Gorm riser as a ruler), and cut across it with a Zona saw. This gave me a roughed piece that I could smooth out with the cheese grater. Here is the branch line riser being located, note the module to the left has the plan in places so I have a clear view of where it's headed.
more alignment...
Once I was happy, I applied glue and my foam "spikes". I've used this method for a long time, simply driving in toothpicks as rebar, they really work wonders holding foam together both while the glue dries, and afterwards. I normally try and drive them in at an angle.
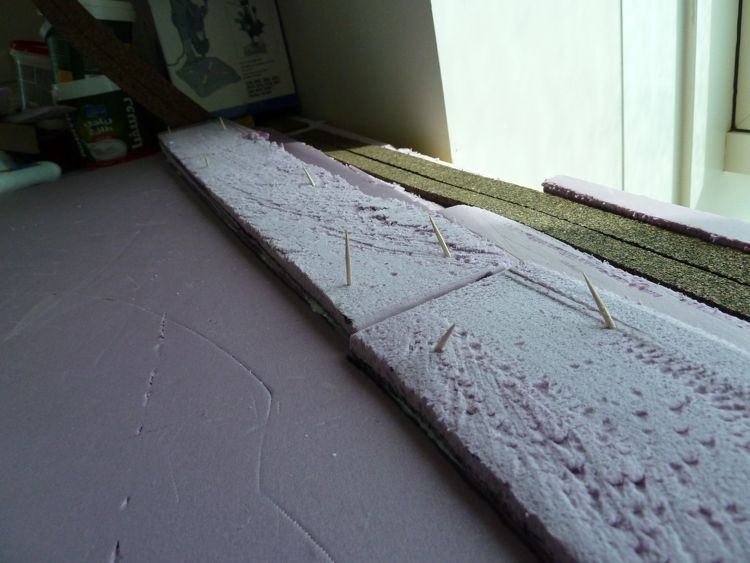
Once they are in, I just cut them off flush.
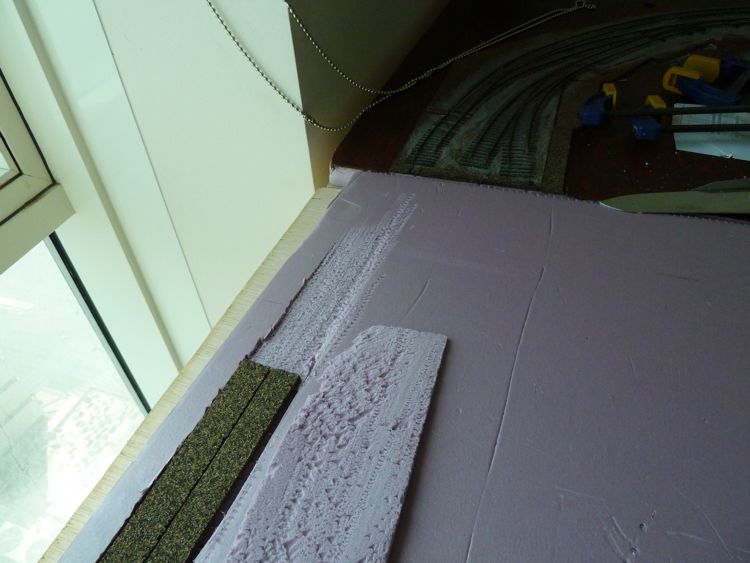
Another alignment check....
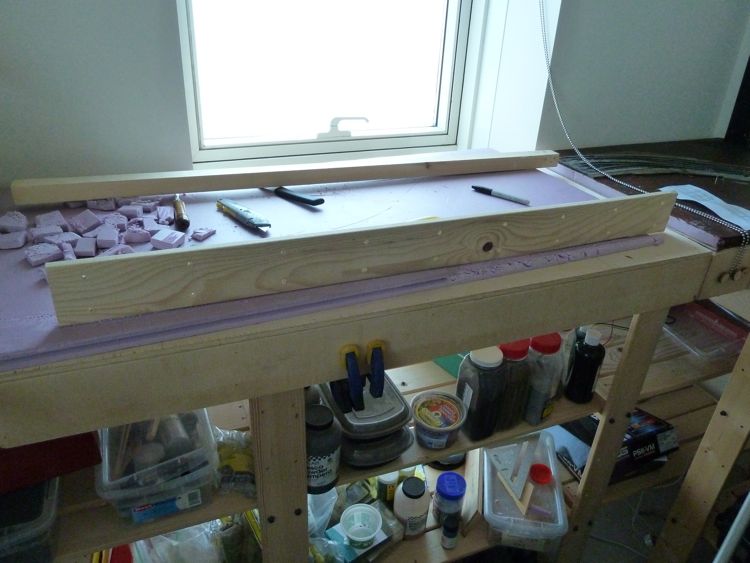
I took this shot for my own purposes, to take a careful look at the grade. Overall, I'm pretty happy with the slope, but I think I'll need to shave down a couple of spots before the cork goes on for real.
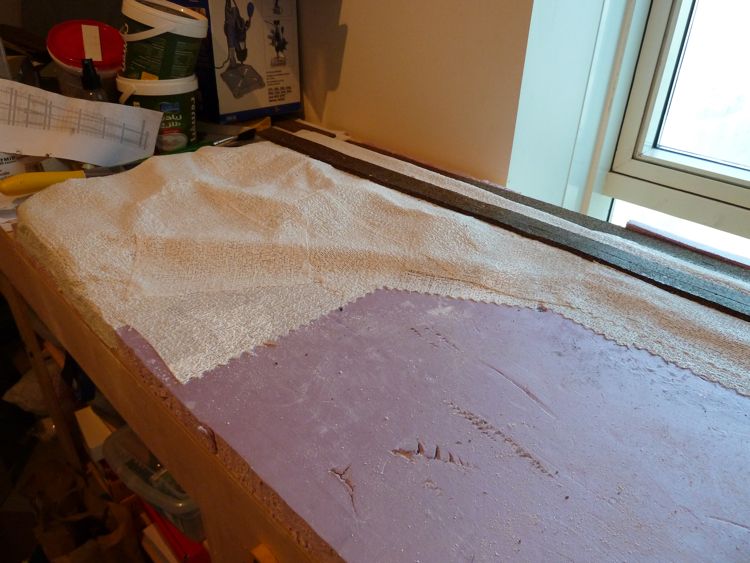
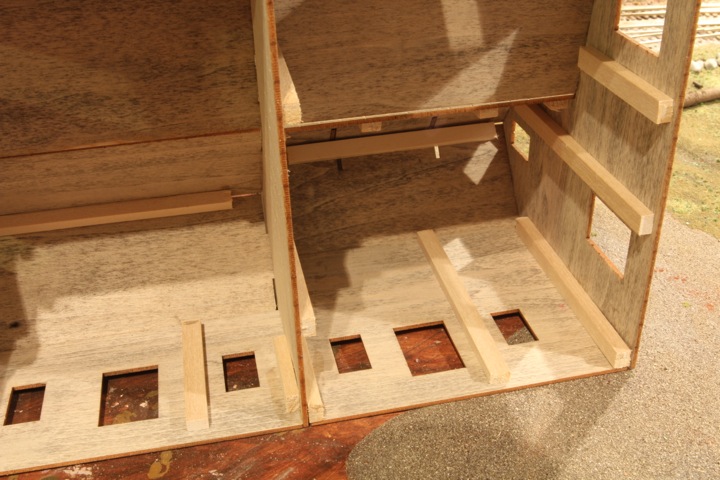
Once that was in, I grabbed some of the scrap that I've accrued, and starting filling in this area as sub-structure to the finished scenery.
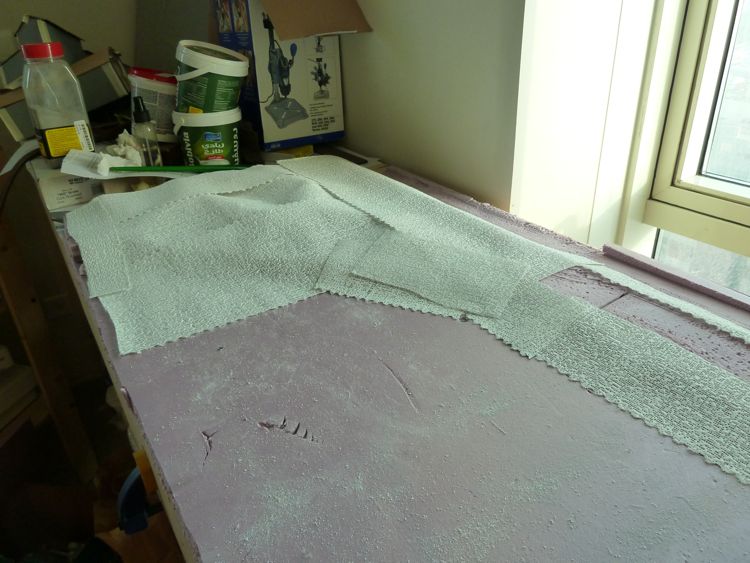
With the glue dry, I've continued to move forward with this, putting down some plaster cloth to form the terrain surface of the module.
Now here is another high-rise challenge - I don't have a utility sink or drain. It used to be that when I was working with plaster, I filled a bowl with water, dipped in the plaster cloth, applied it, and than threw the bowl contents into my yard, hosing out the bowl.
So now, no hose. No yard.
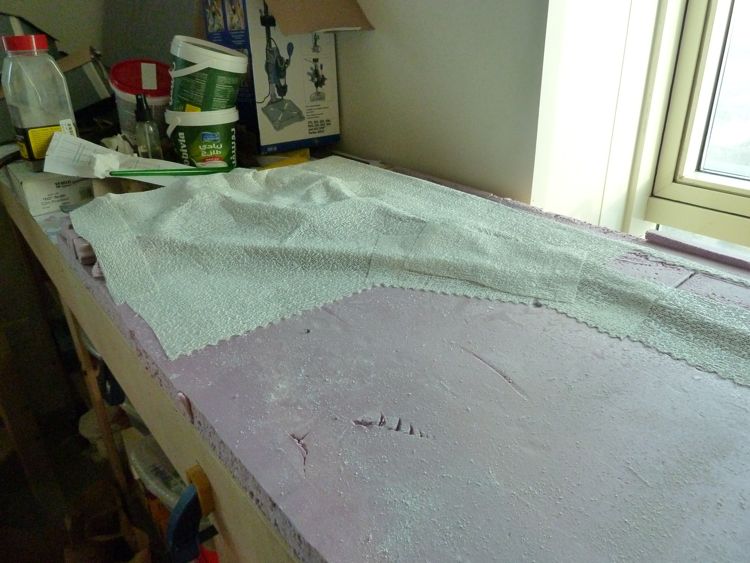
I'm sure that I'm not the first to do this, but I wondered if I could apply the plaster cloth a bit differently - put it down dry, and than using a spray bottle, soak it from above until it was saturated and moldable.
First up was cutting some plaster cloth up to cover the rough areas that I wanted covered. Note the plaster cloth is completely dry at this stage.
And after spraying (what felt like 50 gallons of water, as it was a finger pump spray bottle), it seemed to be working!
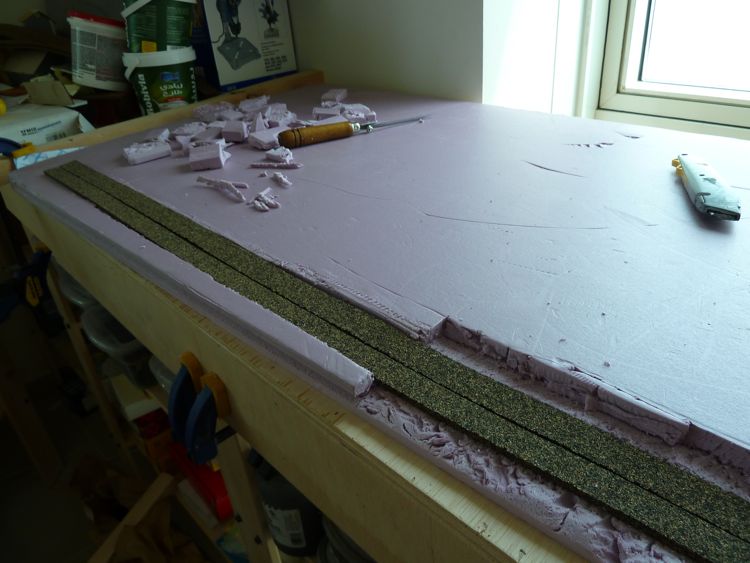
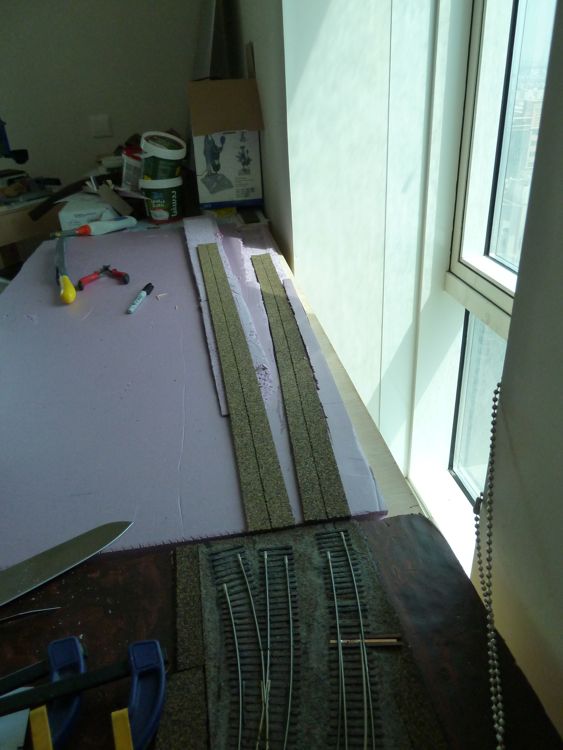
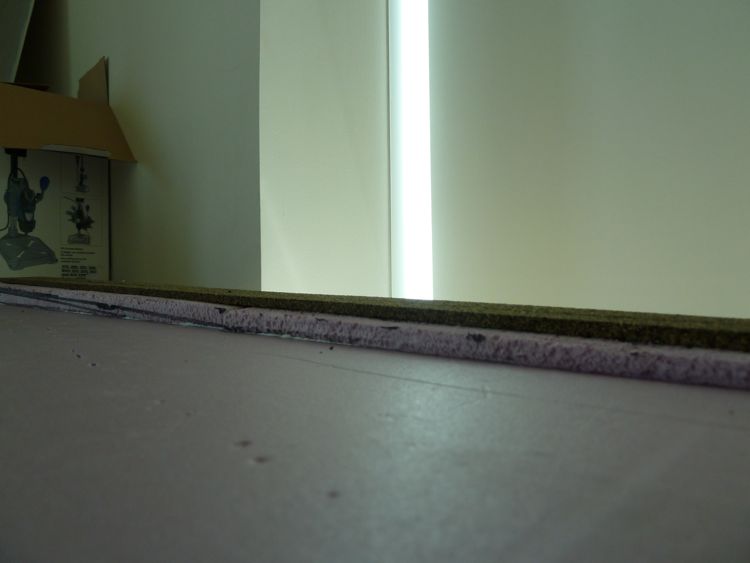
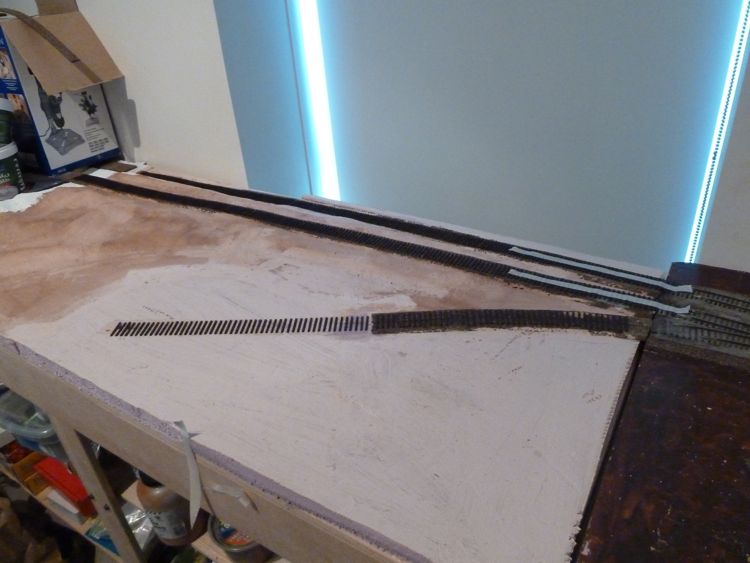
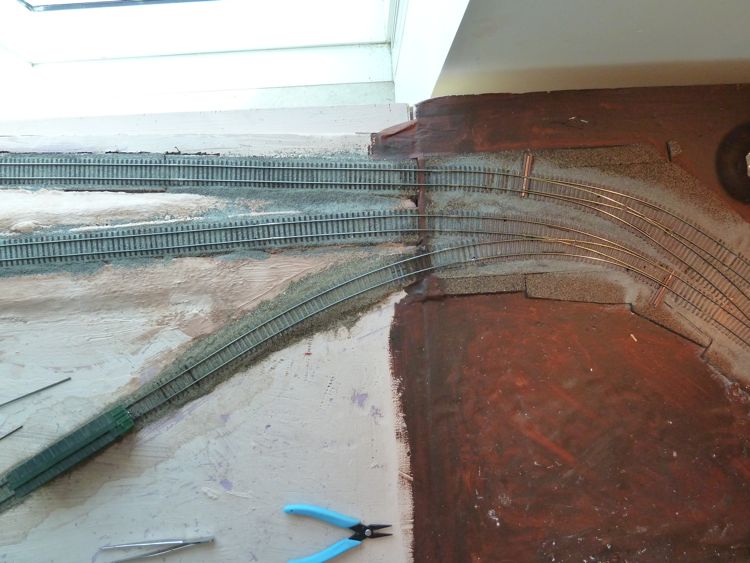
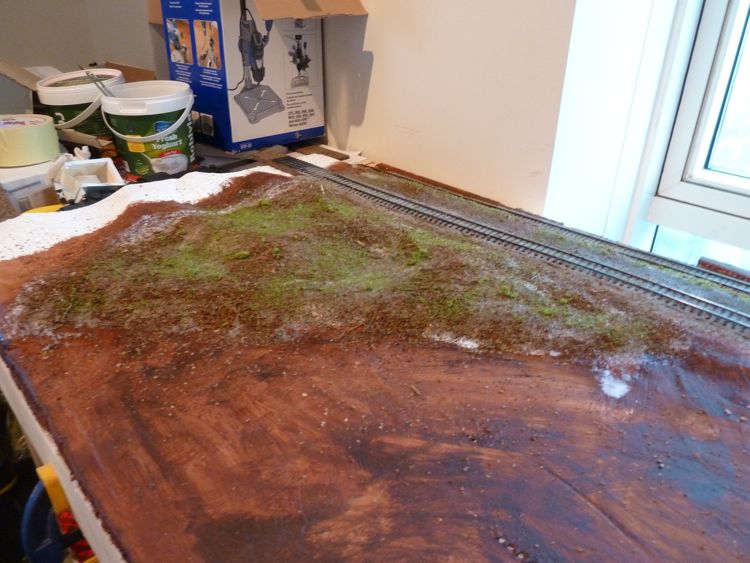
Once that had a chance to set, I started applying the cork roadbed to the module.
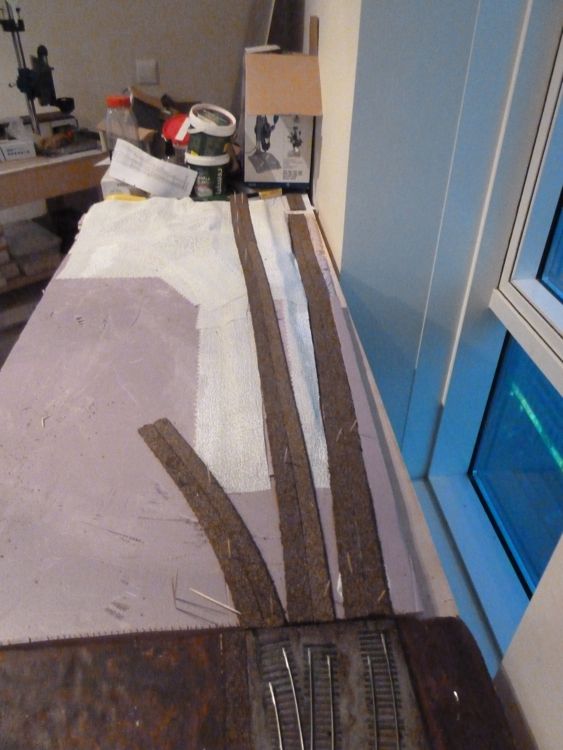
Again, you can see my toothpick spikes, holding the cork down to the surface. The front siding roadbed is sanded down to a flat slope, as the ties will lie directly on the foam board.
Once all of that was dry, I went ahead and applied another coat of plaster cloth. This one went much easier, as I used smaller strips, and applied them one at a time. Again, there was no cleanup, and minimal mess.
I coated the plaster cloth with what I could find locally as ground goop (basically some tinted plaster).
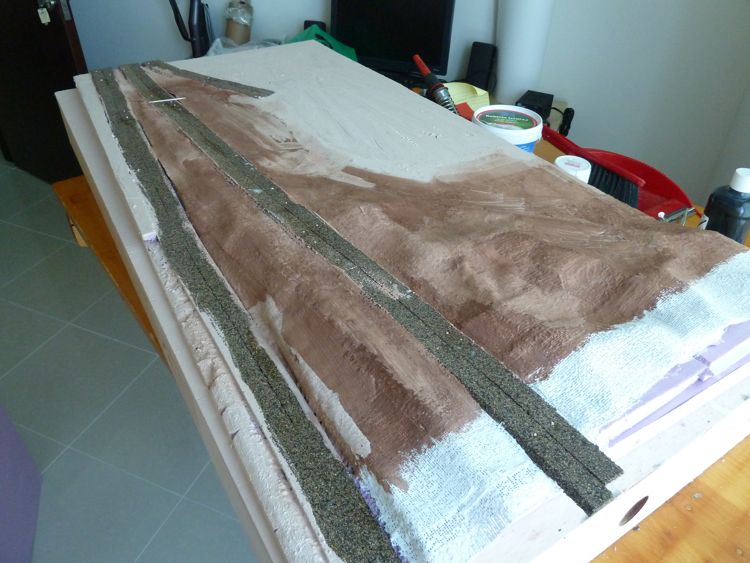
As far as an undercoat, I think it's smoothed out a lot of the edges, and should be good enough as a base for the scenery.
Once that was fully dry, I went ahead and put down the cross ties. Note the mainline and branch line ties at the end are still wet, I put the module back into place to ensure the lineup was right before applying the ties.
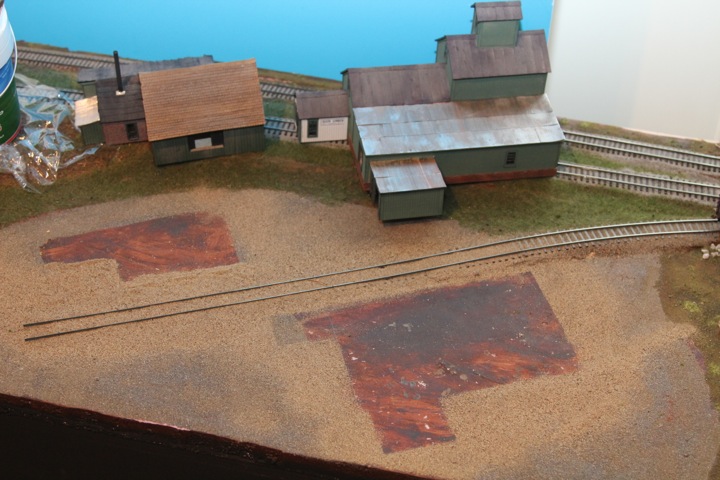
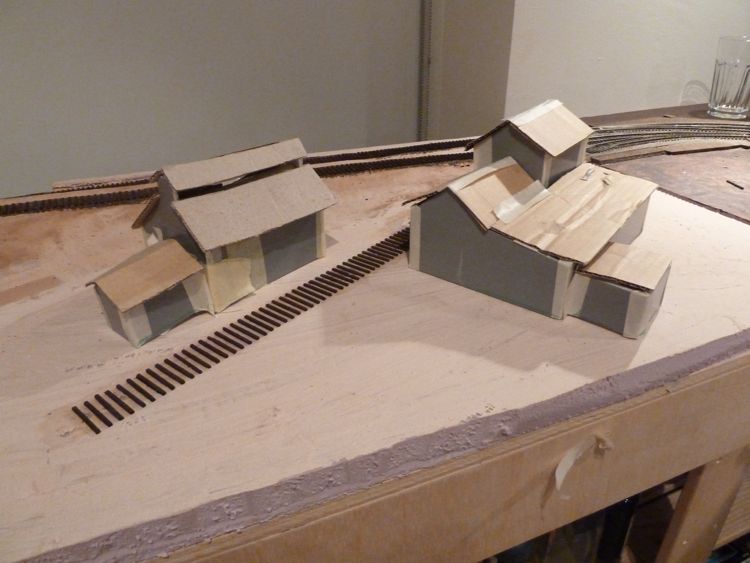
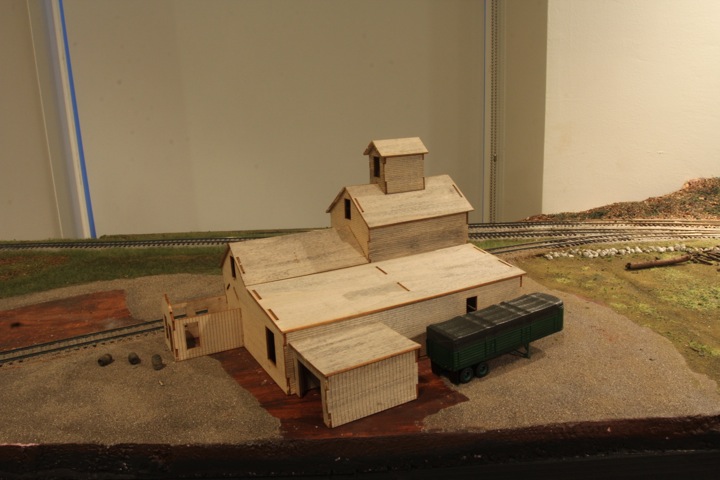
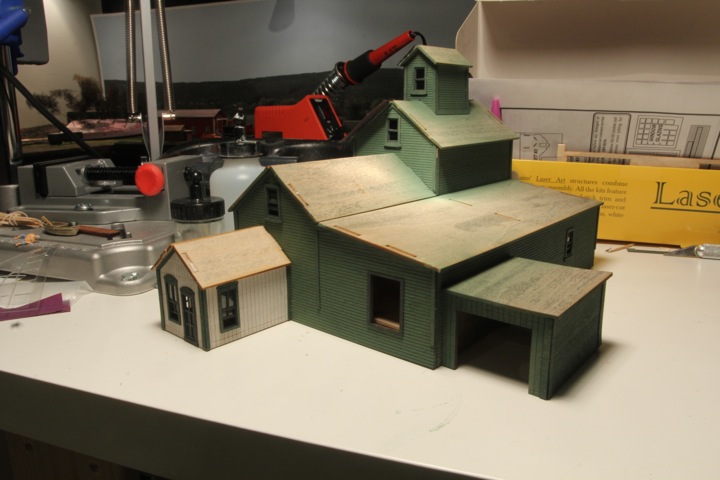
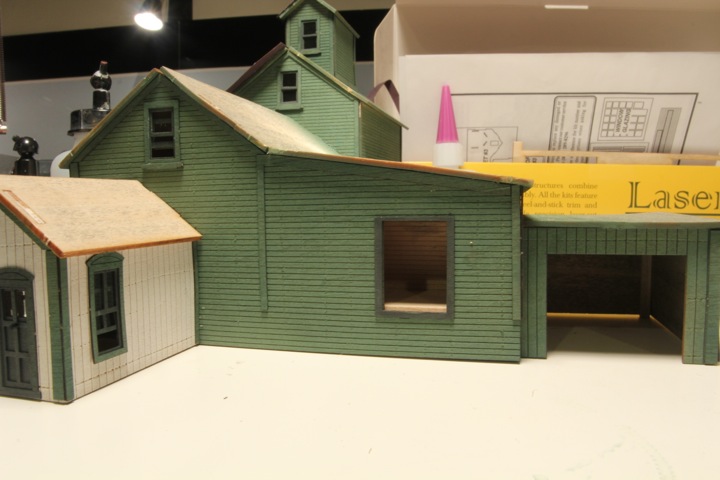
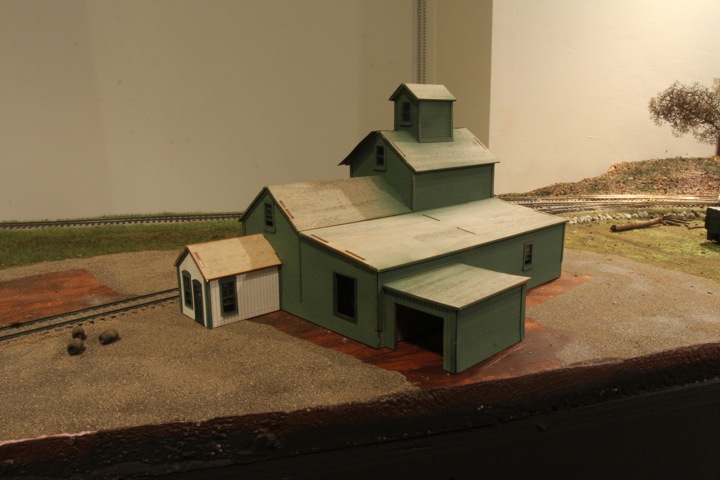
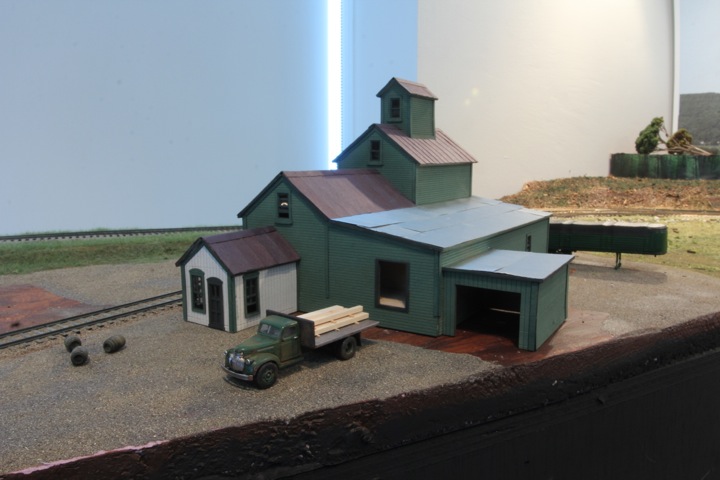
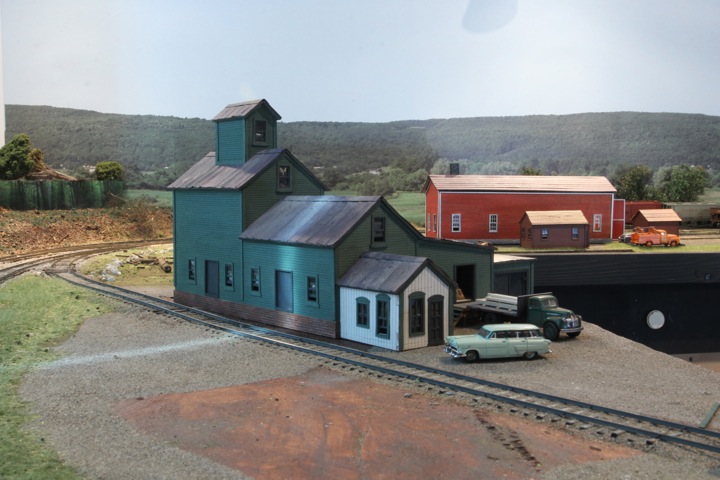
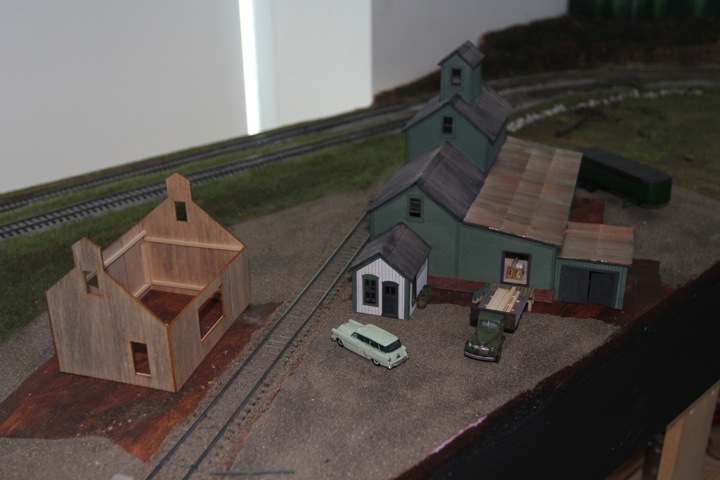
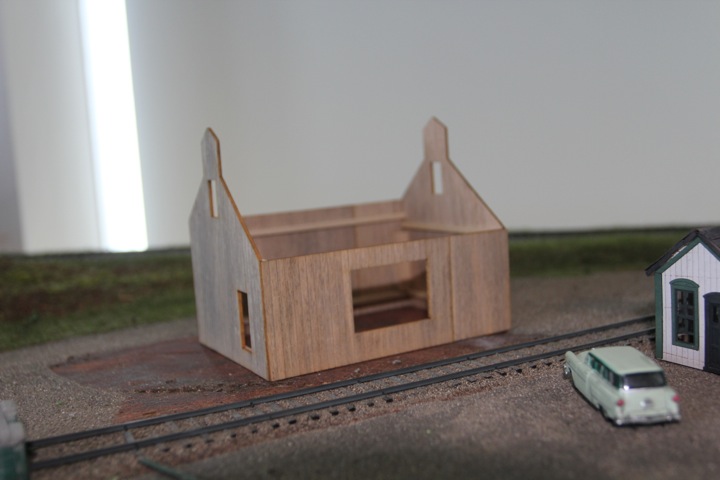
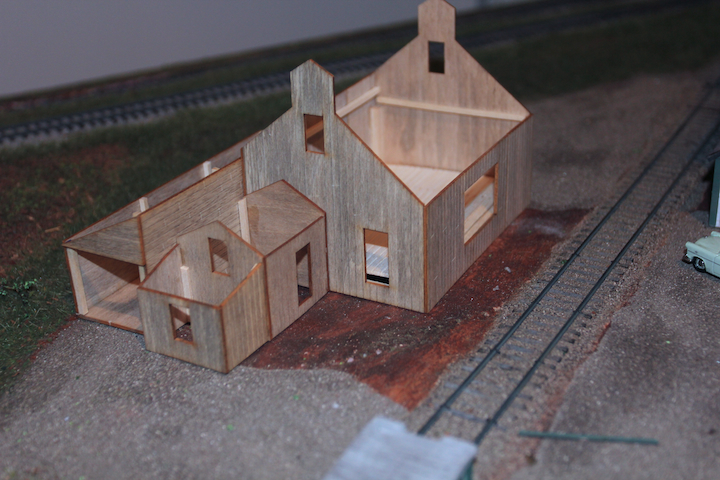
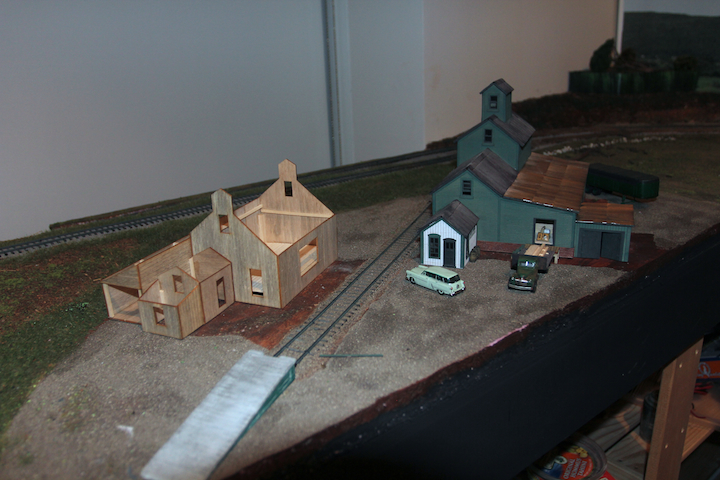
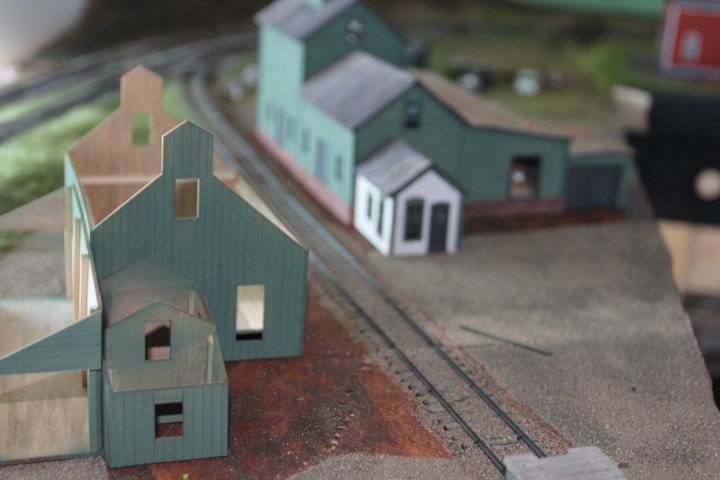
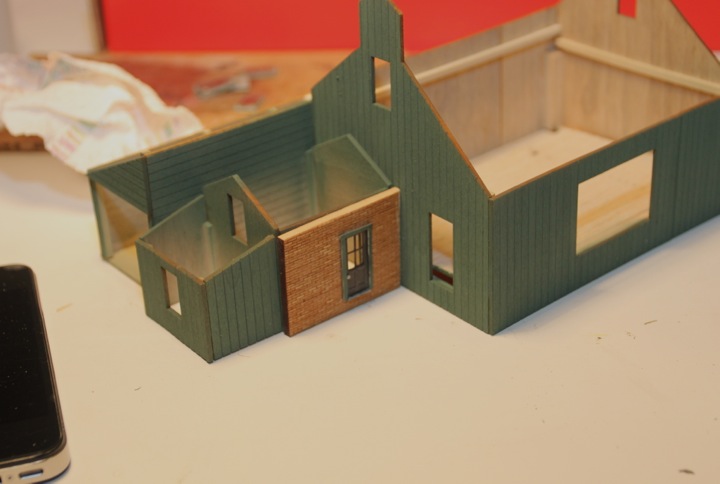
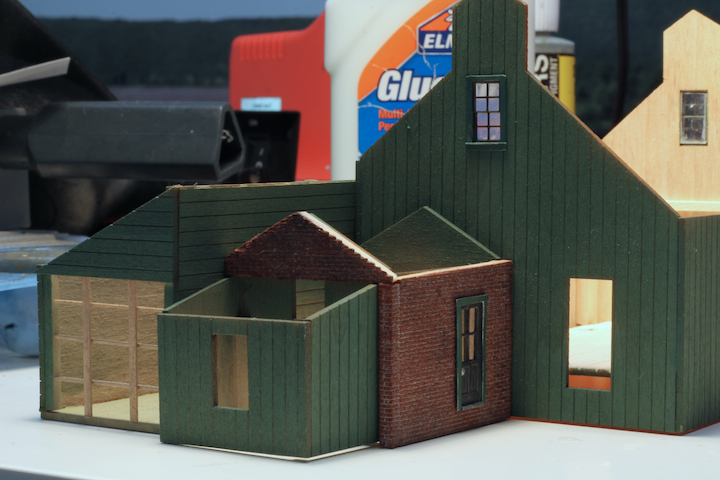
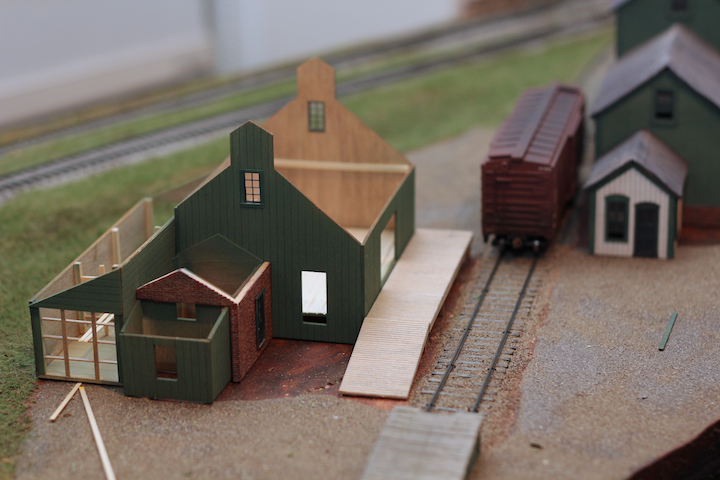
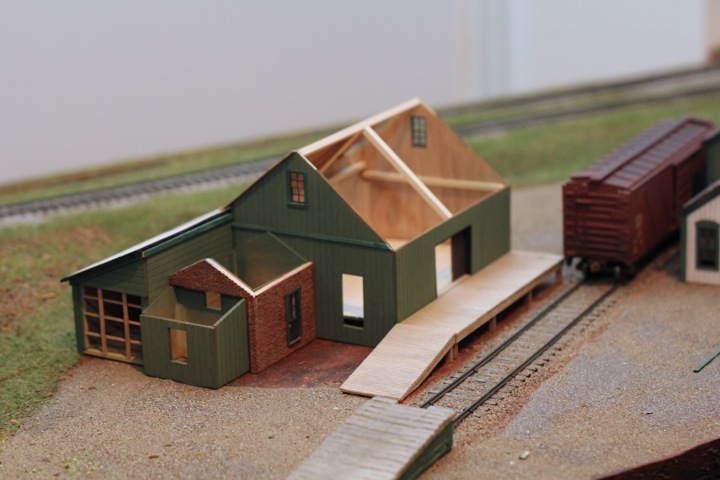
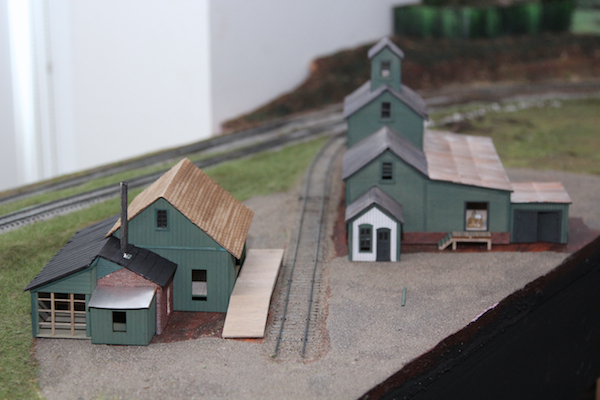
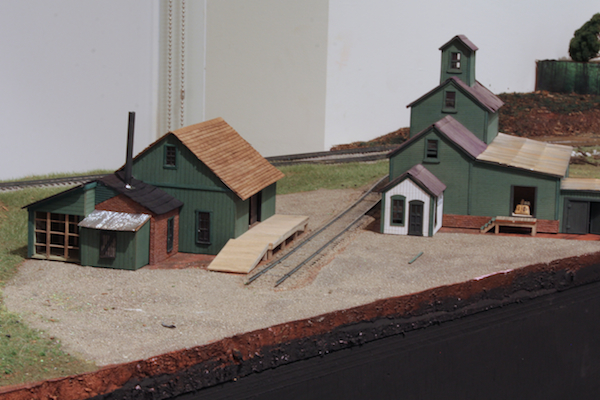
With the ties in place, it was time to bring out the foam buildings to ensure the placement would work.
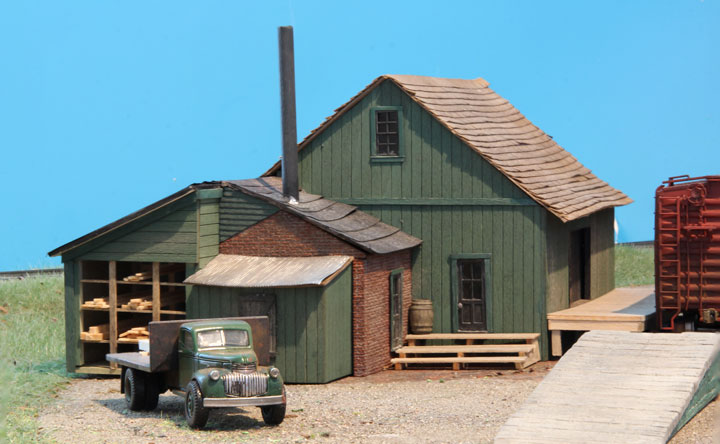
For this module, that means the Allen lumber yard complex.
Operator View
Looking back along the siding from the module edge (the branch line rises to the right)
So that looks pretty good to me. Looks like enough room to reach in and work with cars, and the buildings look logically placed.
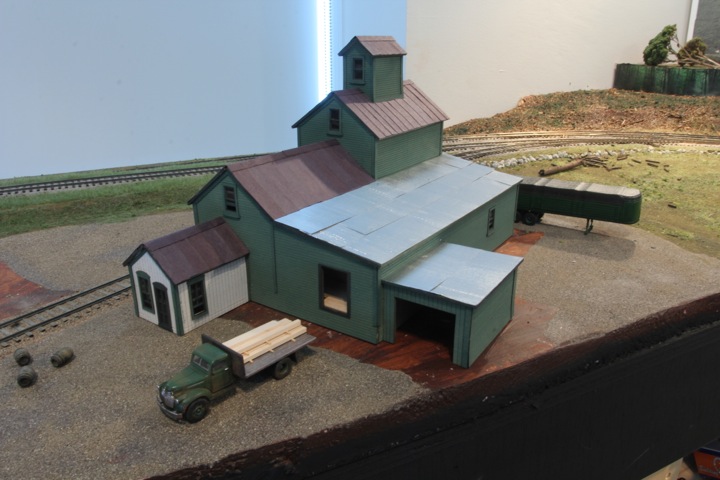
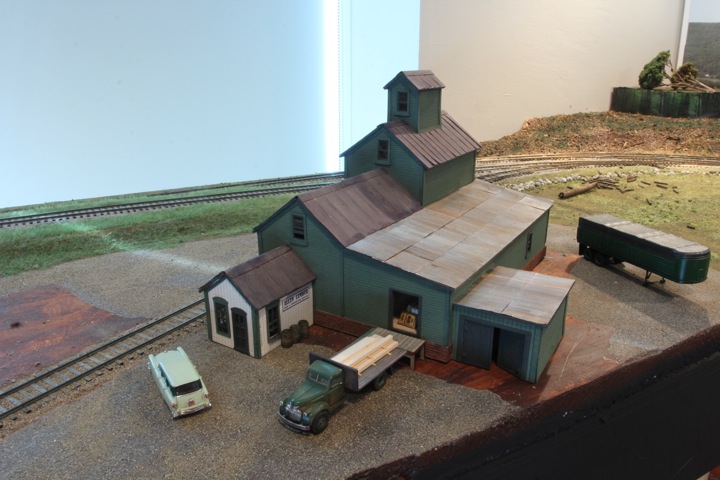
I thought I'd take a look at it from other angles though.
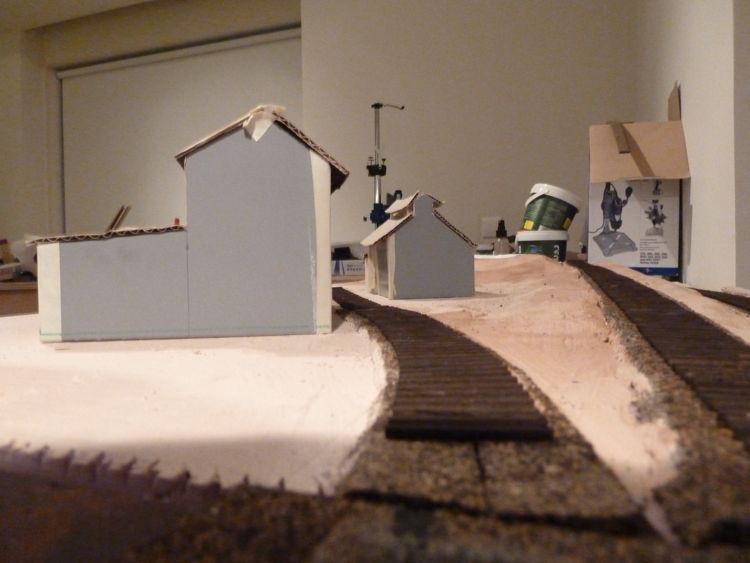
Seen from the front of the engine house on module 2
and from the very end of the yard on module 1
These indicate to me that a view block of some sort will be necessary on module 3 to divide the scene between the engine house and the lumber yard. At this moment, I'm thinking trees should suffice, but I need to run some trains in this area first to see what my real access needs are.
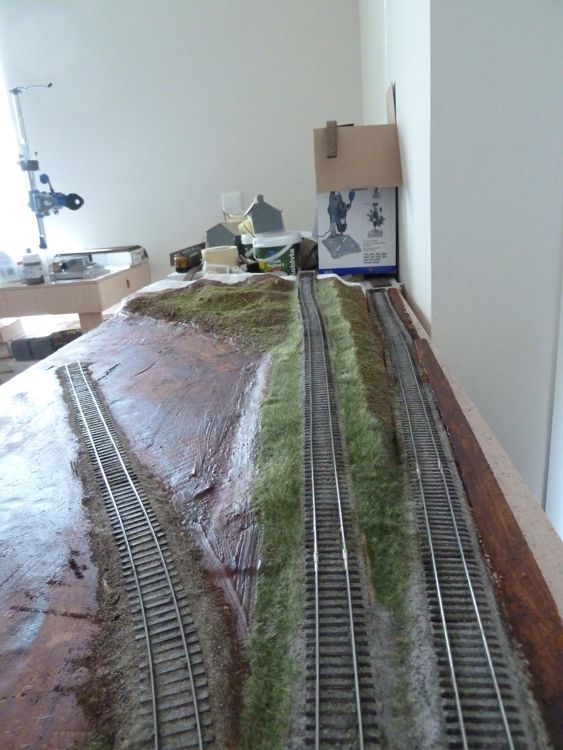
The ties were ballasted in place.
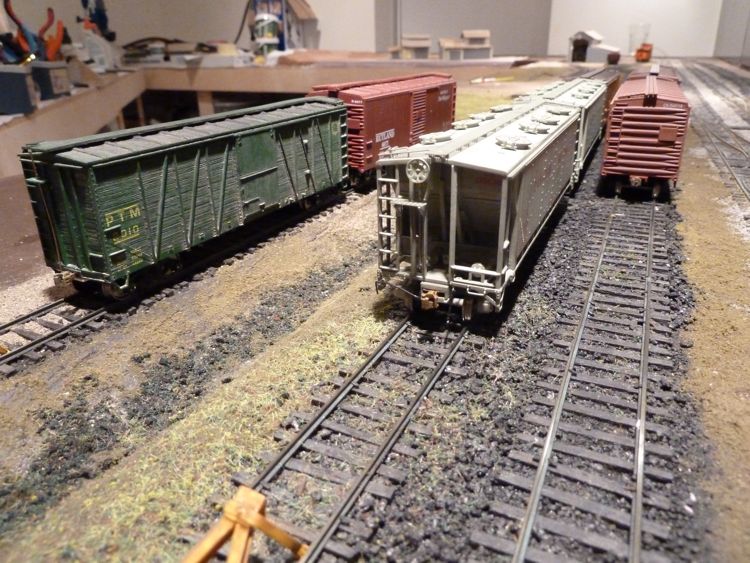
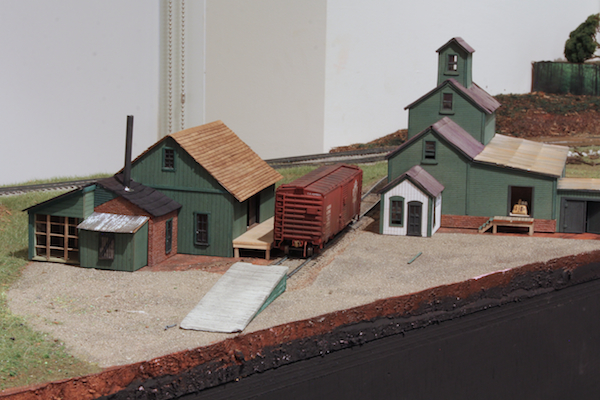
I also thought I'd experiment a bit with the "hidden" mainline. In this photo I put a couple of box cars on each track (the branch line to Barre has the PTM green boxcar)
and setting the camera at ground level near where the lumber yard is going to be, took a shot.
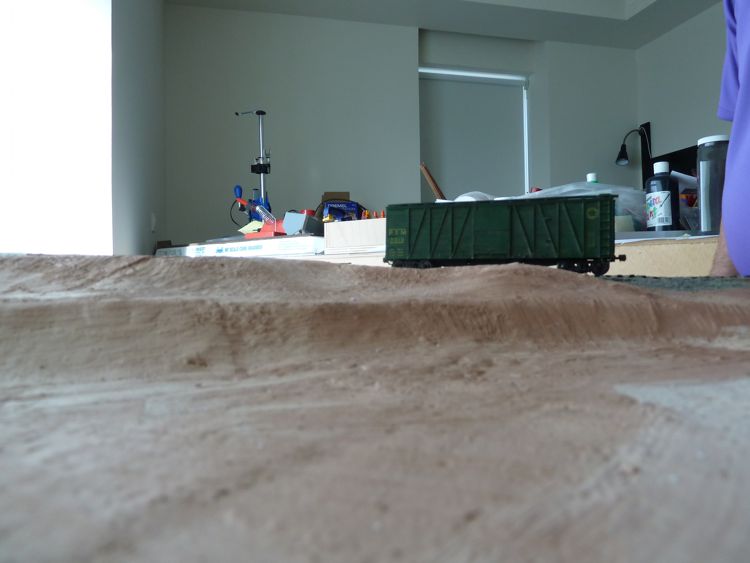
so no Rutland car in sight! Sure, this is at the most extreme angle, but once there are trees on the layout, I'm thinking this will work at a standing height as well.
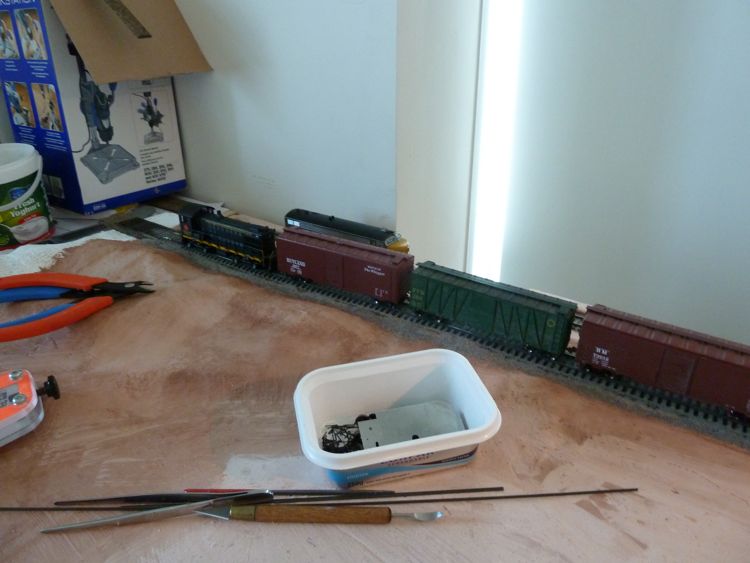
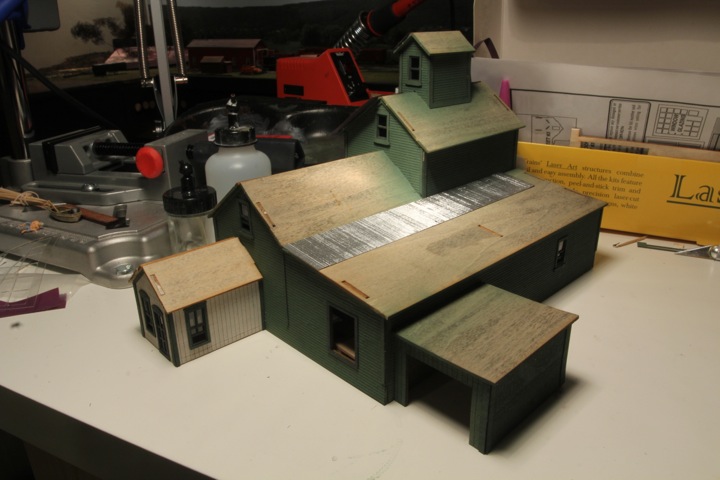
I got the mainline (staging) down, than the branch line, and than I stopped. I decided to put in a single piece of rail for the lumber yard siding, but I needed to run feeders first....so I did that, and ran those before rail went in. In this picture, the feeders are already "hot", as the module is mounted to it's fellows, and the bus is connected.
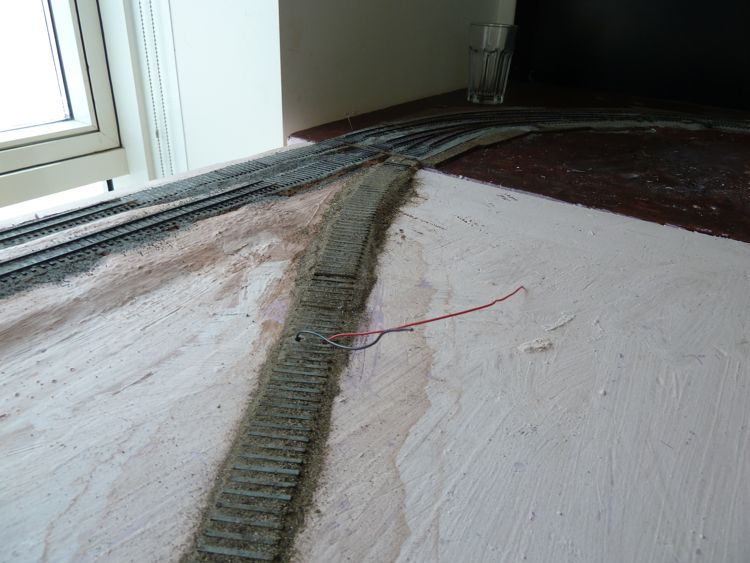
Soon, all three tracks were connected, and passing rolling stock and locomotive tests.
a good view of all three tracks.
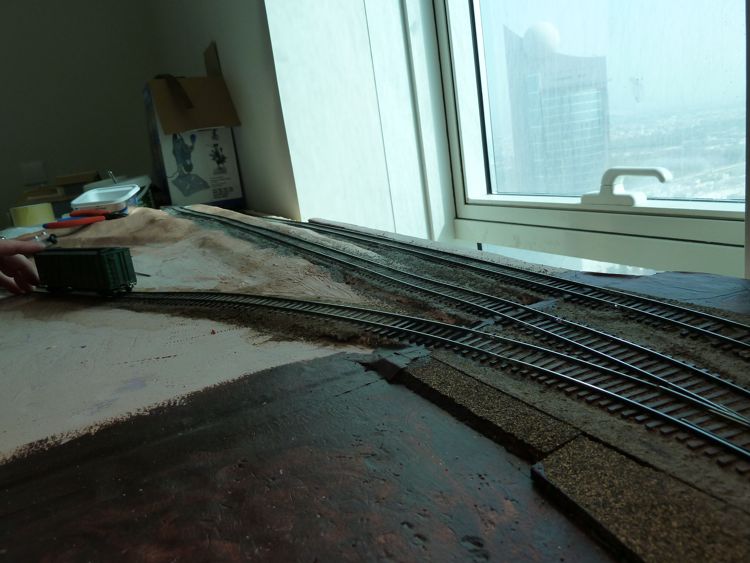
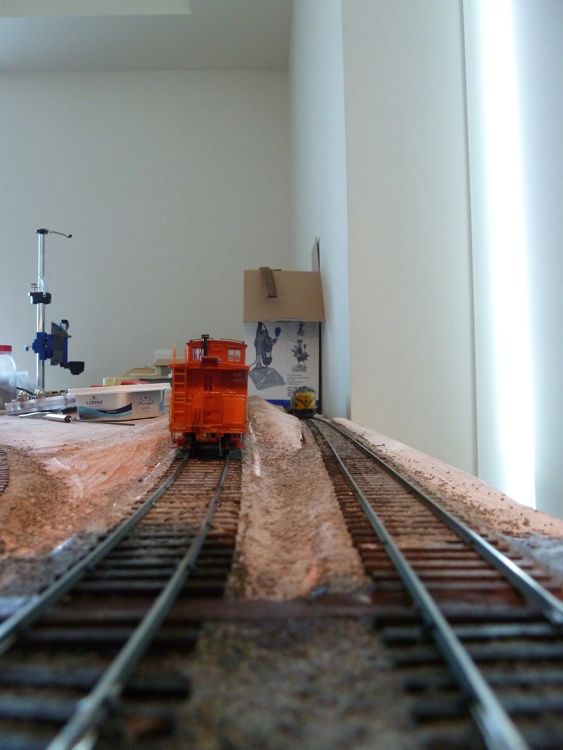
after playing with it for a while, and continuing to tweak the turnouts on the third module, I took another look at the levels. This is my actual eye level view, with the C-Liner on the main line (staging). I think it will be easily hid with some 4-6 inch trees.
Scenery
First up to scenic this module for me was to do the wooded hill and slopes.
A coat of white glue
and than some of the crushed leaf I brought from home, followed by a little bit of colored flock. This is meant to form the forest "floor". This coat was also sprayed with alcohol, and wetted as well with more white glue and water.
I was able to get some grass along the edges of the right of way of the branch line.
Building Construction
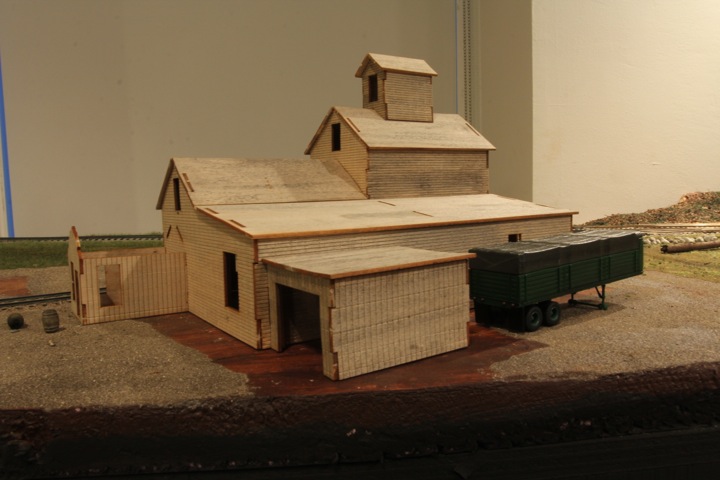
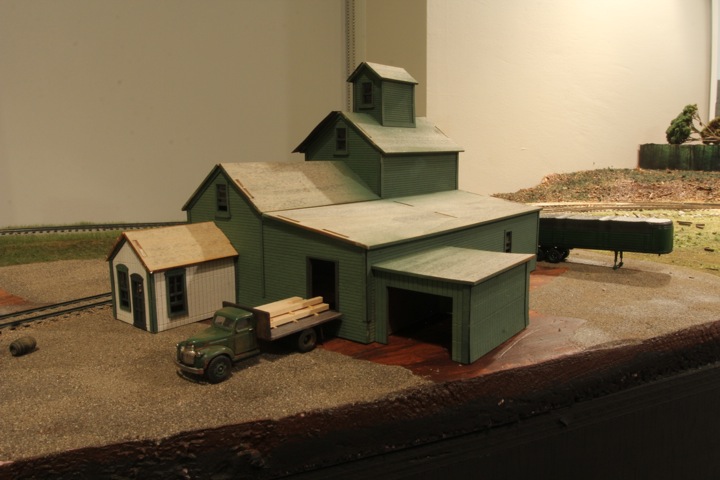
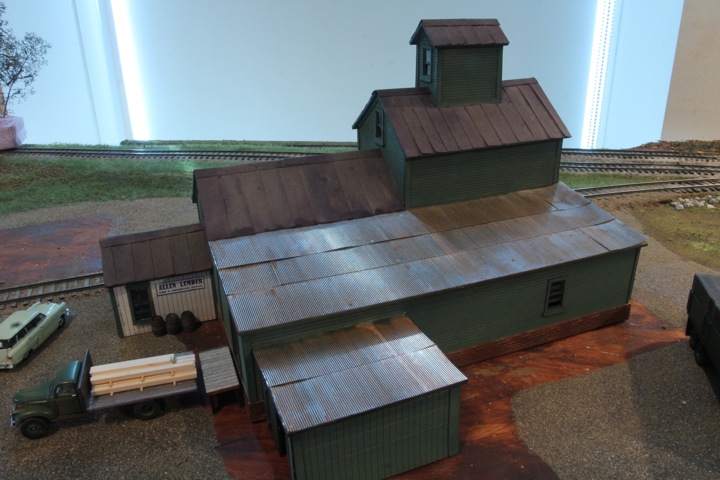
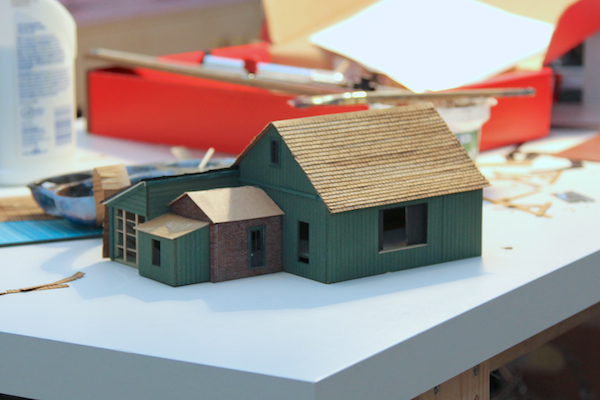
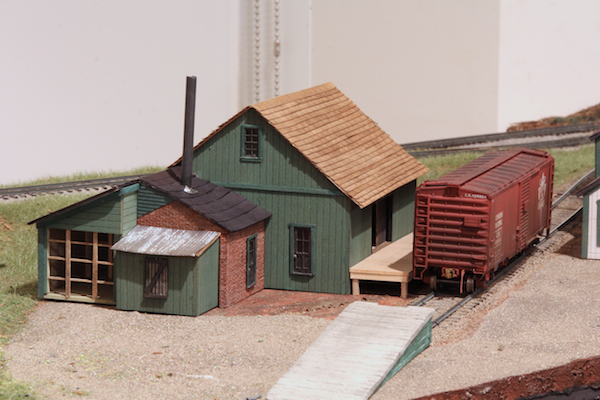
The Allen Lumber Company occupies the sole siding on this module, and with some other projects on hold (either from waiting for parts, or from lack of personal enthusiasm) it was time to start construction on the buildings.
I wanted this to be a bigger complex (multi-building), and the complex consists of two main kits
- Branchline Trains Nickel's Milling and Feed
- Railroad Kits B.J. Scott Lumber Company
While neither of them are exactly what I should be using, they're what I could find before I moved, and I think they'll work well enough.
I took apart both kits this weekend, and decided to start in with the Branchline kit, as it's a lot less complicated than the B.J. Scott Lumber kit from Railroad Kits. I figured it'd be a good start.
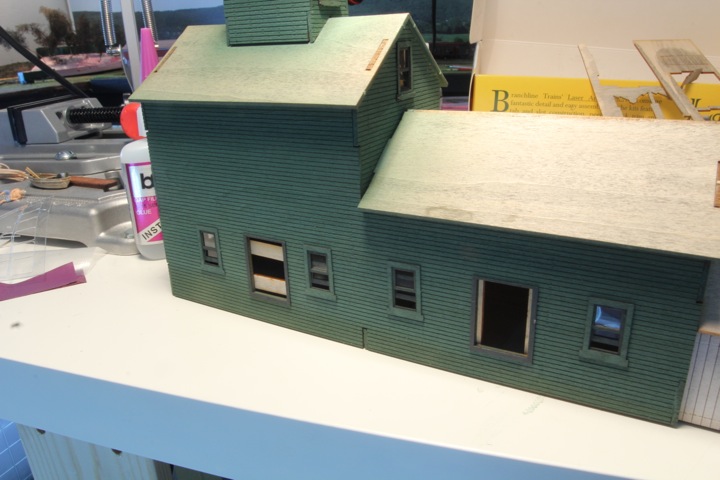
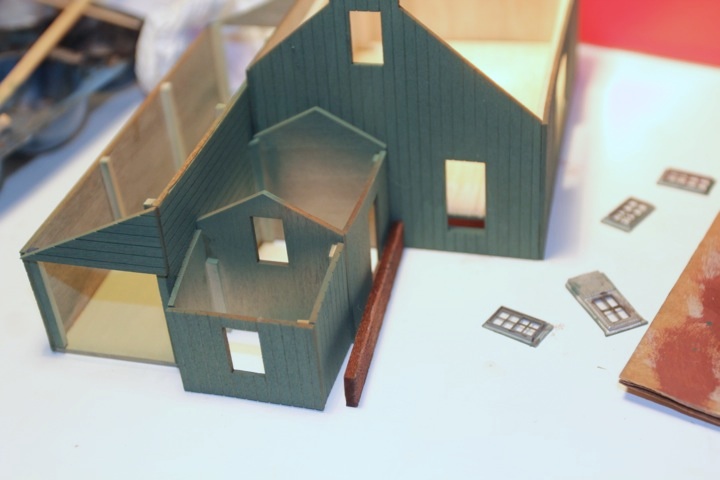
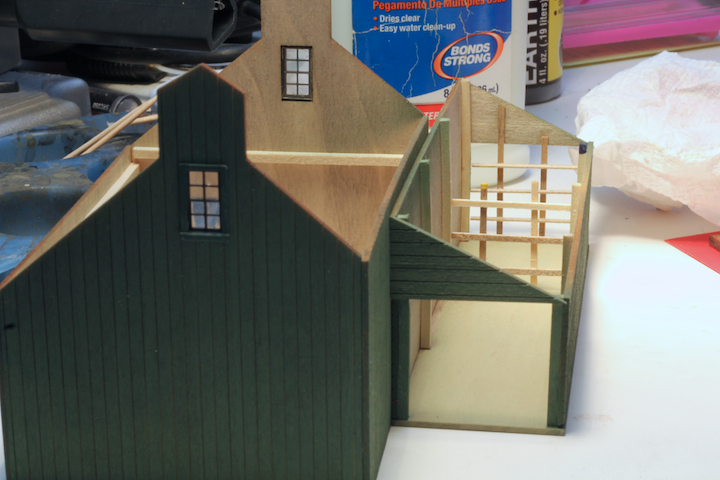
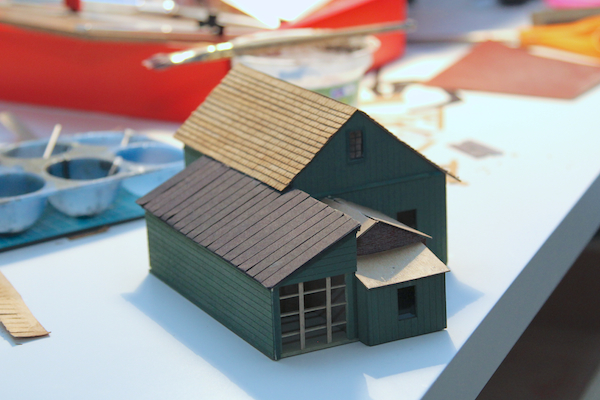
Branchline Trains Nickel's Milling and Feed
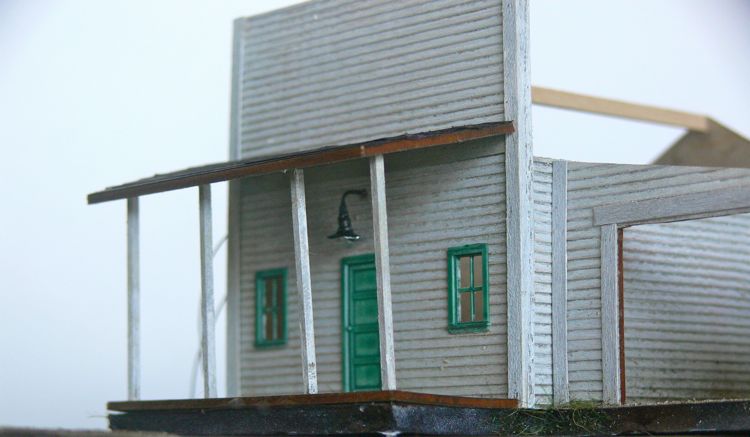
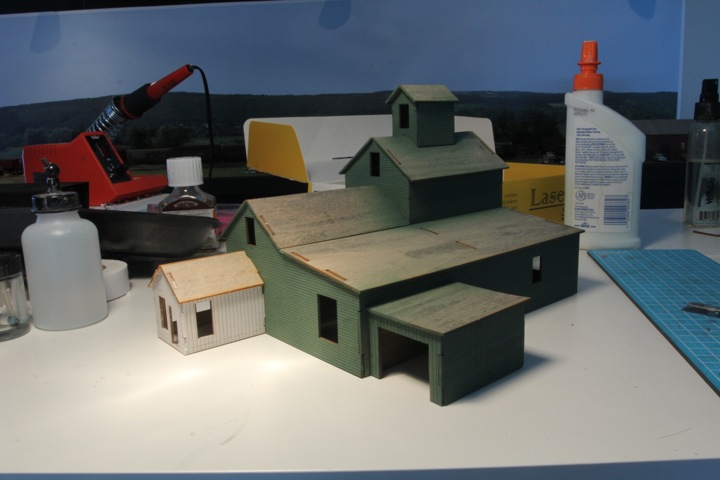
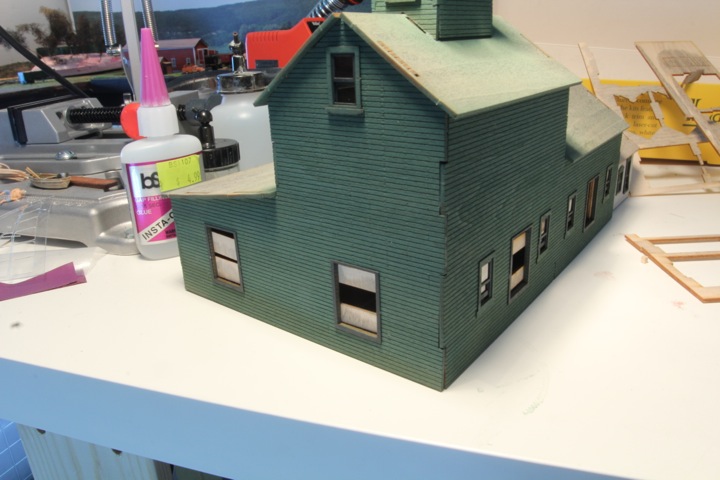
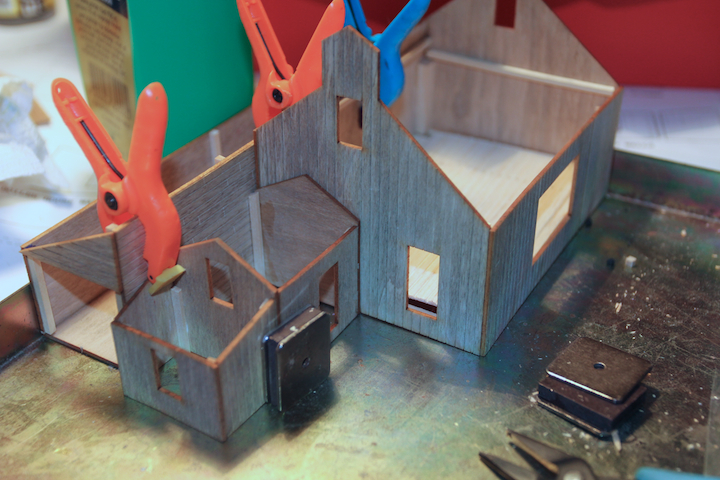
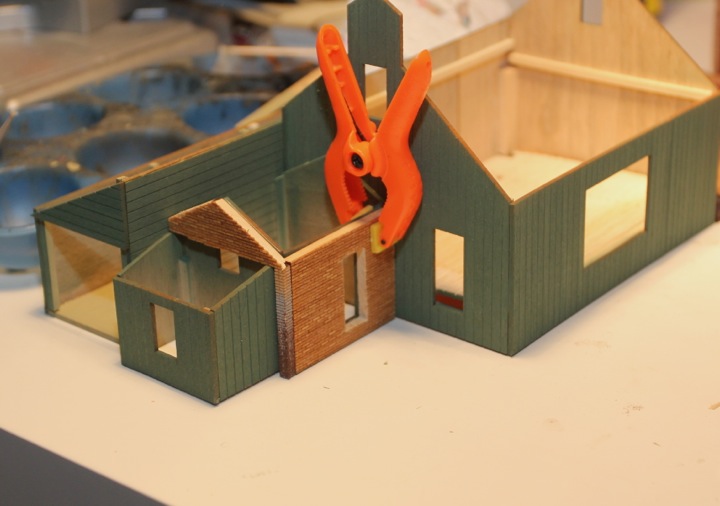
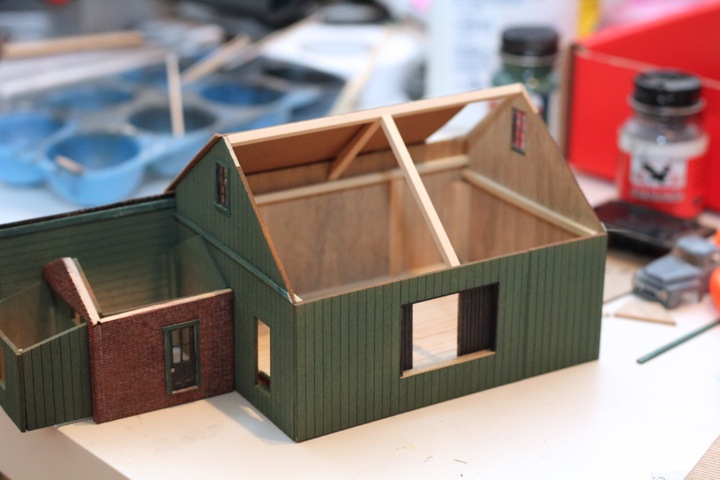
And here's the start...the main building was ink washed, assembled, glued, and braced.
The roofless entrance is not attached, I'll be painting that separately, and I'll attach it afterward. I'm currently planning on a dark green building, with the entry way in white with green trim.
What's unfortunate is the best side of this building is along the tracks, but I'm thinking it's going to work well enough in this spot.
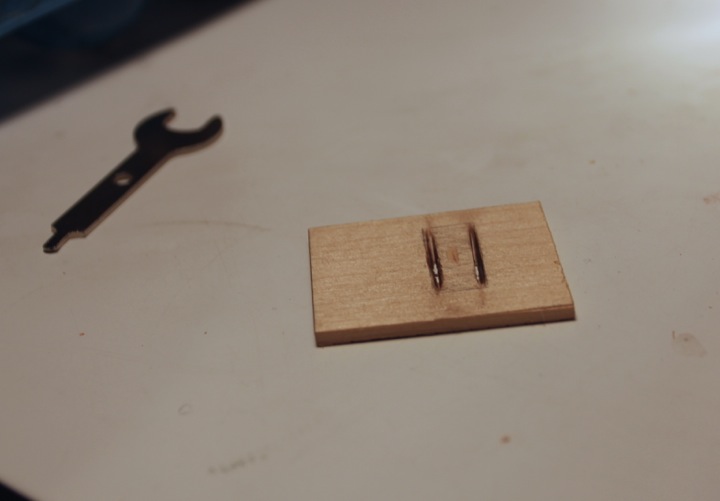
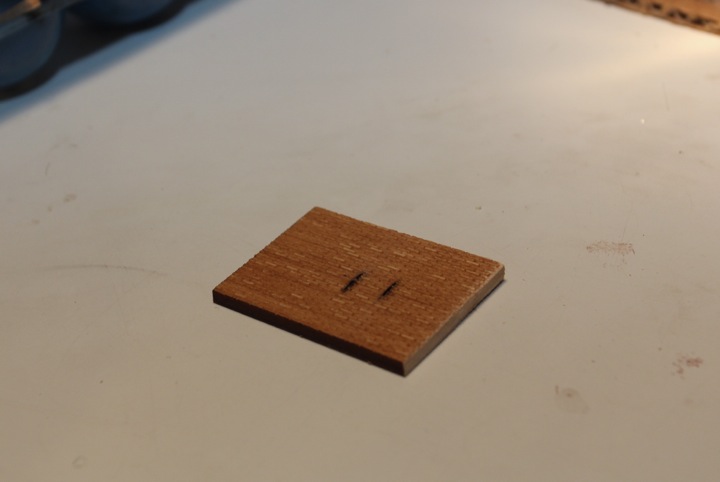
I thought I'd show how I reinforced this building prior and during assembly.
the interior braces I apply to the walls before assembly - this is thick basswood I got in a bundle from MicroMark, and it's perfect for straightening out bent wall. The corner pieces I put in after the glued corner joints just get set - they really help solidify the structure.
You can see similar applications as a center beam for each of the roofs.
Note that I'm not doing any interior detail on this, so I wasn't concerned on exact placement, exact cuts, or size.
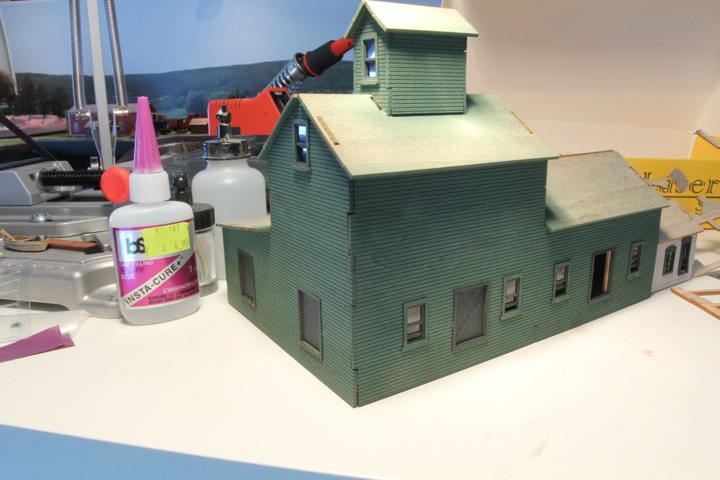
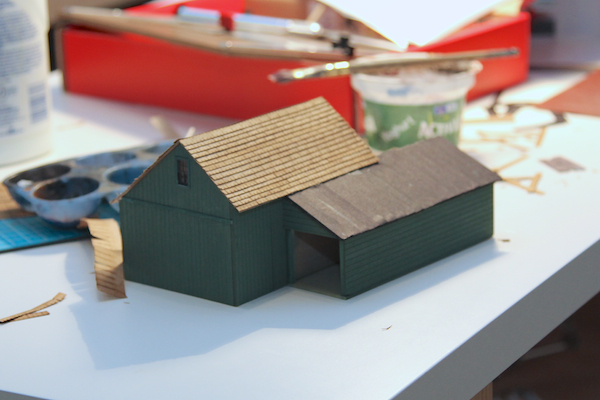
a light spray coat of Poly Scale Dark Green.

and a light brush of Poly Scale Reefer White on the Entry.
I also painted the trim sections at the same time the airbrush was out (in Dark Green) Interior window parts and doors were painted over in Grimy Black.
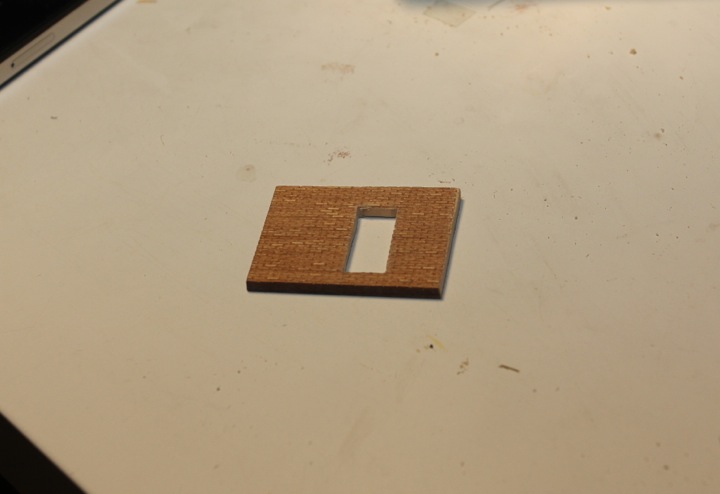
I ran into my first problem with this kit - one that is unusual from my experience with a Branchline kit - the freight doors didn't fit.
They were too small. all of them. In order to fix the problem, I used excess wood sprue to brace across the inside of the doorway, so the doors would have something to stick to. Again, as the interior is not being modeled, no biggie.
the opening on the far right of the building is closer to the front of the layout, so for this one I tried less of an obvious fix - just in case.
After the windows and doors (most of them), came the trim. Problem two with this kit arose - there were not enough pieces. I ended up five pieces short. To make up for the shortage, I used more extra sprue, trimmed to the right length and width with a razor blade.
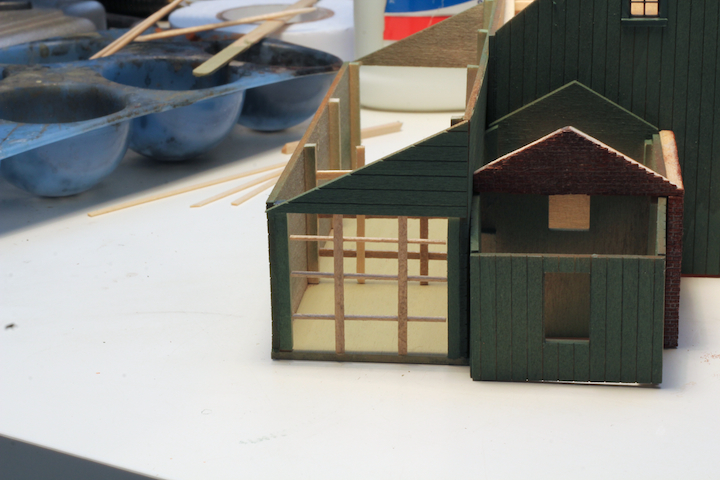
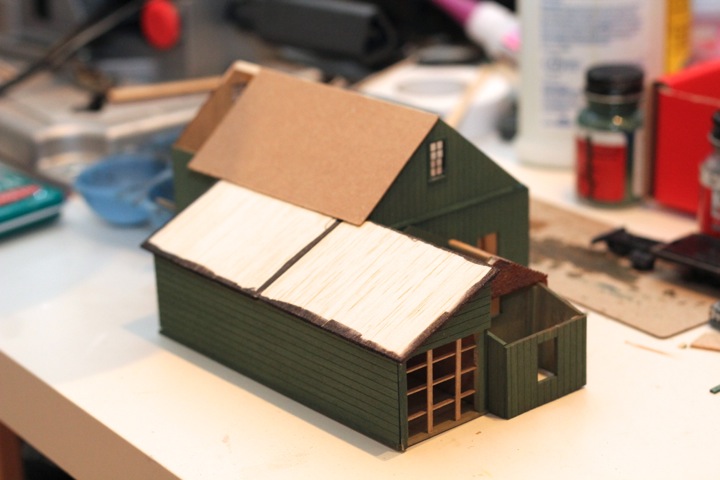
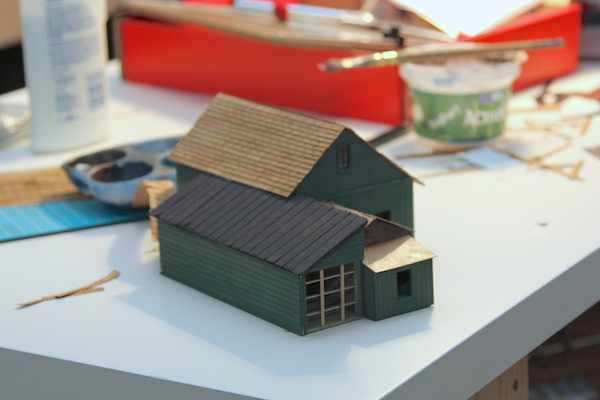
Looking at the roofing, I was thinking seriously of using this aluminum siding from a Campbell Models Corrugated Warehouse kit as roofing material for the "addition".
I decided to model this door as open, meaning I had to fake an interior with some scrap and basswood. While I hate to point it out, you can see how I screwed up the nail holes with the scriber on the entry way. I'm hoping to hide it with signage and landscaping.
I started the upper roof section with the kit provided materials; I like to let the glue dry before going back and trimming it up.
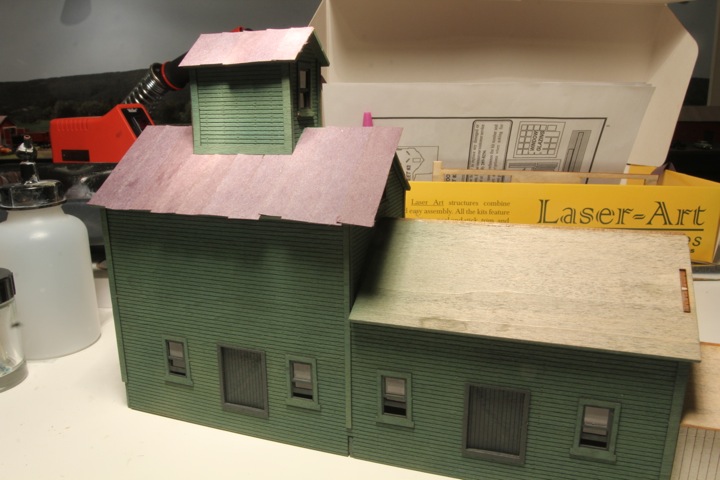
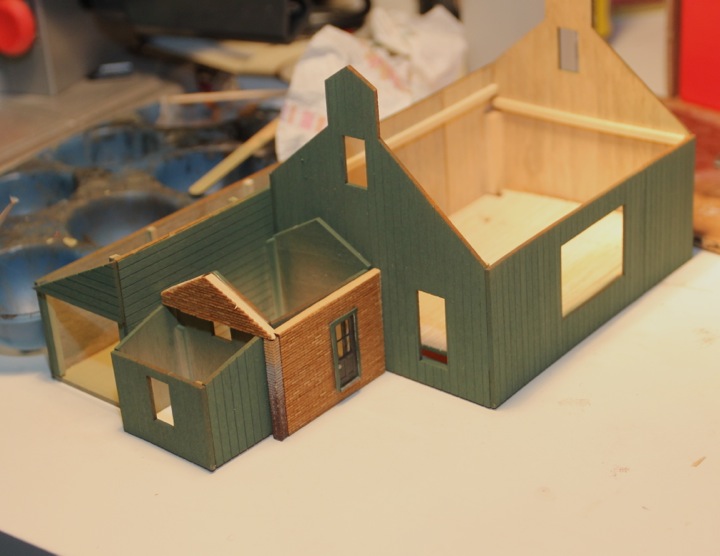
And on the layout...
Finished up the roof, and in the end, decided to use the Campbell corrugated siding as roofing.
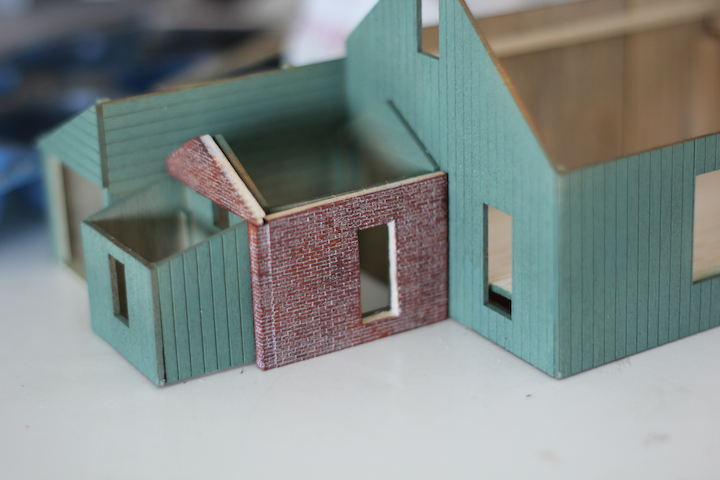
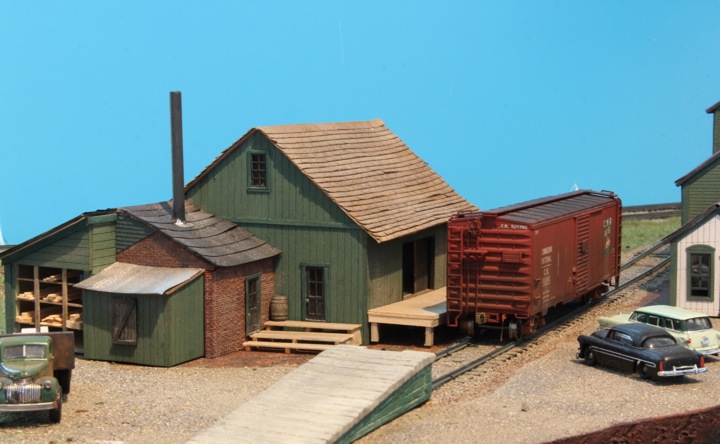
And after painting the brick foundation, applying another black ink wash, touching up the trim here and there, and weathering the roofs (not in that order).

I'm going to stop there for now, as I want to get the other building put together and than tie them in visually. Still need a chimney, landscaping, details, etc.
Overall, I've come to not like the stick-on foundation in these Branchline kits, because to me it looks...stuck on. Even with my preferred brick treatment.
At least now we have a place to spot a car!
There is a slight relief on the foundation, but my issue is that with these stick on foundation pieces, the foundation now sits outside the walls, instead of inside (or equal to) the exterior of the walls like, well, a real building.
Were I to redo it with no thought to effort, I'd probably measure and have Monster cut a custom foundation set and than trim the wall height of the kit to match.
I also realize that as I modeled this kit the large "addition" shares a common foundation due to the stick on strips. It would be a much better model if it had a stone foundation for the old part, and than brick for the new - or at least a visual seam. I may add that with a sharpie.
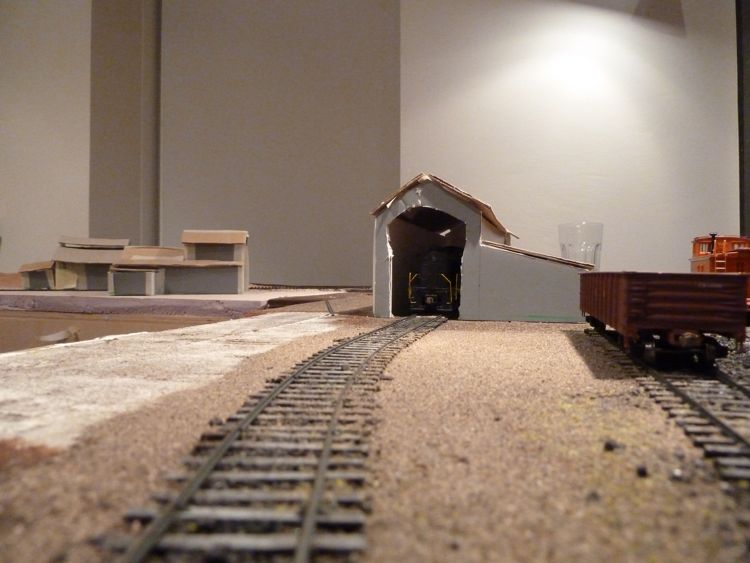
I'm also not 100% satisfied with the engine house. It's a functional stand-in, if I get to the point that I'm looking for something new to do, I think I'll scratch build one closer to the prototype.
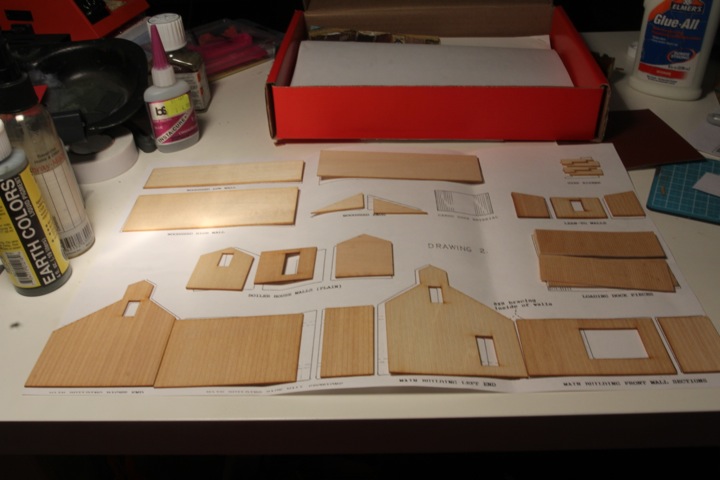
Railroad Kits B.J. Scott Lumber Company
As a companion on my layout to the Nickel's Milling and Feed kit, the B.J. Scott Lumber Company from Railroad Kits will represent the lumber part of the Allen Lumber Company.
I started this build the way one should - by opening the box, and staring blankly at the included parts.
Fortunately for the gentle modeler, the manufacturer has very good documentation, including in the box a 10+ page instruction set, two large (tabloid or A3 size) drawing sheets (basically 1:1), and nicely enough, a couple of color photographs of a completed model.
The loose stick wood is color coded on one end, making the correct selection of building materials easy.
After reading through the instructions a few times, the process became a bit more obvious - aided by laying out the main parts to match their drawing.
Satisfied with the process, step one was to treat (weather) the wood with a mix of india ink and alcohol. I did add a bit of brown water based varnish to the mix for a bit of variety.
Both sides get treated, and I let them set over night under nice flat weight (Fast Tracks turnout jigs)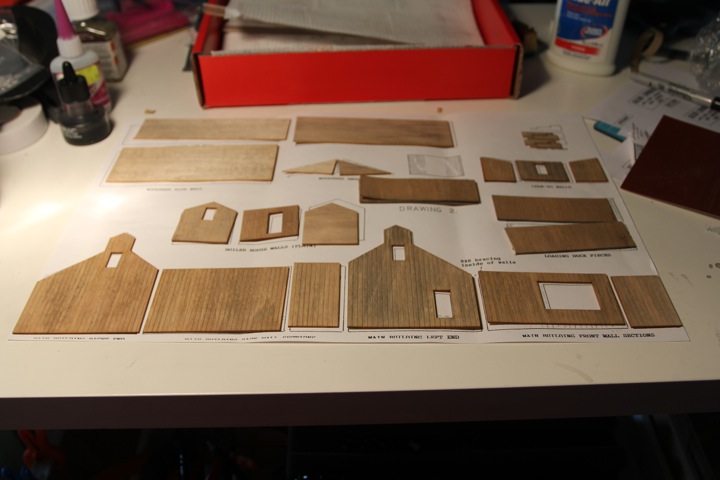
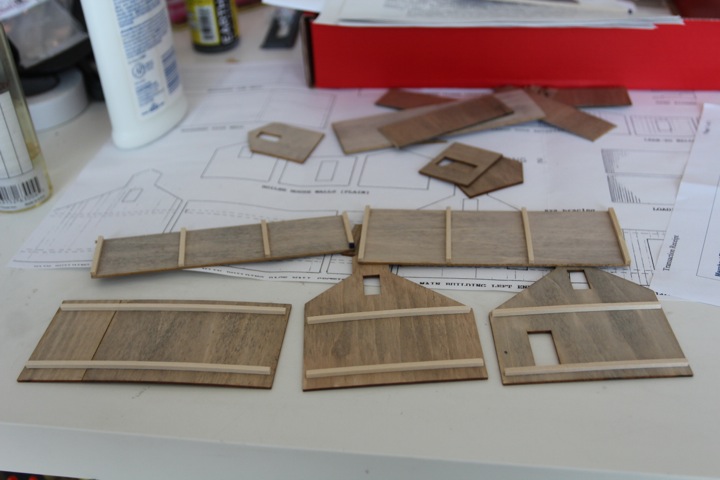
Next up per the instructions was to cut boards randomly into the siding with #11 knife and add nail holes; I did the former, but not the later.
With the boards cut, I braced the walls as described in the instructions. They are drying currently (again, under the jigs) over night. Based on my progress so far, I may get to the painting stage this weekend.
The bracing on the main walls was completed; even though this dried under a heavy flat weight for two days, the walls still bent. I decided to not correct it; I am hoping that it will add some character to the structure.
I'm now deviating from the instructions and have assembled the building. I'm doing this as I'd like to paint this with the airbrush as a complete structure.
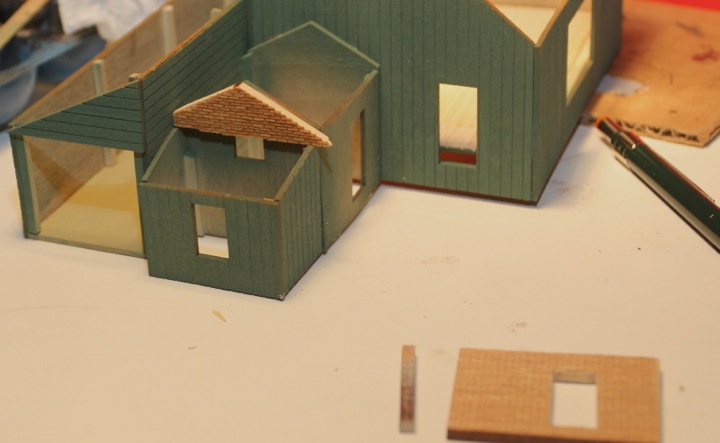
With that in place, the next part was assembling the woodshed. In this instance,as the walls are bowing out (which is actually a perfect prototype, this ballooning effect is common on older buildings in New England that weren't built properly, the attached coach barn on my house in NH has the same problem) the magnetic clamping tool is a god send. What you can't see are the magnets holding the taller wall in place while the triangle trim dries.

Boiler house to main building.
Woodshed to main building

Boiler house to woodshed. Note that I've added reinforcements, even though it was flat wall to flat wall.
Lean to to boiler house and wood shed.
dry and in place for sizing.
and with the other building
The appropriate walls received a matching coat of dark green as the other building.
I stopped construction for a bit. The reason being, the boiler house part of the structure has an embossed plastic sheet to use for the brick siding. As you may or may not know, I'm working on another building using (and loving) the Monster Models brick.
So as I began to cut the plastic sheet, I wondered to myself - why? Why not use Monster brick (as I have some extra bits).
So the challenge is identifying if the additional wall thickness (as the Monster is 1/8" thick) is or will represent a problem.
Here are some shots of a sample strip lined up.
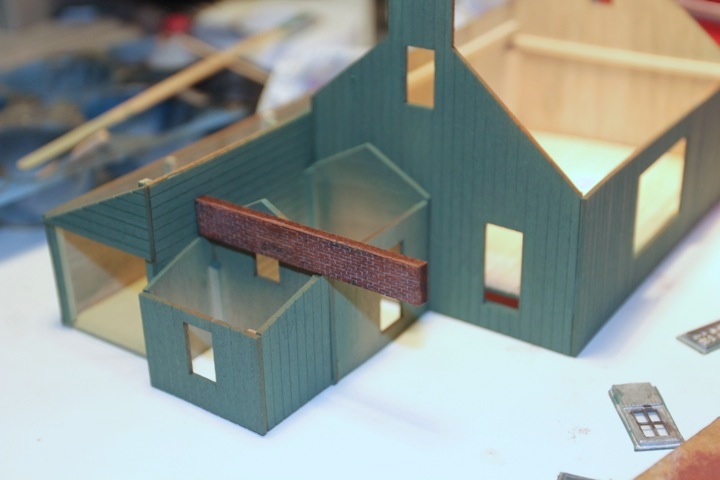
Yes, the boiler house is the one in the middle.
The thicker structure will result in a smaller lean to, and a bigger boiler house, but I think this will work...now to make a template, and cut out a piece of monster brick for the side wall with the door.
First up was cutting an appropriate piece for the main (visible) wall.
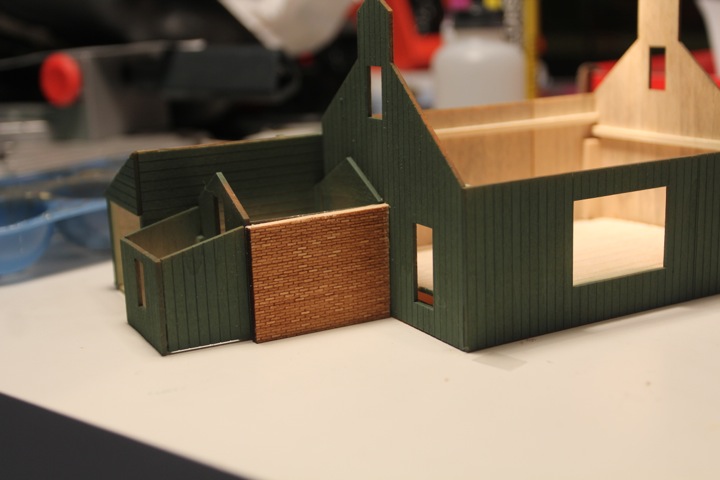
sorry, but in my opinion, the Monster brick is simply sexy as shit. No other way to describe it.
Once that was sized, I cut it from the back with my dremel on the stand. Kinda like using a skill saw to open a gap in plywood. A big negative from this approach with the Monster stuff is the fact that it's very thick - 1/8", so cutting and trimming is not as trivial as with thinner stock.
On the front side, I was happy with just a little burn through.
after a half hour with a toothed #11 saw blade (from Micromark) and a file, the door opening was ready
And actually fit in place.
next up was cutting a piece for the "front" wall.
and than sizing the front wall (with a section of corner trim) to make sure the measurements were correct.
Without the clamp in place, I think this can work. It bulks out the boiler house, but looks so much better.
The walls are not attached, they need to be (sponge) painted first. Once that was done, I was able to get a real feel for how it was going to look.
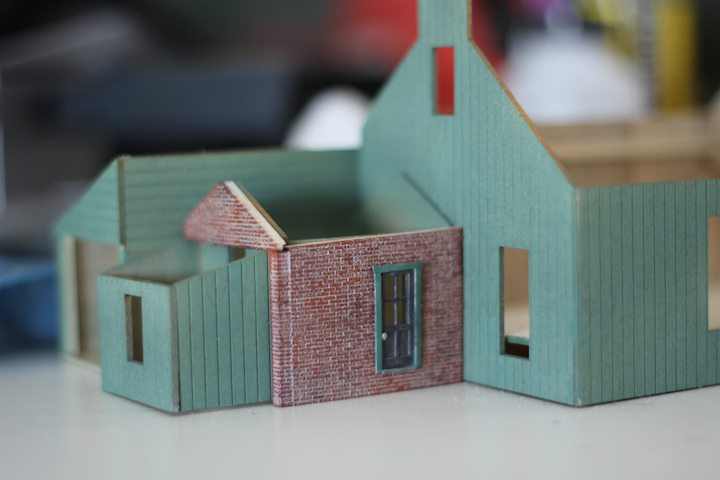
Not totally happy with the corner line, but we'll have to sort something out about that.
Once the glue was dry, it was time to work on other parts, like the wood racks.
This was not a pleasurable or fast experience, as it was built in place, stick by stick. This is what the plans call for, and is a bad idea. The drawings that accompany the kit are pretty robust, but this one was drawn skewed as well — not even providing a good template.
If anyone attempts this kit, I'd recommend building these racks on the side, and than install it as a single piece. Not that I did that, by the time I realized what was going down, it was too late.
Next up for me, was assembling the loading dock.
It was assembled with the top glued together on wax paper, and than boxed in and legged (stick build).
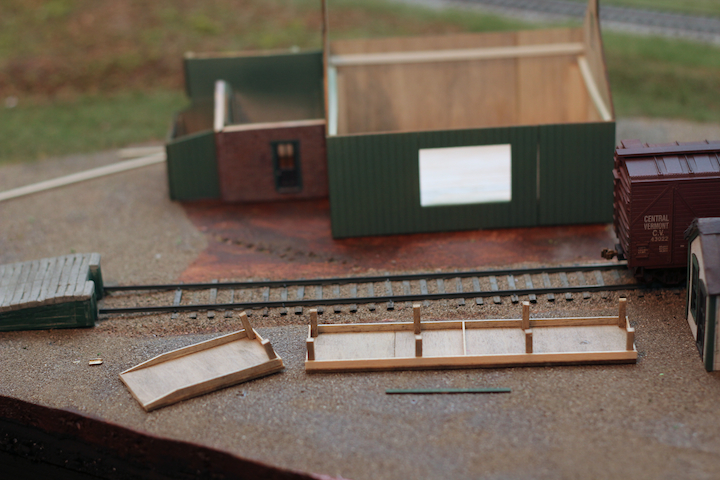
Still needs a bit of sanding for a good fit once the glue is a day old.
There was some forgotten trim, that needed to be cut to size, and than painted prior to gluing on. It's the piece just above the boiler house, and it is on both sides of the building.

Additionally, there was some trim inside the freight doors that needed to go on - the threshold I left stained wood, but the top and sides were painted black to match the doors (not shown).
![[Image: IMG_5888.jpg]](http://www.garbo.org/MRR/images/barrebuild/IMG_5888.jpg)
Next up, were the clerestory windows. The kit has an interesting approach, where you are supposed to build the windows out of stick lumber atop pre-printed clear plastic, using their template. Which is what I did. The bottom one has the outside frame complete, the top one is just starting.
![[Image: IMG_5885.jpg]](http://www.garbo.org/MRR/images/barrebuild/IMG_5885.jpg)
So all of that was good and cheerful, (slow work though, had to cut and paint the parts, than apply a piece or two, let dry, repeat). until the windows didn't fit. Not even close, actually.
![[Image: IMG_5889.jpg]](http://www.garbo.org/MRR/images/barrebuild/IMG_5889.jpg)
I finagled, cut off the ends and moved them inside, and tried mounting one of the windows on the outside of the wall (figuring the roof lines would hide it). It looked horrible.
I'd lost a few hours by this time, and was frustrated. The realist in me said - you know what, clerestory windows in a building like this in Vermont is just dumb - it's a warehouse, not a workshop - and it would be cold as hell come winter.
With that pragmatism in mind, I marked the roof lines.
![[Image: IMG_5890.jpg]](http://www.garbo.org/MRR/images/barrebuild/IMG_5890.jpg)
And cut it down.
![[Image: IMG_5893.jpg]](http://www.garbo.org/MRR/images/barrebuild/IMG_5893.jpg)
It actually looks more New England to me now, as the roof line is very close to a saltbox style of home. With that behind me, I added a ridge pole, and a couple of rafters for strength.
![[Image: IMG_5894.jpg]](http://www.garbo.org/MRR/images/barrebuild/IMG_5894.jpg)
![[Image: IMG_5895.jpg]](http://www.garbo.org/MRR/images/barrebuild/IMG_5895.jpg)
The freight doors are on, and the roofing has begun.
For that thick balsa top, I darkened the edges with a sharpie to help hide any bare wood that might show.
And the sub-roof is on.
![[Image: IMG_5902.jpg]](http://www.garbo.org/MRR/images/barrebuild/IMG_5902.jpg)
![[Image: IMG_5903.jpg]](http://www.garbo.org/MRR/images/barrebuild/IMG_5903.jpg)
![[Image: IMG_5904.jpg]](http://www.garbo.org/MRR/images/barrebuild/IMG_5904.jpg)
Then the actual roofing.
![[Image: IMG_5908.jpg]](http://www.garbo.org/MRR/images/barrebuild/IMG_5908.jpg)
![[Image: IMG_5909.jpg]](http://www.garbo.org/MRR/images/barrebuild/IMG_5909.jpg)
![[Image: IMG_5910.jpg]](http://www.garbo.org/MRR/images/barrebuild/IMG_5910.jpg)
![[Image: IMG_5911.jpg]](http://www.garbo.org/MRR/images/barrebuild/IMG_5911.jpg)
![[Image: IMG_5912.jpg]](http://www.garbo.org/MRR/images/barrebuild/IMG_5912.jpg)
![[Image: IMG_5915.jpg]](http://www.garbo.org/MRR/images/barrebuild/IMG_5915.jpg)
The roofing is going a bit slower than I'd like, but it is what it is. These shingles are put on one row at a time, and I find it better to wait for the glue to set before applying the next strip.
You can see on the bottom edges where I "learned" this the rows are a bit off, as they got slid around a bit by applying the next one.
![[Image: IMG_5915.jpg]](http://www.garbo.org/MRR/images/barrebuild/IMG_5917.jpg)
Once the glue's set overnight, I can trim the edges, and start in on the back.
After another couple of days, the main roof was shingled.
Next up is moving to the boiler house roof. I had some options on the material, including
- Tar paper
- Shingles
- Corrugated Metal
I was leaning towards the tar paper, as that seems the most appropriate for a building that's going to get a fairly large chimney (which this will).
Moving forward with this kit, the boiler house roof is on, including some flashing around the base of the chimney.
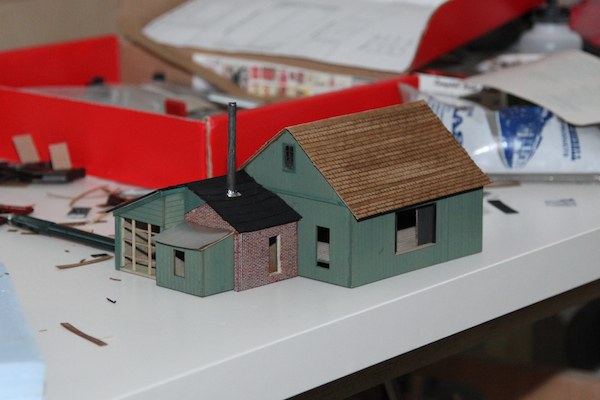
The doors were installed, including a coal loading door on the end of the shed.
The whole model received a wash of ink and alcohol, prior to weathering.
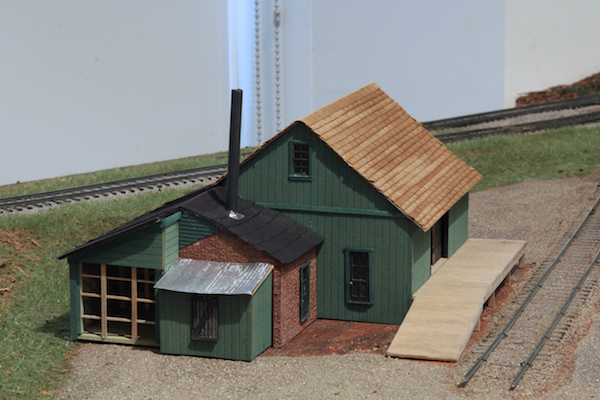

I'm fooling around with the loading ramp, I may even leave the ramp off as I have the large end of track ramp (which I'd like to keep, as it does keep cars from running off the edge of the layout.
Weathering powders, some paint here and there, steps, and some light detailing.
With those steps roughed out, it was time to begin working on the surrounding area. First up was to cover the bare foam with sand.