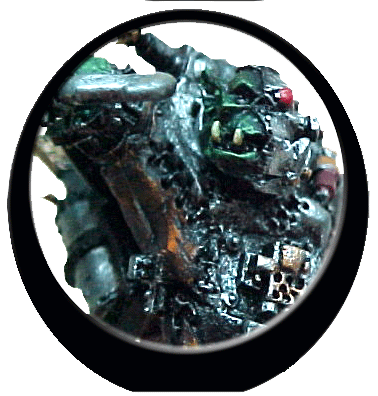
 Looted
Basilisk
Looted
Basilisk Looted
Basilisk
Looted
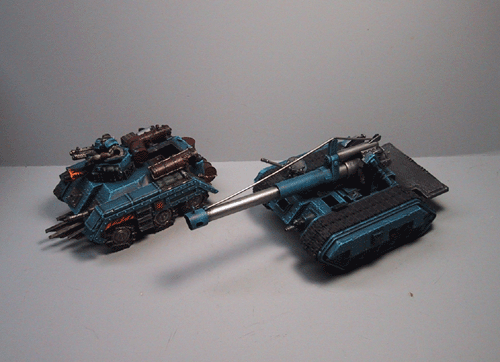
Basilisk- UPDATED 27 MARCH 2005 - I'm working on three models at once - a chimera, a hellhound, and this looted basilisk! The lootas Tri-fecta!
If you have time, check out the rest of the site too - including the ork army list, and the other conversions.
so 'ere we go!
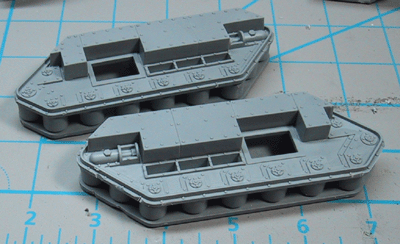 |
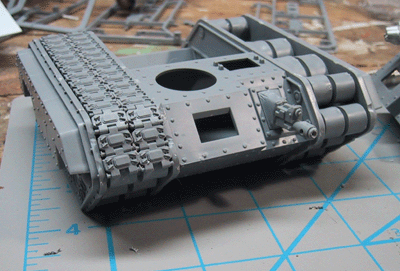
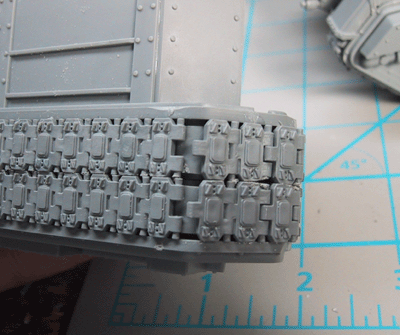
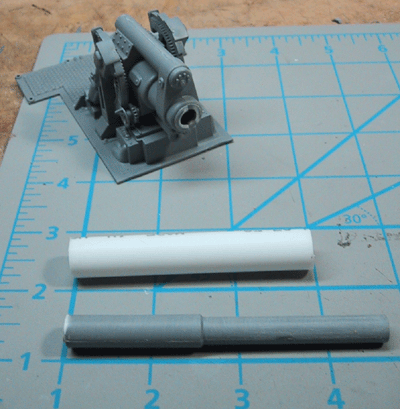
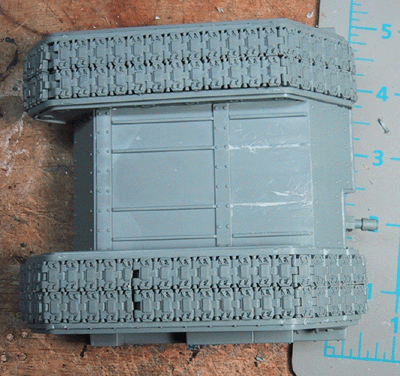
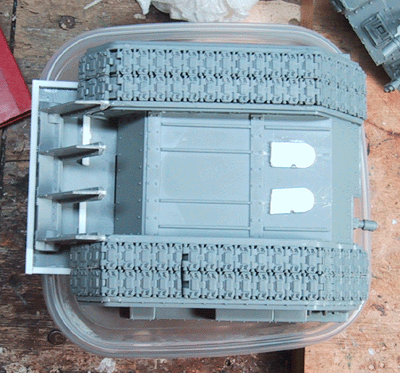
I started on the basilisk with the track units. |
 |
And I got them and the gun together, when I realized that I spaced out the fact that I wanted the tracks doubled, and I lost the small pin that goes inside the gun! |
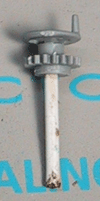 |
So with the
pin gone, I made a new one from plastic covered wire. |
 |
And I was able to pull apart the tracks (as the glue hadn't dried yet), so doubles it was! |
 |
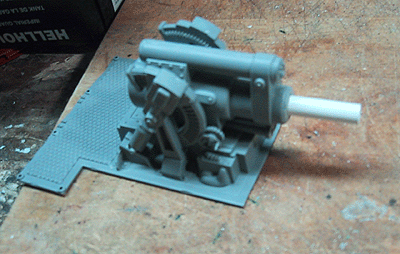
In keeping them with the hellhound, I deceided to replace the front heavy bolter with a "real" gun, in this case, a big shoota from the gun sprue. |
 |
The cut pieces before assembly. |
 |
And now mounted
to the hull. I got some of the tracks together, it takes a light sanding
on the inside of each to make them fit without buckleing. |
 |
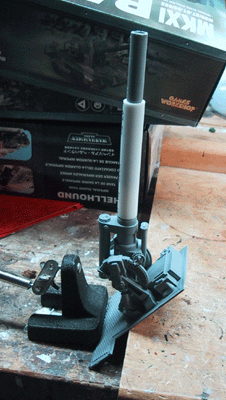
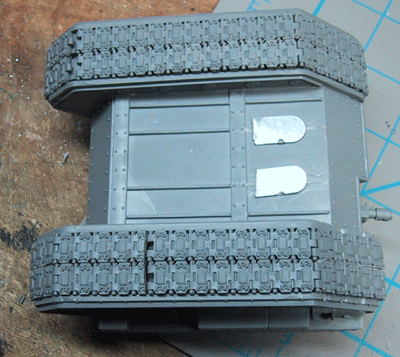
On the back, I wanted the gun platform removable, so these two strips up front "pinch" the platform in place on the front. |
 |
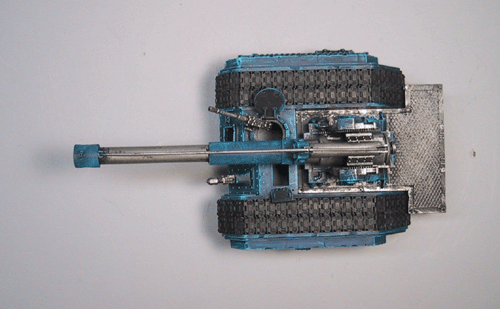
I'm still playing with the shield configuration, here the top was shaved off, and viewport cut into the side. |
 |
GW track sets suck. No question about it. This gap is endemic of the models. At least its not visable from above. |
 |
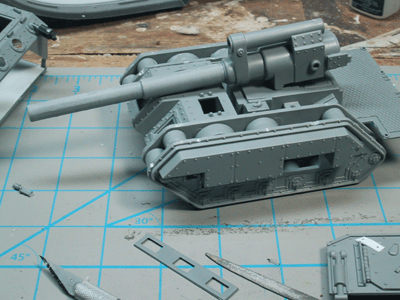
Well, Gooba felt the gun was too weedy, so off it came to get "bored" out. |
 |
And a smaller piece of plastic rod was inserted in the gun for alignment and join strength. |
 |
I was happy at first, but folks on the WAAAGH brought out a number of complaints with the new barrel. |
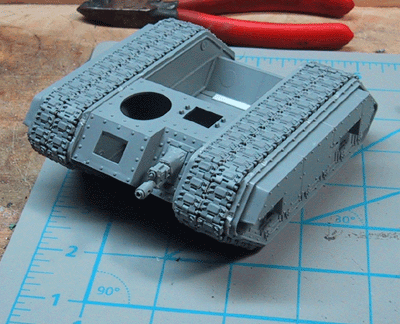 |
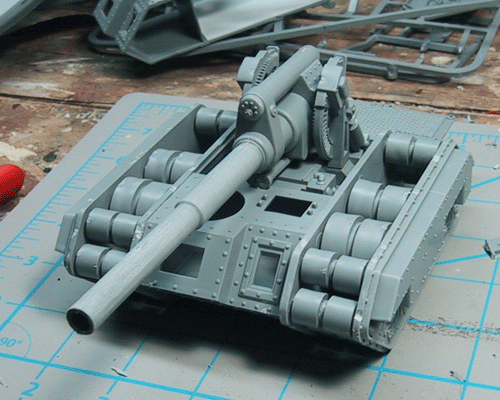
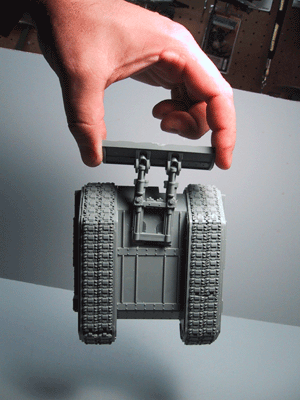
While I mulled over the barrel issue, I finished up the tracks on the model. |
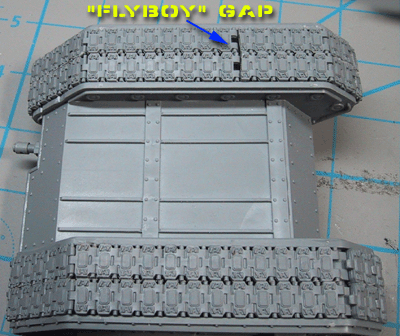 |
Flyboy had a good idea, in that instead of using one large track for the bottom, use two small ones on either end and have the gap on the very bottom. It worked nicely, and next time, I can eliminate that gap entirely! |
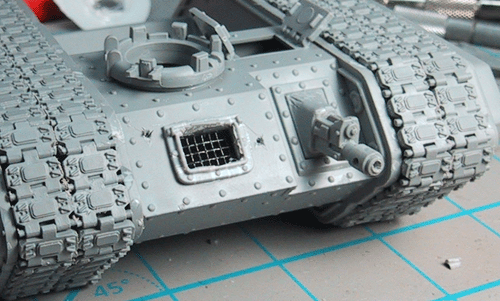 |
I added "screen" mesh to the drivers window, and the upper turret coupulas. |
 |
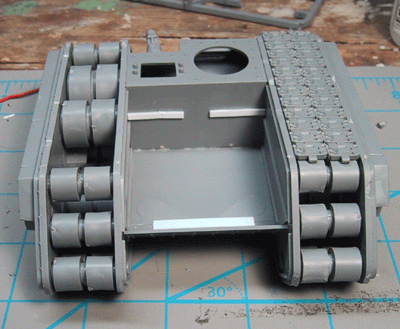
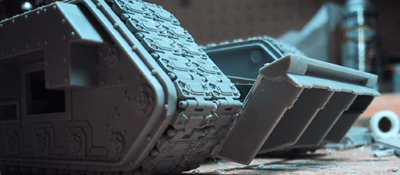
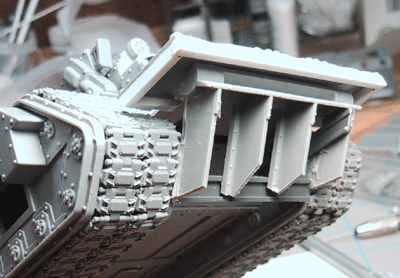
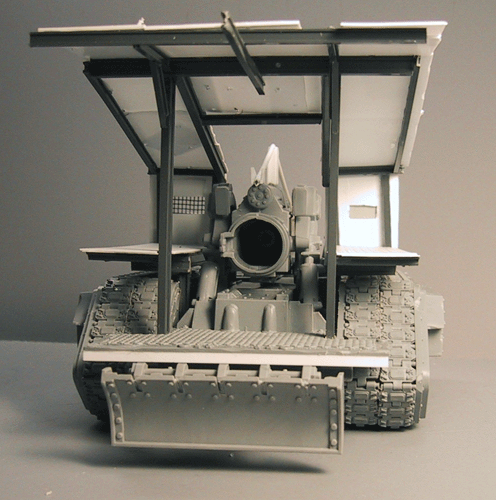
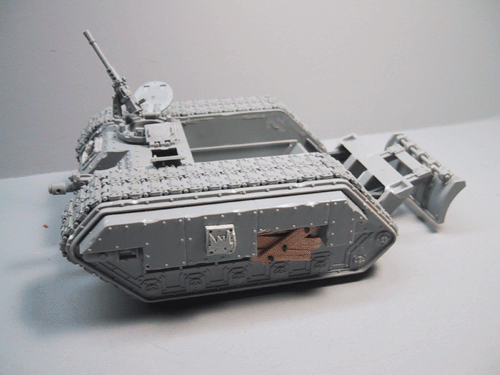
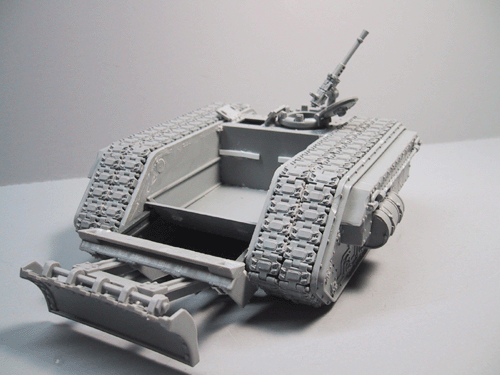
I deceided to play with some rare earth magnets and make a removable dozer blade. Step one was mounting the magnets to the blade frame like this. |
 |
Cross section. If you do this, I would move them forward about 1/2 the distance to the front. |
 |
On the vehicle, I shaved off these two inner ribs |
 |
And added some scrap punched steel from a computer case (it is pretty thin) |
 |
Holds pretty good, don't you think? My intention is to add metal plates to the chimera and hellhound as well, and simply move the dozer blade where I want it. |
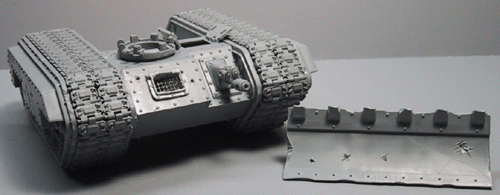 |
The chassie with removed blade. |
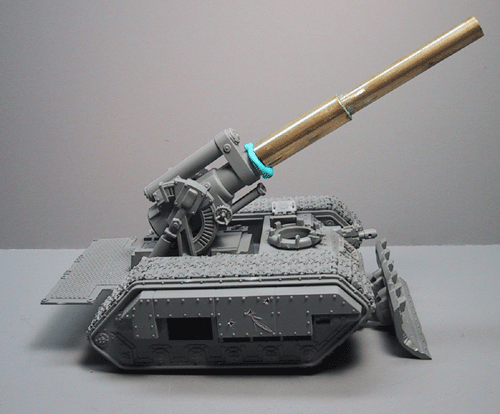 |
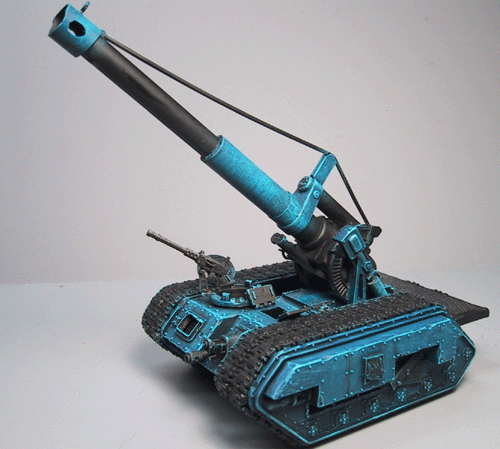
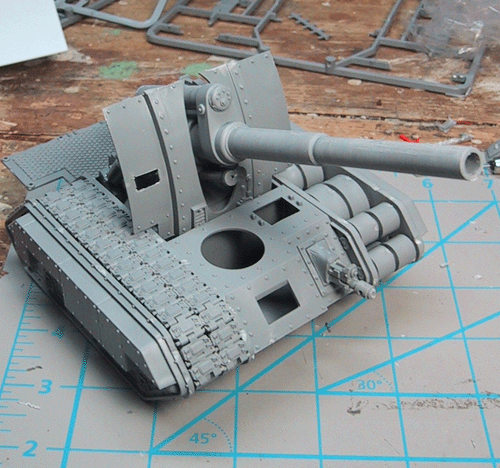
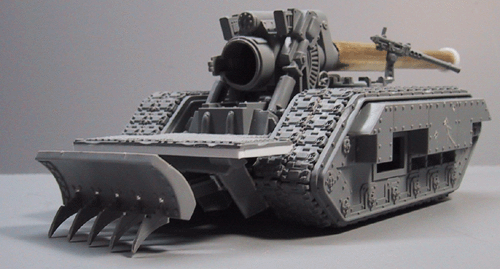
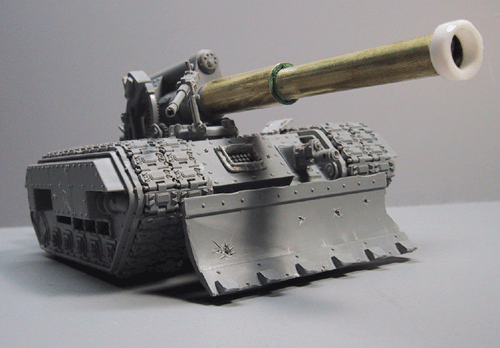
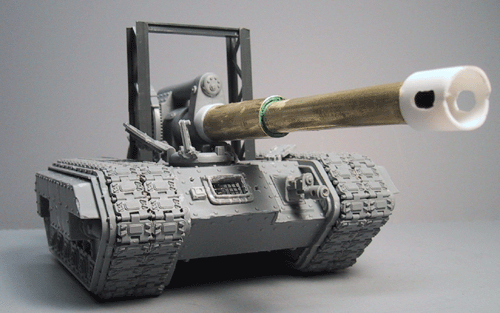
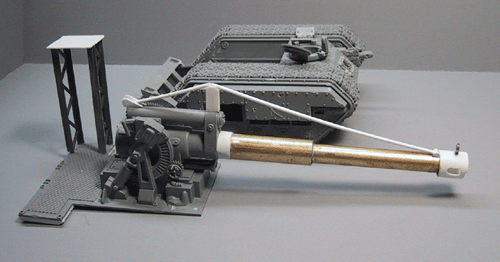
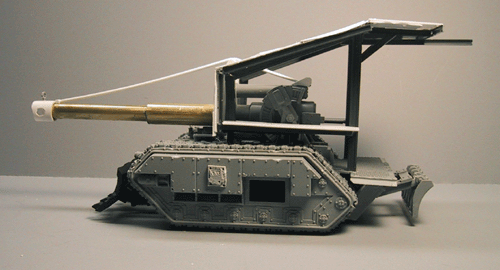
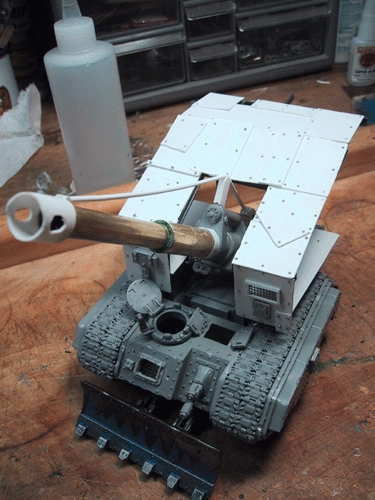
Ok, so you've been wondering where the gun is. Well lets just say I scrapped my other idea, and built a new one out of brass tubing. |
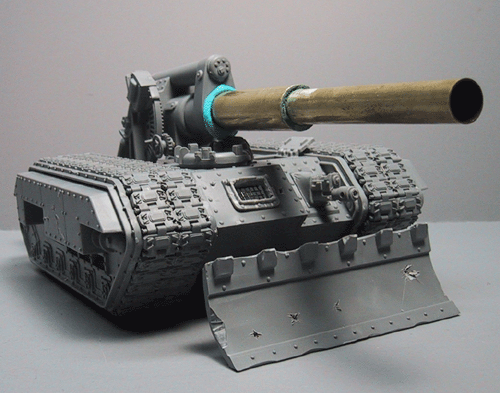 |
Looks bit bigger than a standard basililsk.. |
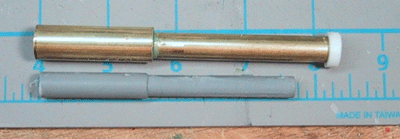 |
Barrell comparision. (the propa one's on top!) |
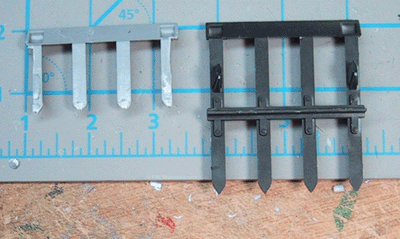 |
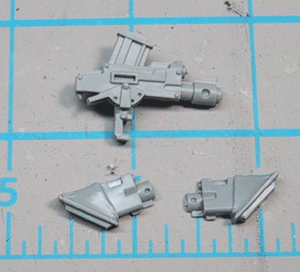
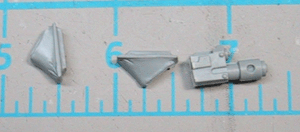
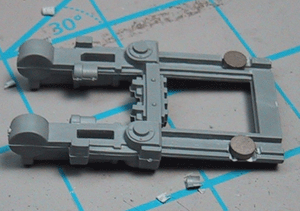
For the back support, I cut away parts from the anti-tank sprue. |
 |
And after building up the edge of the platform, I mounted the bit. |
 |
Than some ibeam along the top and bottom (the bassie is upside down in this view). |
 |
The completed support. |
 |
And with the gun platform in place. |
 |
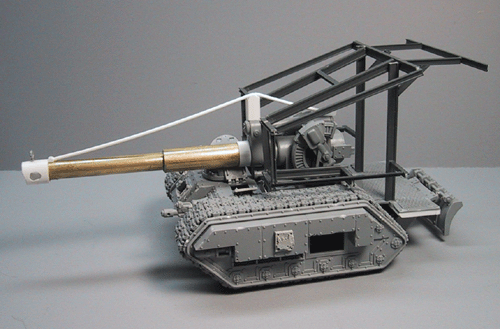
I'm still thinking about the rear blade; here's the first concept. |
 |
|
 |
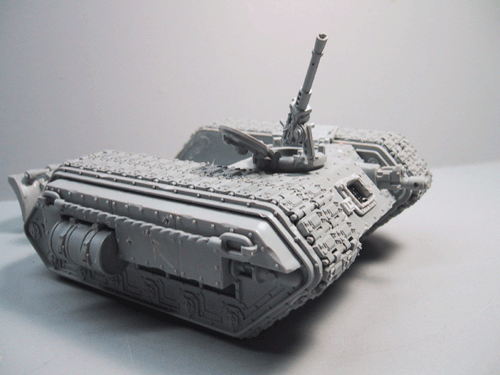
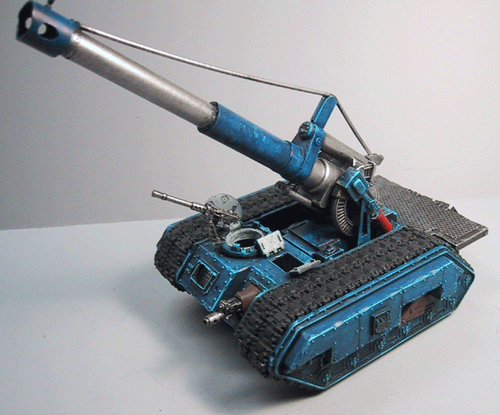
and I got the pintal heavy stubber mounted. |
 |
|
 |
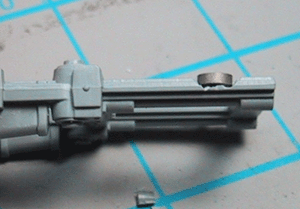
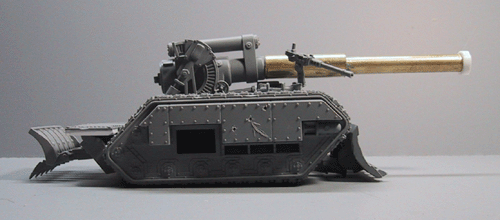
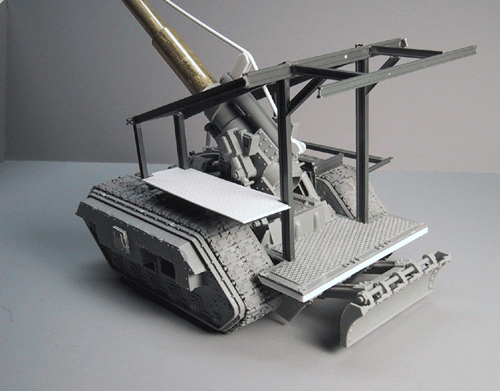
The barrel was finally mounted, a muzzle break installed, and work began on the upper structure. |
 |
|
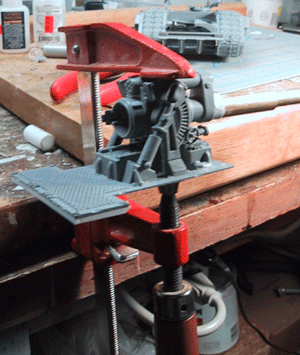 |
When you make "real" gunz, ya gotta use real tools. |
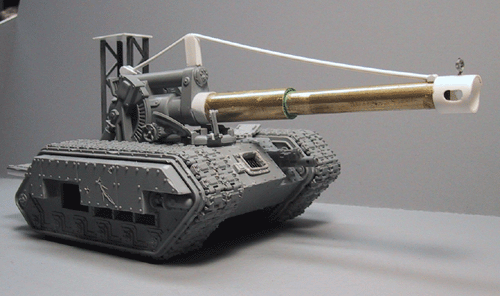 |
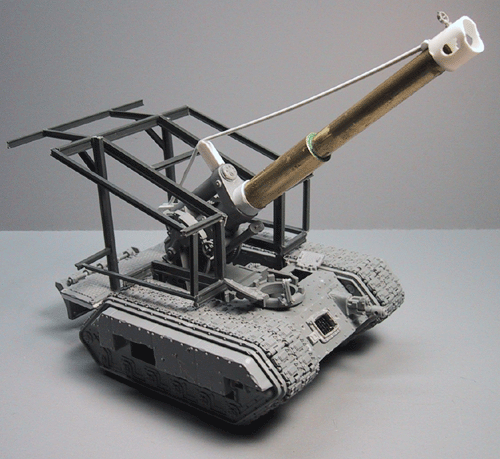
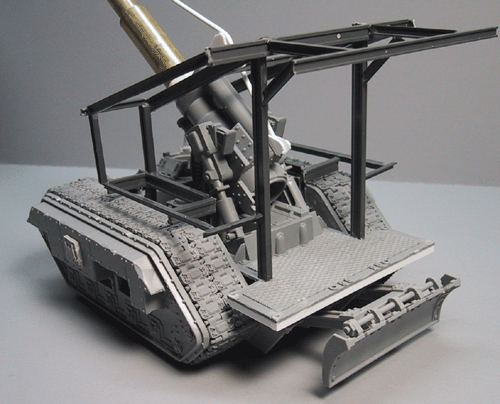
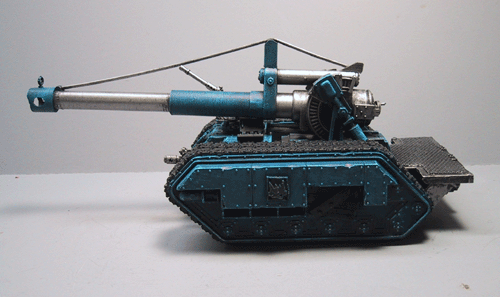
I moved the upper part to the back, and added the "Paris Gun" stabilization system. |
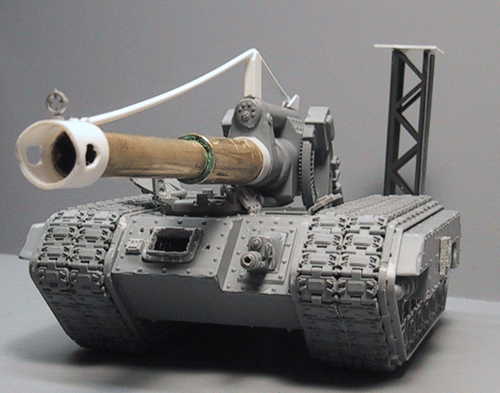 |
oh, and some targeting cross hairs. |
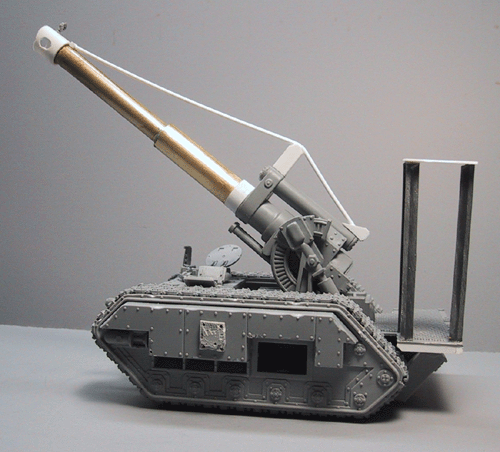 |
full elevation. |
 |
And it's still removable. |
 |
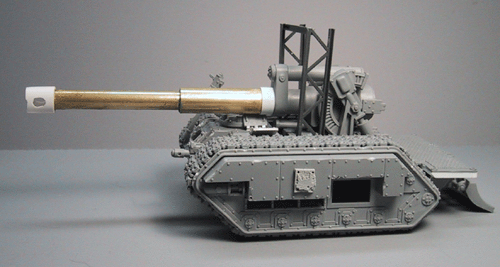
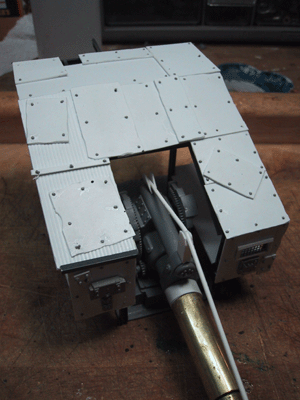
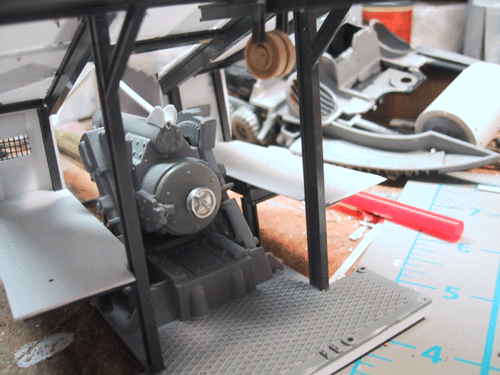
So I started
fresh with a new superstructure. |
 |
|
 |
This will
only be partially enclosed. |
 |
|
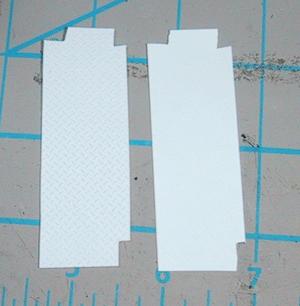 |
in order to
cut the side walkways, I made a template from .010 plasticard first. |
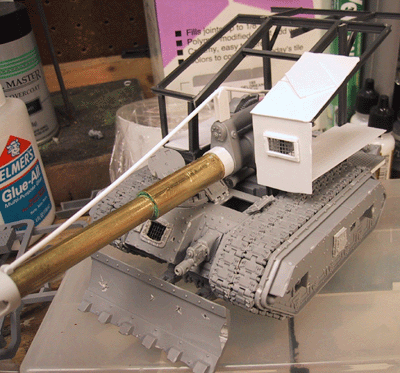 |
Some
of the "armor" got mounted. |
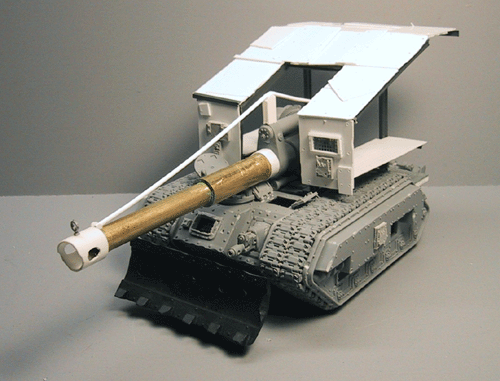 |
And
than the full top. |
 |
|
 |
|
 |
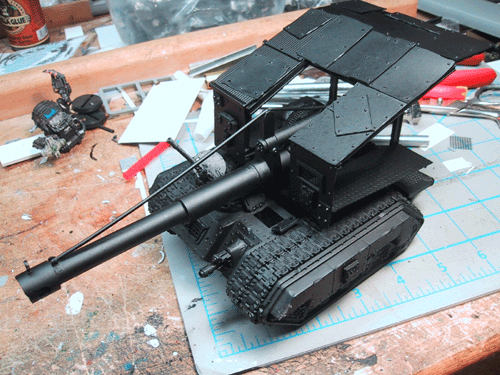
Still needs
rivits. |
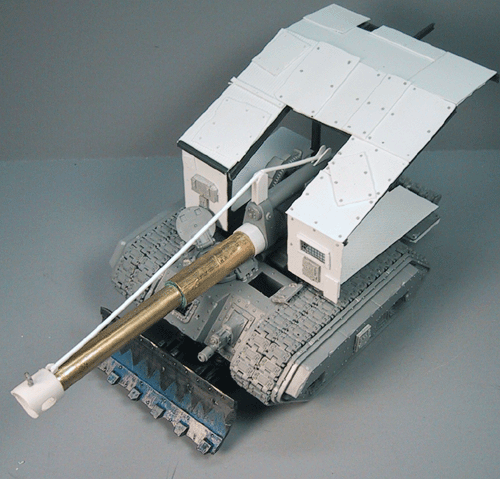 |
I started
riviting....until I went blind and had to take a break! |
 |
After a bit of a break, I got the rivits finished on the roof. |
 |
|
 |
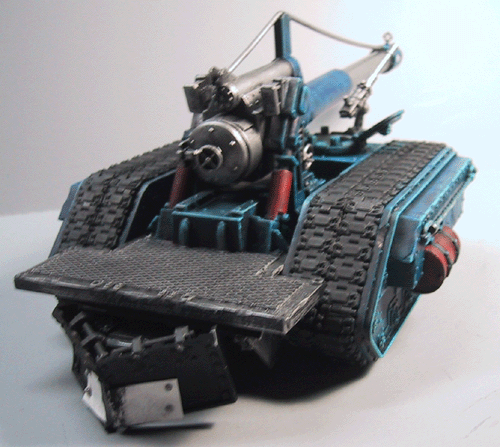
The model base is ready for painting. |
 |
|
 |
Note that this is meant to be the base for multiple models, so the bassie gun is just one of them! |
 |
I had some real delays in building this model as had lost the breach part. A friend suggested the hatch from a MK II Rhino, and sure enough, it fit perfectly. I added a wheel from a Killa Kan sprue. I had hoped to add "live" ammunition, but the open hatch wouldn' allow the barrel to elevate. |
 |
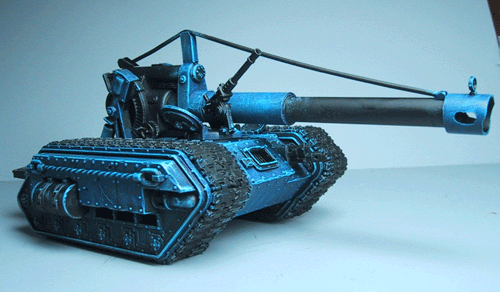
Primed! |
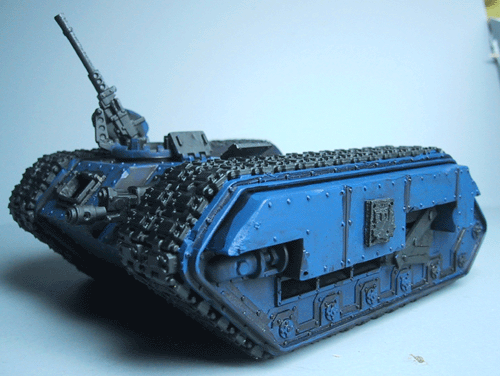 |
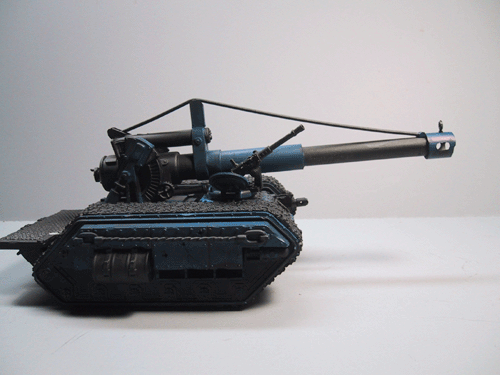
A base coat of regal blue, followd by a blue/purple/black in wash in the recesses. |
 |
|
 |
The top also got hit with the blue, but only on the lower plates. |
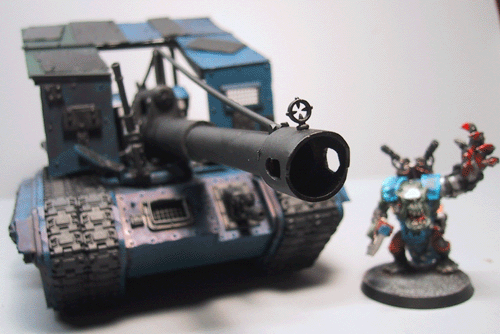 |
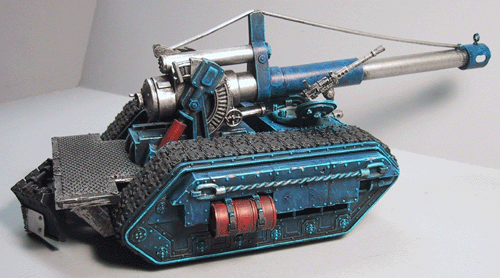
I think Bob likes it! |
 |
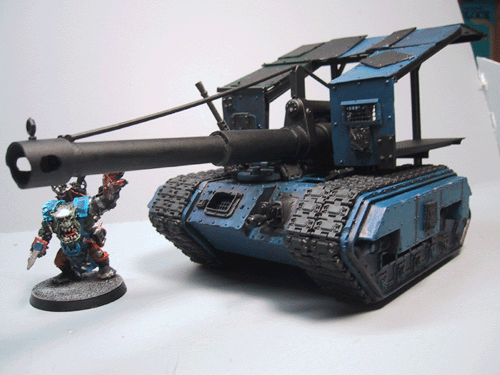
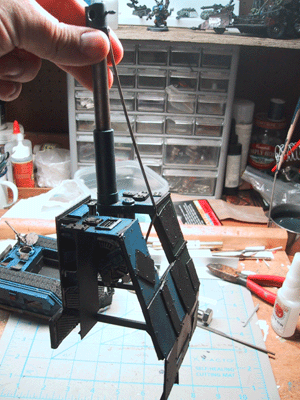
In a surprising revisal, I decided that I really didn't like the top that much. So I made it removable, and I was able to take it off without damage. |
 |
I think the sleek look is just that much better...... |
 |
With lighter drybrush applied. |
|
Yeah, that's too much gun for a shed. |
 |
|
 |
another ink wash over the model, this one blue/purple/water. |
 |
|
 |
|
 |
Started picking out some details. Note that the highlights are left overs from before - the ink wash settled in nicely! |
 |
|
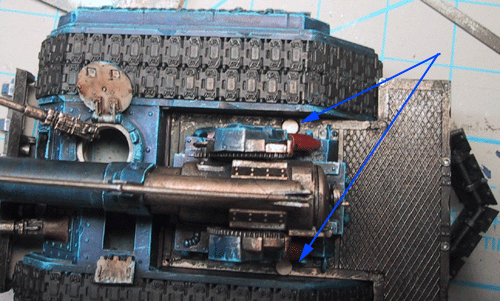 |
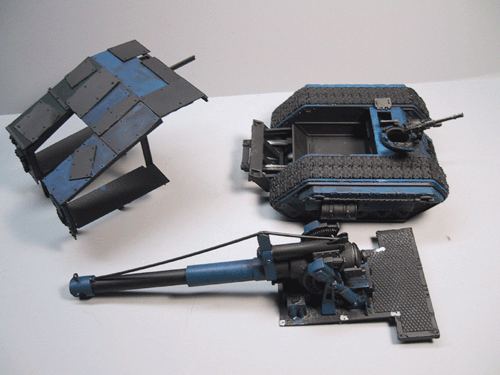
I decided I can't leave the shed just sitting there, so it had to be removable. First step was mounting the rare earth magnets. |
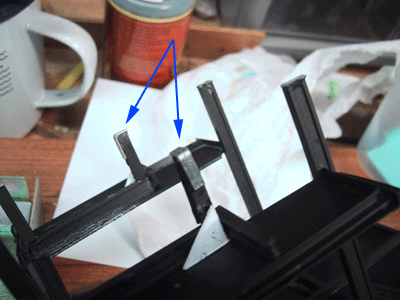 |
Second was taking these industrial sized staples, and cutting them in half. They make perfect mounting plates for the center shed post. Note that having the long verticle side provides greater adhesion area for glue. |
 |
These magnets rock. |
 |
|