 Scarpia's MINIVerse - Model Railroading
Scarpia's MINIVerse - Model Railroading
Tools & Tricks
Roadbed
The next consideration is what the track itself will sit on. Based on some of the same criteria I used for my bench work model
1. Must be strong
2. Must be allow minimal, if any humidity absorption.
3. Must be cost effective
4. Must be durable
5. Must be "mountable"
I am looking at a combining a couple of common materials into a homemade laminate. The laminate may consist of
1/4 inch homosote (under roadbed and structures only)
1 inch closed cell foam
1/4 MDF
Large panels can be created for areas such as towns or yards, or strips for singular road bed. The laminate should be flexible to a degree, but strong enough to support the required weight. The underlying MDF allows for switch machine mounting, wire management, and sound deadening. Each laminate to be created by applying adhesive and pressure. By only using homosote under areas such as the road bed and structures, the top of the foam maybe carved for small depressions and ditches.
My original idea was to make a composite out of MDF, foam, and homosote; however I can only get 1/2 inch homosote in my area, and I don't really want to use a sheet that thick. Were I not hand laying, I wouldn't be as concerned, but I need something that will grab and hold onto spikes.
Another gentleman has suggested that his method, which is nothing more than card stock caulked to the track above and foam below, works great for hand laying, is a consideration, but it doesn't help me with the height difference between sidings and the main. Likewise, cork is out due to the hand laying method.
Maybe a combination of basswood for the main, and card stock for everything else?
 |
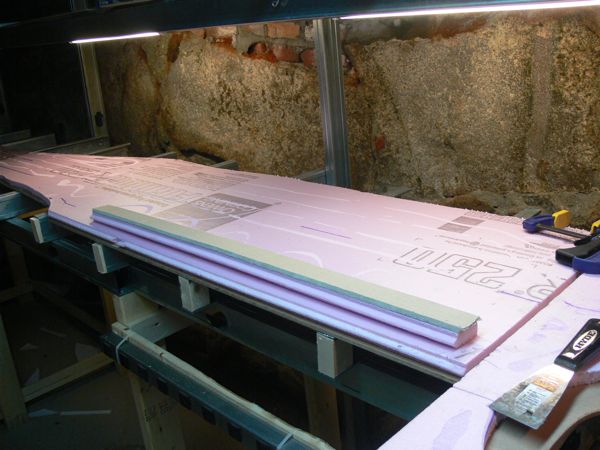
1/4 inch MDF will be the first layer of the roadbed |
 |
followed by 1 inch pink foam. |
 |
I printed out the track plan 1 to 1, and after stitching it together, I cut out the foam, giving some excess on both sides. |
 |
|
 |
Using the foam as a template, I than marked the MDF with a sharpie |
 |
And cut out the form with a jig (saber) saw. Note that I also gave the MDF an "edge", so I'd have space to attach terrain to. |
 |
Once the pink foam was glued to the MDF, I put the layout print out back in place to get the alignment correct. |
 |
Important was making sure there was enough clearance on the ends for the curves. |
 |
Once the sides were right, I aligned it front to back. This view is a good one of the yard layout. |
 |
What makes this great (the printing out of the track plan, 1:1) is that you can put down real track and cars to check clearances. A couple of pieces of Atlas code 100 works great for this. |
 |
The front edge of the risers in this case meets the front edge of the MDF. With this in place, I drilled holes, and screwed the MDF to the risers, two screws per riser. |
 |
Next up was adding the base for the end. I chose for this a large piece of 1/4 inch thick MDF. |
 |
And sized out the turntable. Yes, this is the crappy Walther's 90' manual turntable. I know folks have tons of problems with it, but I have it, so I'm going to use it. I had to adjust it's location a bit from the plan, in order to center it between the joists. I could have moved the joists, but I have some space to play here. |
 |
After measure the depth and slope, I made a first round cut with the jig saw. Walthers does not provide a pattern for this, only for the top hole, and this is on the bottom of the roadbed laminate. |
 |
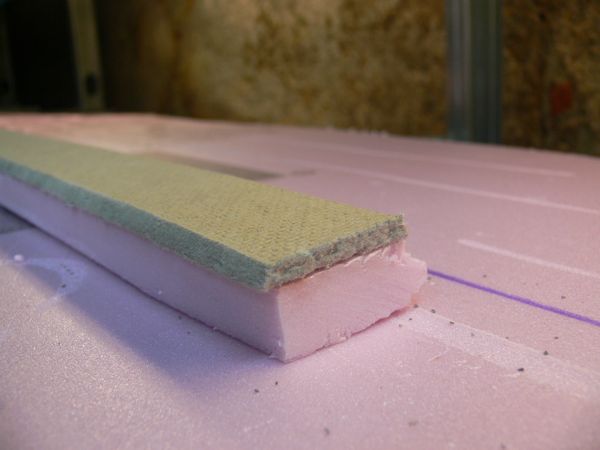
The first cut was too narrow, the turntable was sitting too high (per the sample foam and MDF piece to the left. |
 |
I widened the hole a fair amount (it's always better to cut too little, than too much), and got it to sit level in the hole, at the right height. |
 |
Laying down another piece of MDF, I cut out the top of the turntable hole using the Walther's instructions. |
 |
And how it looks from below. One report I read said that this turntable works ok if it's supported from below, so who knows, this method may actually pay off. |
 |
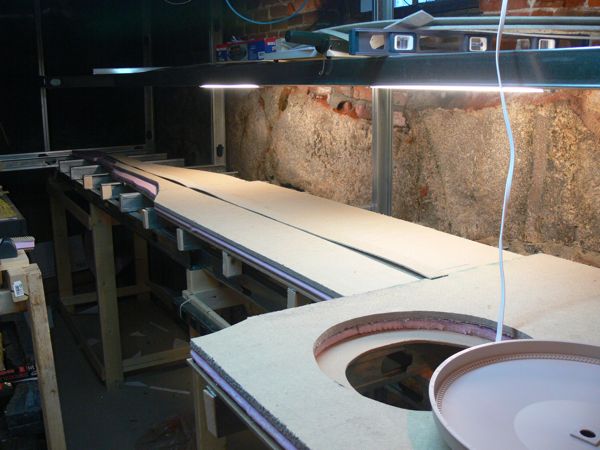
Back on top, the main line, and yard roadbed (1/4 and 1/8 inch MDF respectively) got glued in. |
 |
|
 |
The passenger car is on the main line, and the hopper in a siding. I think the height difference works. |
 |
At this stage, this area is now ready for track. I just need for that stuff to show up, and we can move on.
Costs so far - $30.70
(4) 1/4 inch MDF craft boards @ $3.80 - $15.20
(1) 1/8 inch MDF craft board @ $4.80 - $4.80
(1) 1 inch pink insulation foam board @ $6.20 - $6.20
(1) foam adhesive @ $4.50 - @$4.50
Whoa Nelly!
The MDF roadbed was a complete failure. The rail spikes would not go in, and the ballasting process totally warped the test piece.
It looks like that this idea was a failure, and I'm turning to homasote for the top layer of the composite for the hand layed areas.
There is a great set of instructions on how to make your own on Craig Bisgeir's web site. The commercial homasote road bed is very expensive, as high as $1 per linear foot, and a 4 x 8 foot sheet cost me $22 at our Home Depot.
I had the guys at HD cut my panel into 3 32" wide sections, as this made it much easier to transport. I than whipped out the table saw, and started cutting. They weren't kidding that this stuff makes a horrible mess - the dust is incredible. I did mine outside, and it still made a horrible mess. Wear a mask!
 |
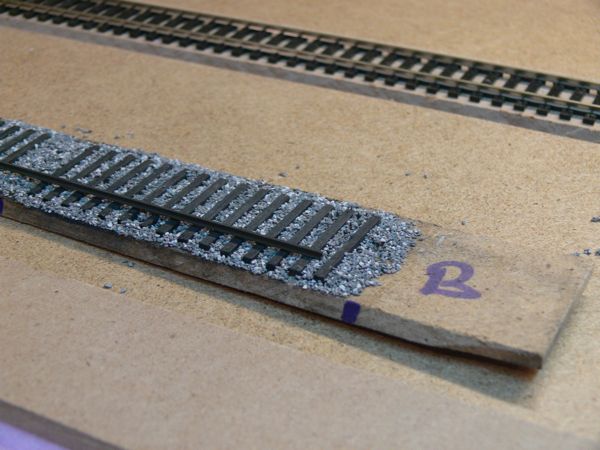
I was able to pull up the top layer of MDF easy enough with a putty knife. Some foam tore, but not too much. To start this round of the hand laying test, I glued a strip of the homasote roadbed to a strip of foam. |
 |
A closer look. The homasote was cut into 4' long strips, than "thinned" into 1/4" think sections, and than the sides beveled on the table saw. |
 |
I used the pulled up MDF sections as a template for the homasote. Note that I just covered the area with a full piece of 1/2 inch homasote, cut to fit. |
 |
This is the mainline roadbed put on top of the yard area. This is the 1/8' thick piece you get when you rip the 1/4" road bed sections, also with beveled edges. Craig Bisgeir suggests using these 1/8" sections for sidings; in this case I'm using it for the mainline on top of the stock 1/2" homasote sheet. Once the tracks leave the yard, I'll go back to a 1/4" main line roadbed. |
 |
The turntable hole is recreated and fit into place. |
'ere is dem nasty legal bits:
This website is completely unofficial and is in no way endorsed by anyone. All corporate and company names are used without permission. No challenge to their status is intended. ©2009. This site is the sole work of Scarpia (Thomas Garbelotti) unless otherwise noted. All content not created by Scarpia is copyrighted by the respective copyright holders.