 Scarpia's MINIVerse - Model Railroading
Scarpia's MINIVerse - Model Railroading
Tools
A quick and inexpensive storage /display case
I've been collecting a fair amount of motive power, and decided that they needed to be better stored. I tried a closed box, but the problem is I kind of forgot about them. I wanted an open case that would make me think about using them.
I did a quick search on the web, and while I found some topics, I finally just jumped both feet first into the project. I've done more than a little wood work, so I wasn't too worried.
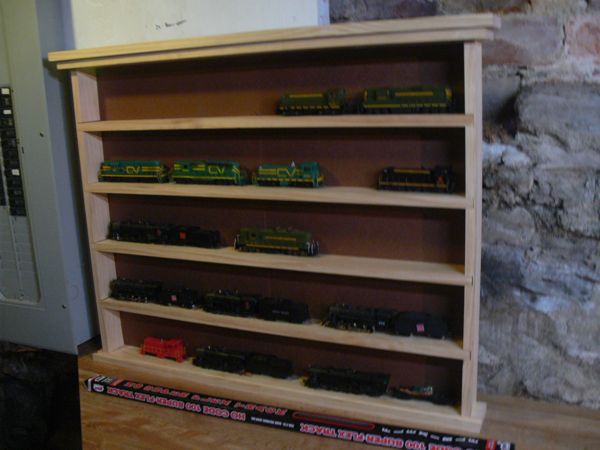
Ok, the important things first. It's constructed of clear pine, 1x3 inch shelves, a 1x4 top and base, and a 1x5 top cap. The back is fiberboard.
Here is the part list, This all ran under $35 at my local Home Depot.
I have also ordered two glass panels with ground edges for the front; they haven't arrived as of this moment, but they will be another $35.
Construction was straight forward. I made a few mistakes with this, so folks trying this might want to make some corrections.
I cut two of the 1X3's into 36" inch lengths (Mistake one - I wasn't thinking at the time how to fix the shelves to the sides - and this, is, of course, the length of a piece of flextrack. Due to my mounting decision, I should have cut them a bit longer to compensate)
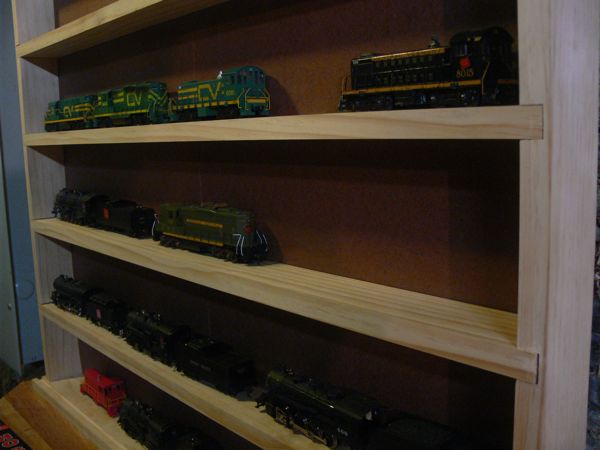
I than spaced out the shelves, to give a 5 inch gap between each, and cut the side pieces out of the remaining 1x3 28" long (.75 for each shelf, and a 5 inch between gap). I think you could go tighter, but this seemed a good gap. Using my table saw, I cut out the shelf slots on the two side pieces where the shelves fit (Mistake two - I almost always do a test cut, but I was talking to a friend at the time, and cut the first side piece. Only then did I realize I had cut it deeper than I would have liked). I don't have a dado blade, I just kept ripping it with the saw, and the cuts are not that perfect.
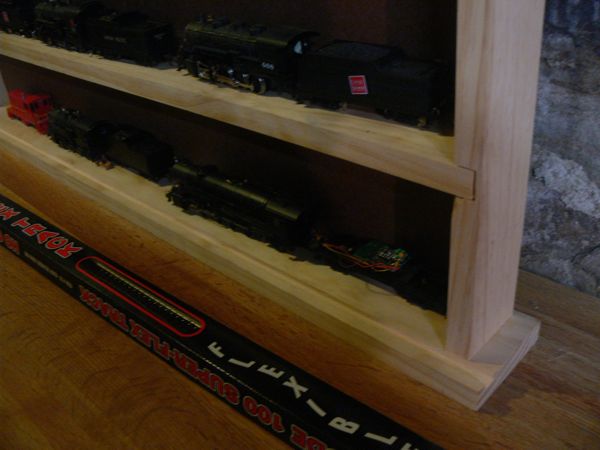
I cut the 1x4 to be an inch longer than the assembled unit, approximately 38 inches (my increased depth threw that off a bit). Measuring from the back, I built in a 1/8 overlap on the back for the fiberboard, and than, using a table saw, cut a 3/8 channel in the front of both the top and bottom for the glass to slide in. I just guessed on the depth, but it turned out to be a 1/4 on both top and bottom.
The shelves are glued into the side pieces, and the top and bottom is glued and screwed (countersunk) to the sides for strength. (Mistake three - I used a forstner bit to make the screw heads sit below surface level, and miss measured. That's why I added the top trim, to hide that extra hole).
I ripped the 1x6 down to a 1x4 1/2, in order to have a half inch overlap all the way around.

Finally I cut the fiberboard to fit for the backing (Mistake four - I should have put the seam horizontally, behind a shelf, instead of vertically). The backing went on with glue and brads.
I hope this hopes others - for $70 total, it's not too shabby, and didn't require a lot of tools. I'm still debating on paint.
'ere is dem nasty legal bits:
This website is completely unofficial and is in no way endorsed by anyone. All corporate and company names are used without permission. No challenge to their status is intended. ©2008. This site is the sole work of Scarpia (Thomas Garbelotti) unless otherwise noted. All content not created by Scarpia is copyrighted by the respective copyright holders.