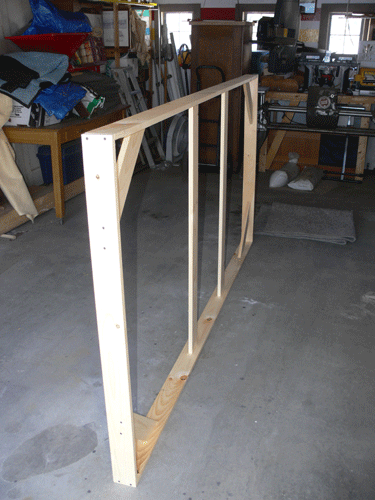
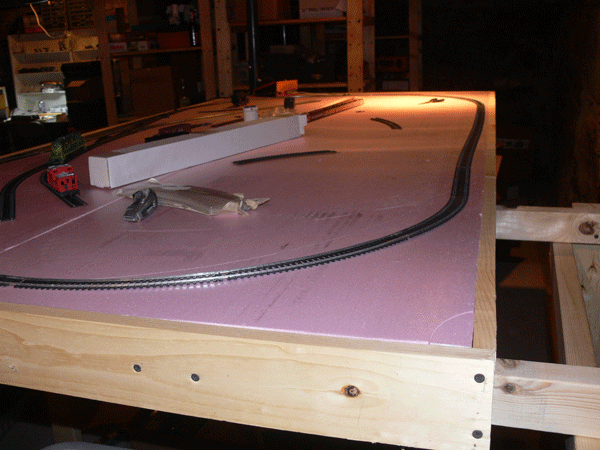
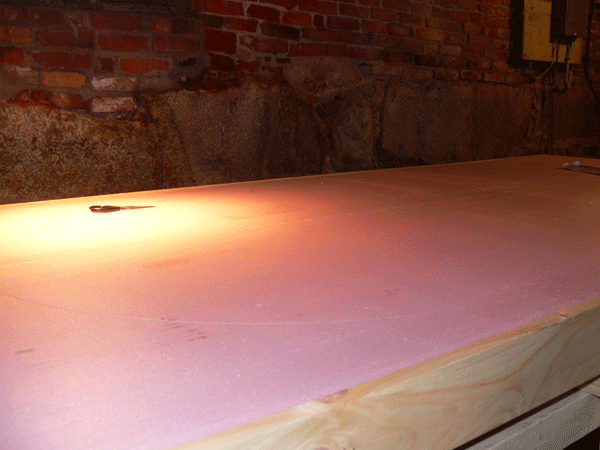
Construction
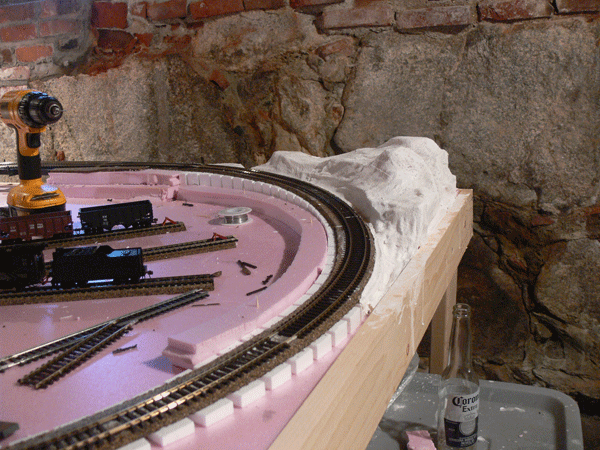
This layout was construction of 1x4 pine in a "bed frame" style. I used 5 eight foot pieces, were I do to do this again, I would use 6 pieces and add two more reinforcements. The frame holds the 1.75 inch thick insulation foam that the layout will be based on.
My cuts were as follows
▶ two eight foot pieces (exact) for the sides. Note that even though you buy 8 foot lumber, it never is exactly 8 feet, usually a little long. Also measure your foam first, it turned out my foam was a bit long too, so I had to trim that to get it to fit right.
▶ two 49.5 inch pieces for the ends)
▶ two 48 inch pieces for the lateral internal support.
▶ four 15 inch angled pieces (45 degree) for corner internal support
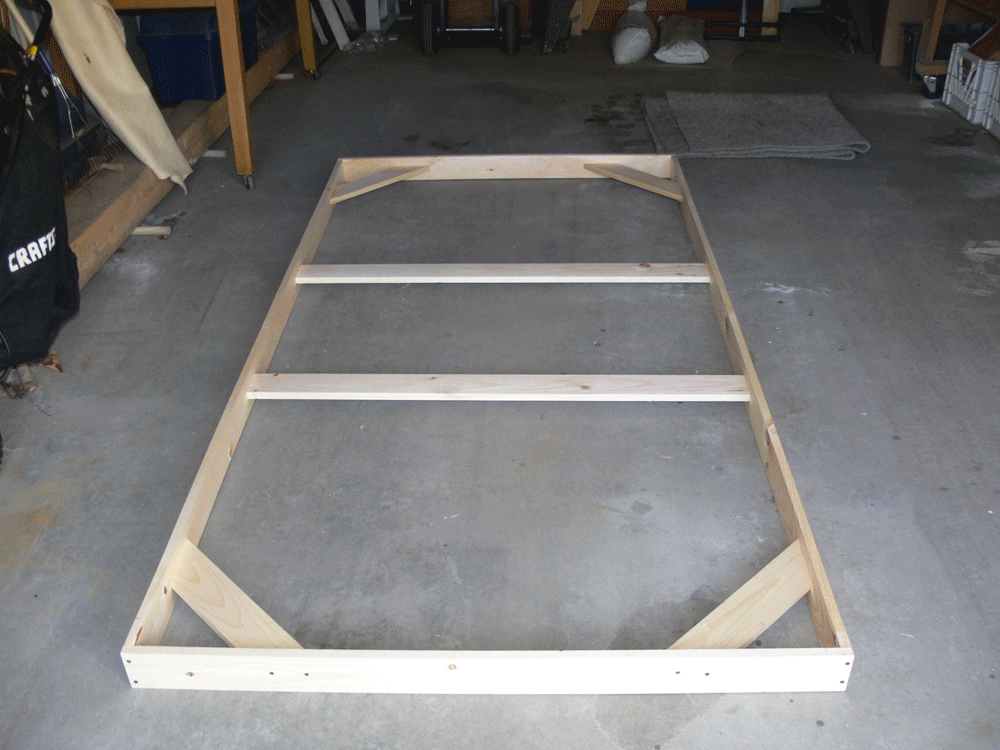
With this I purchased two 2 x 8 foot foam insulation boards, 1.75 inches thick (my home depot didn't sell larger sheets), a box of 1 5/8 inch coarse sheet rock screws, and a tube of liquid nails. The total purchase price was under $25.00, so not too bad for a starter set. Naturally any kind of leg support will cost extra.
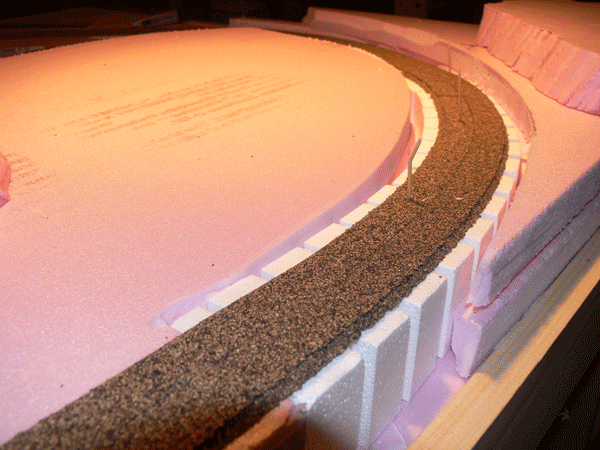
Here you can see it on the stand with the foam in place.
This foam level is a base - I will add some more for interest, as soon as the Woodland Scenic's slopes arrive from Walthers.
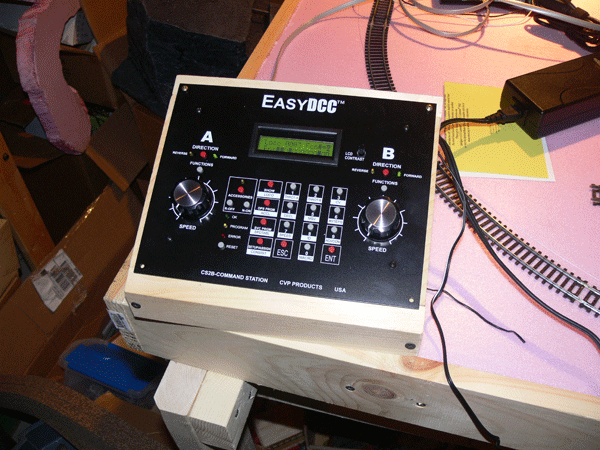
I got the DCC unit from CVP today, and quickly built a box for the panel from an old 1x6 I had laying around. I only sloped the box to make running it a bit easier; I may mount this to the side of the layout as it progresses. If you're interested, the box has a 6 x 8 opening, and I cut it at a 22.5 degree slope. The system was easy to set up and test, and ran a loco with ease.
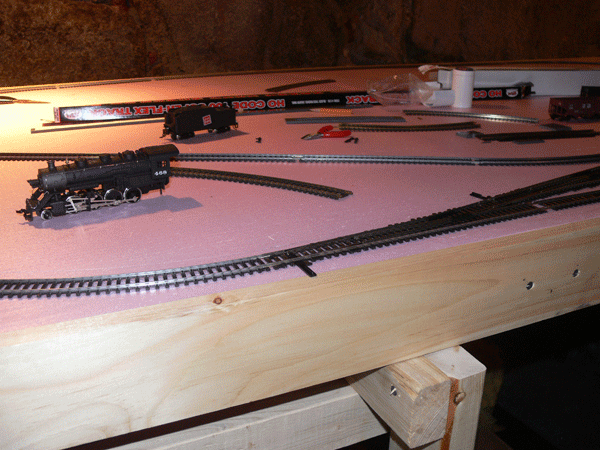
The Trackplan.

I should say that the layout plan was from Basic Model Railroad Track Plans, one of the Kalmbach books. I am using the plan on page 24, The Atlanta Central, but with modifications. Basically I am removing the intersecting connecting track, and most of the far switch yard. Instead, I'm keeping the small passing siding, and adding a double track truss bridge in the rear. I am also running 22 inch radius curves, so a couple of my larger road locomotives can navigate. These modifications will allow me to play with some terrain, including a water feature, and removing the connecting track intersection cuts down on track costs (switches mostly).
You'll note that my yard varies from the one in the book, I had intended on running 3 switches in a row, but because I am using 22 inch radius curves, i didn't have the room, so Instead i branched off the one.
The red numbers indicate major structures. I'm not really sure yet, but here are my ballpark ideas.
▶ Warehouse
▶ Engine Servicing
▶ Industry (farm or dairy?)
▶ Business
▶ Business
▶ Depot
Some of the supplies I was waiting for arrived, and it was time to get building. This may not end up as the best layout ever, but it's point was for me to be able to learn how this stuff goes together.
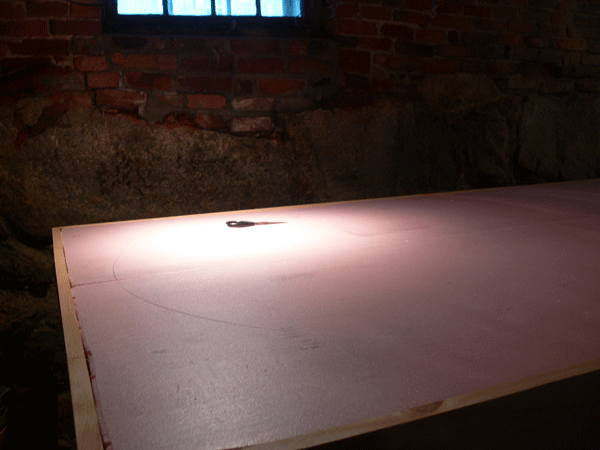
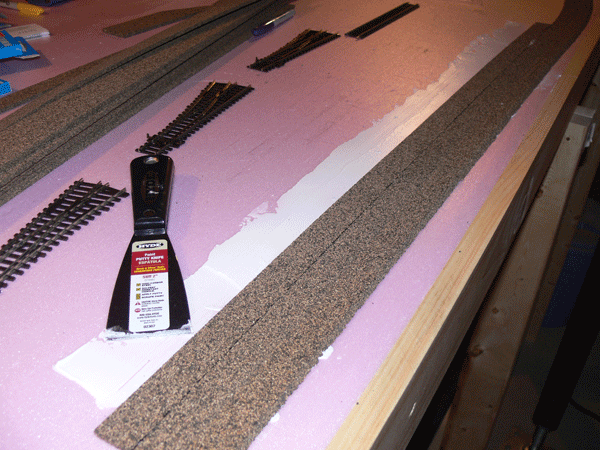
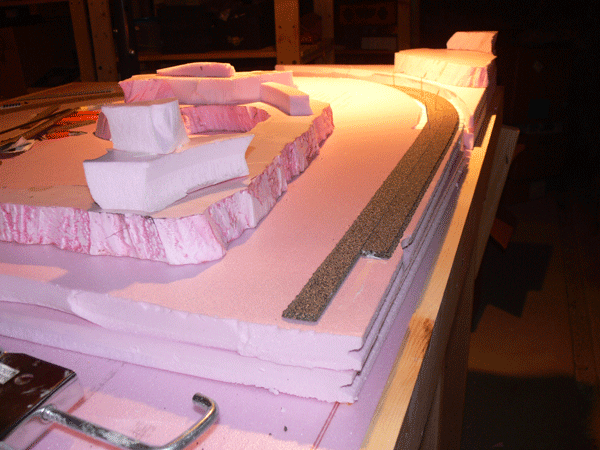
Step one was clearing off all of the "play" aspects, and get back to the bare surface
If you look closely you can see the curve radios I gouged into the foam surface with a pencil.
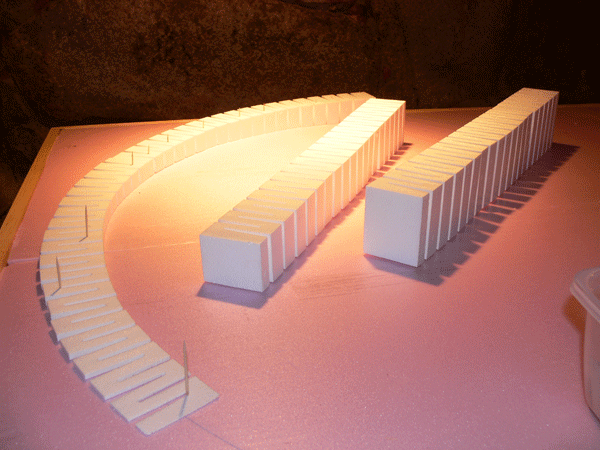
Foam has a lot of advantages. Here, the Woodland Scenic's risers are simply held into place with toothpicks while the adhesive dries. Note that I bought the 4% slope set, but I will not be using the taller ones - just the first two parts.
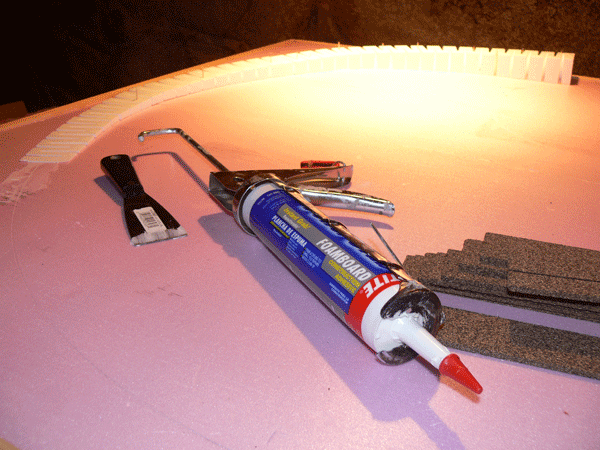
The risers and roadbed were held into place with this glue made for Foam board.
A ribbon of adhesive is laid down
and than toweled smooth for the riser/roadbed.
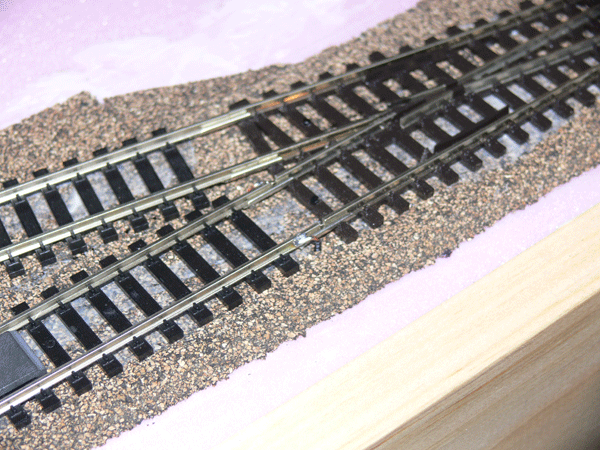
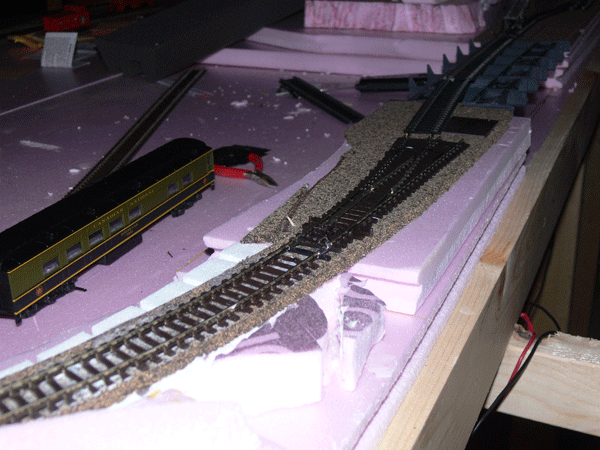
You can see in the last picture above the Peco insulfrog turnouts; they arrived today as well. This was great, as I realized as I put them together that there needs to be some track spacer between each, otherwise they won't operate. This might sound basic to most advanced modelers, but for me, I was glad to have a chance to "size it up" before putting them down. I got the Peco turnouts for a fair price from Cherry Creek Hobbies, best yet was the lightening delivery. I ordered them on Friday, and they were waiting for me on Monday afternoon. Not too bad, as I'm in New Hampshire, and Cherry Creek is in Wyoming!
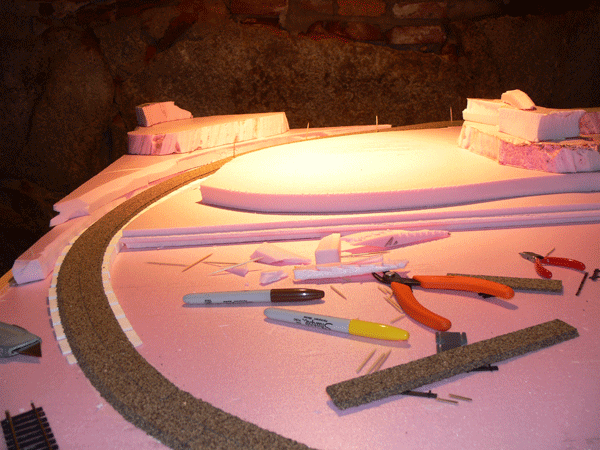
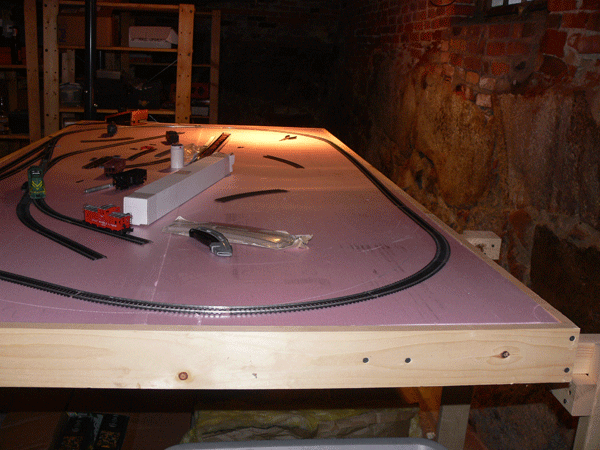
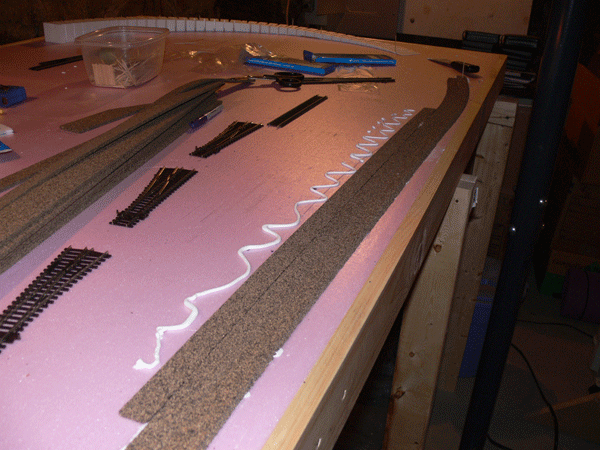
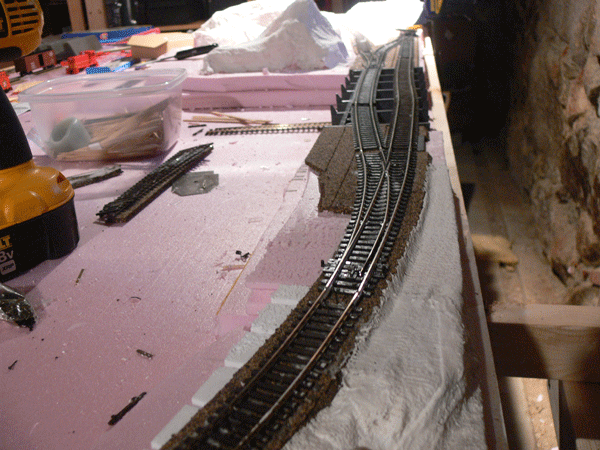
With the slopes and some road bed in place, I added more foam board for a scenery understructure.
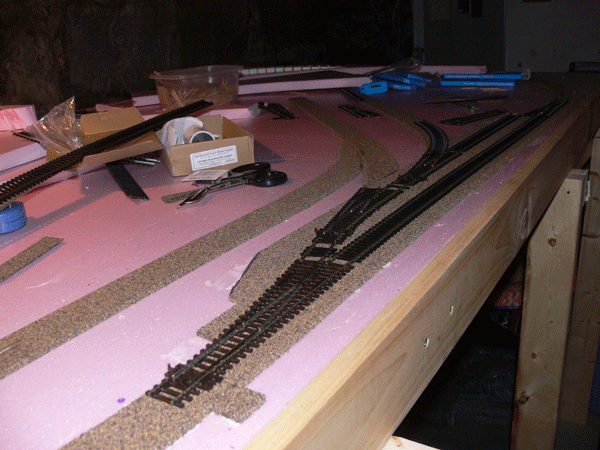
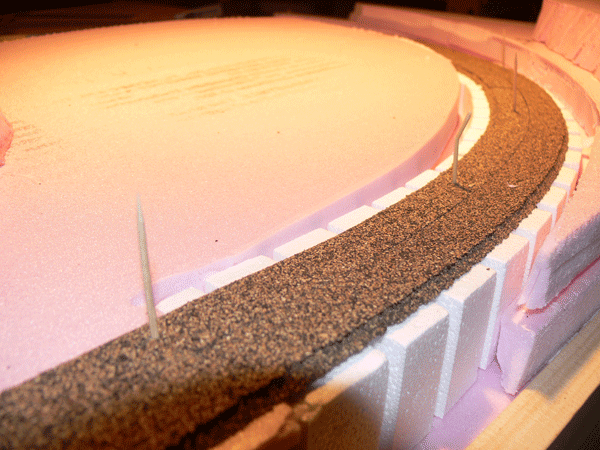
Here's looking back at the main yard, the cork is in place (mostly), and the track is here just for sizing.
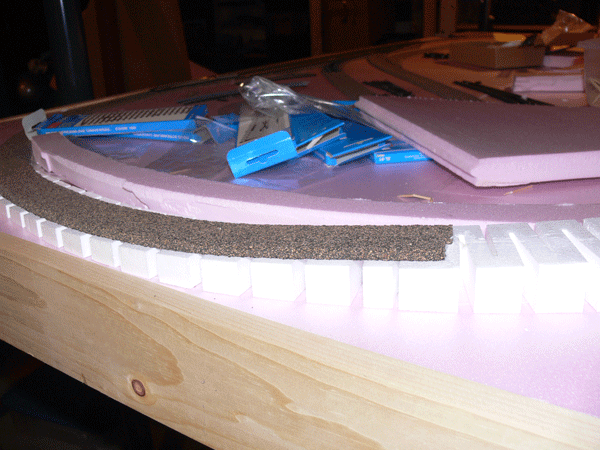
This is a good cross section of the build right now. Foam board base, woodland scenic's slopes, cork roadbed, and more foam as a scenery base.
This flat area will have a small siding, and cliff will be where the bridge will be. The hills look strange, but don't forget this is a substructure - there will be plaster cloth on top, so these should look like smooth hills.
One of the advantages of this construction are the toothpicks. Yup, toothpicks. here they are holding the roadbed to the sub roadbed while the glue sets
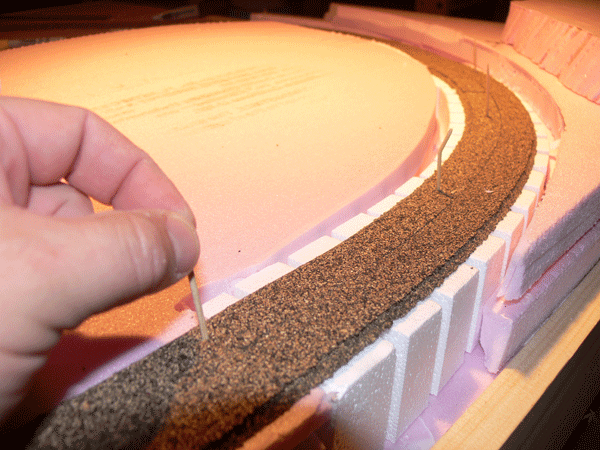
I don't bother removing them, but instead just break them off. Bend them carefully
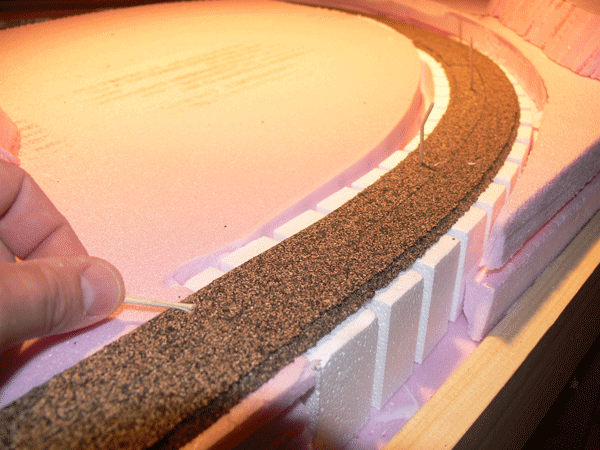
until they snap.
So far, I'm 100% at having them break off right at the surface. If needed, you could razor saw them if you liked.
The build continues, but I've hit a few snags...
Problem 1: I discovered what insulfrog turnouts are. I've used some nice Peco insulfrog turnouts, and with just two wires connected to the rails, when they're thrown the power dies. I understand now that I'll need to run a fair amount of feeder lines, and I may have to cut rail to isolate them. Still gotta figure that part out. The problem manifests itself in both DC and DCC modes.
Problem 2: the switch on the top passing siding meets the flex track right at the slope edge. This is a bad idea, as it becomes a bit of a rail kind. My locomotives are handling it, albeit at a slow pace. I would avoid this set up at all costs, I forced myself to do this in order to fit in the 15 inch long bridge, plus three turnouts on the hill, the curse of small space. I'd hazard a guess that a shallower grade would also decrease this problem.
So far, those are my biggest issues. I'm not displeased, however, this is exactly why I'm making this layout, to discover the "gotchas".
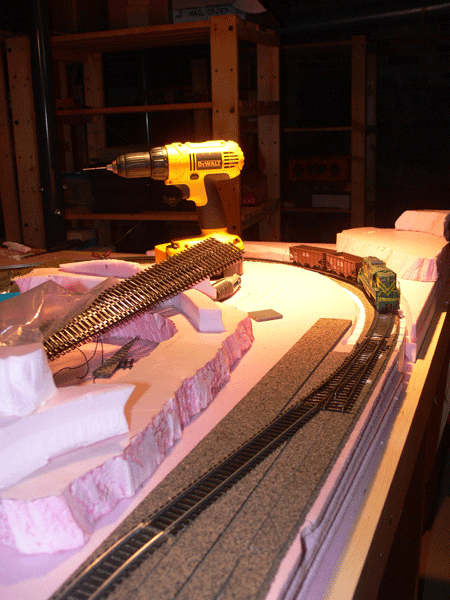
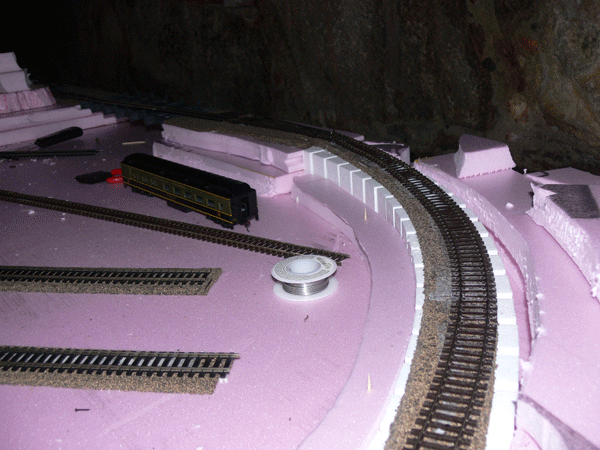
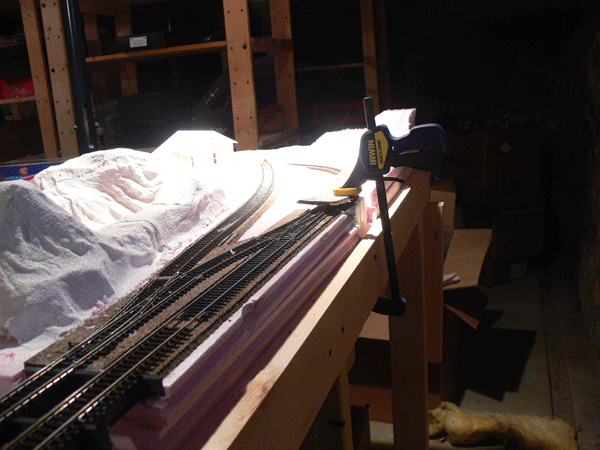
The upper passing siding begins to take shape.
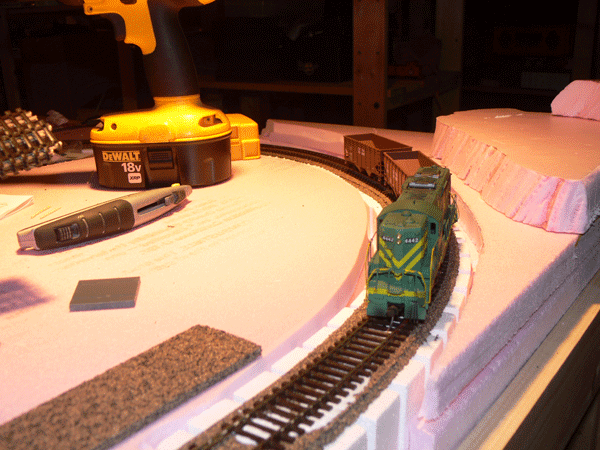
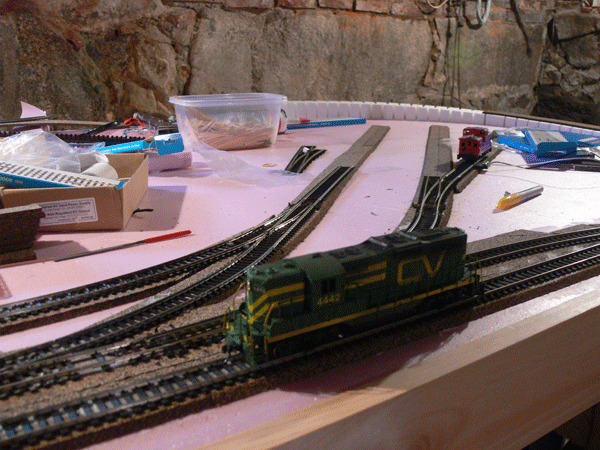
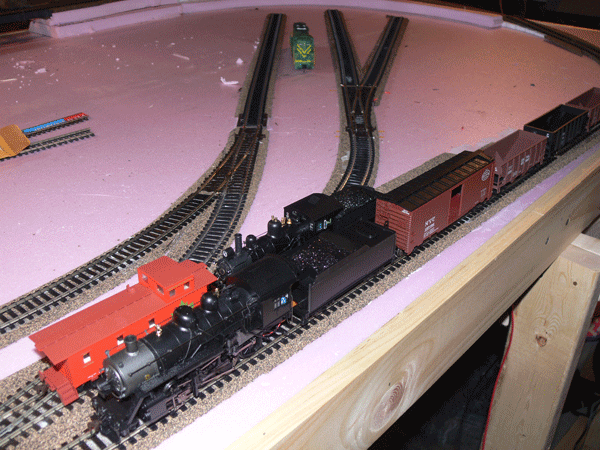
CV 4442 (DC) climbs the hill
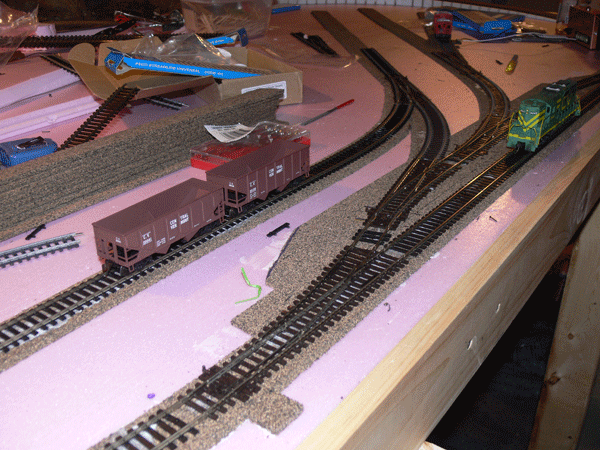
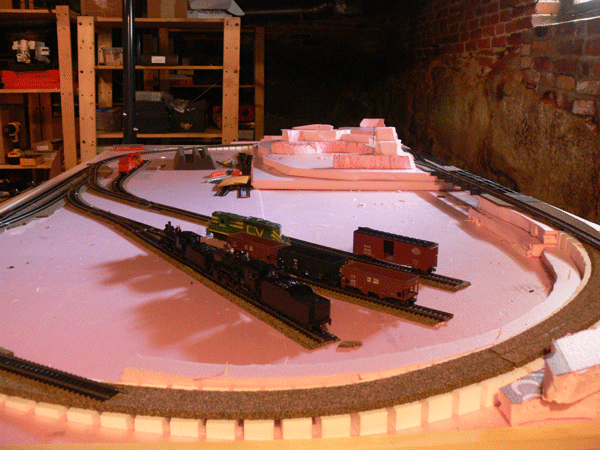
The "main" yard is almost done.
The annual train show was in my town this weekend, and I picked up some more things I wanted - some plaster cloth, under track magnetic uncouplers, a small depot, and a couple of boxcars.
I was hung up with the operation of the pike, as the switches would turn off power when thrown. I knew I had to learn to solder, so I finally went down to Radio Shack, and got a $7 soldering iron (25 amp). After a few tries, I managed to get the feeder wires in place, and everything worked!
Until I started laying more track, and really messed up southern slope.
Note that his was not my FIRST piece soldered; I wouldn't dare show that. But this one looks pretty good! I drilled a small hole in the cork, and than just pushed the wire (solid core 18 gauge) right through the foam.
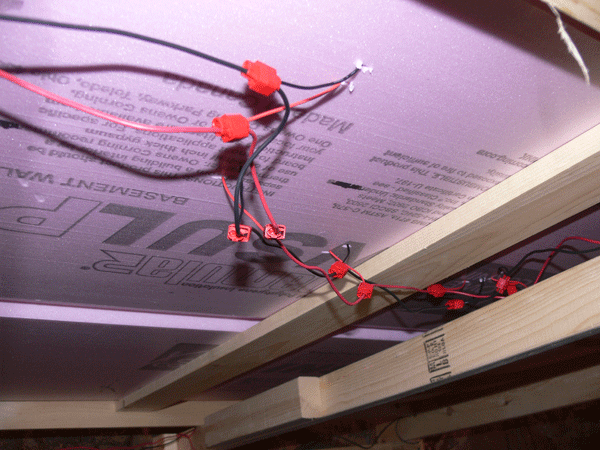
I used the suitcase connectors from Micro Mark to attach the feeders to the bus. These are great and easy to use. The bus is 16 gauge
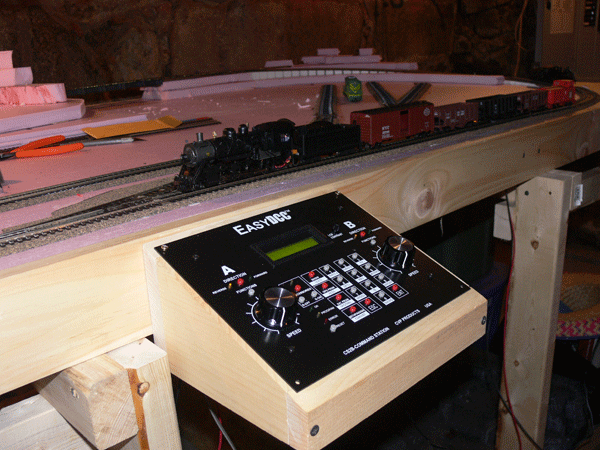
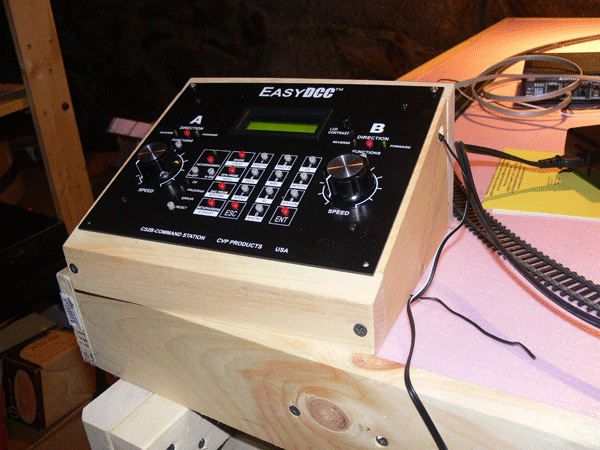
With the wiring in place, I was able to finally mount the control box to the front of the layout using screws.
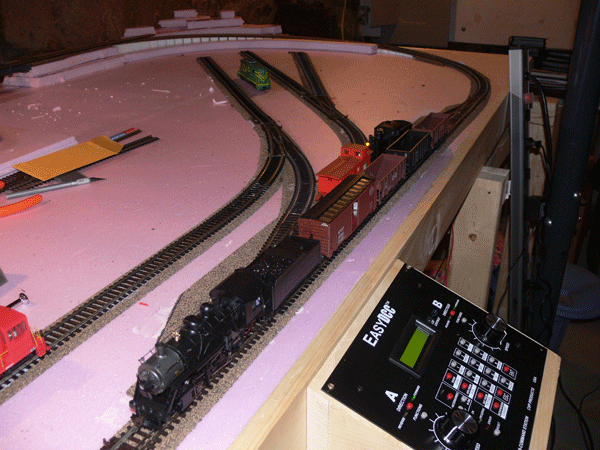
This makes for much nicer operation.
A view of the now working part of the railroad.
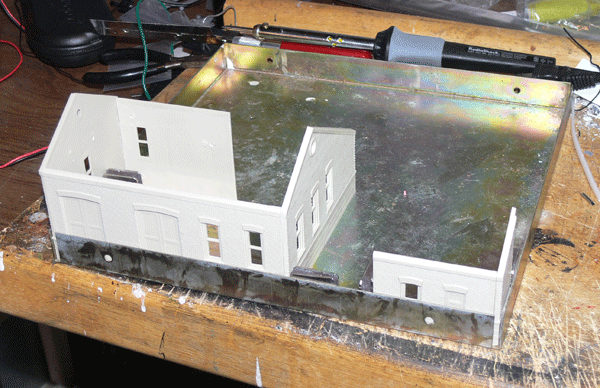
At the local train show, I got this small depot from Design Preservation Models. It was reasonably priced (>$15), and so far is going together pretty well.
Here is their finished model
This joint is a major problem. The large locomotives won't go over it without derailing, and most of my rolling stock as well. i even thought to solder the rail connections to see if that would smooth it out, but that failed as well. The issues are clearly due to the 4% grade, and the meeting of the track pieces at this point.
I'm going to tear it out, and this part of the flex that shifted during installation, and do it over. I'm going to add a curved turnout instead about middle picture, and lengthen the passing siding some. I'm also going to rasp down the slope on top a bit.
So far the foam has been agreeable for construction, lets see how it does when I tear it apart. I'm not happy about wasting time and money on this, but than again, this is exactly why I'm doing the test layout.

The bridge base is assembled and in place for fitting/temp operations. The track on it is not fixed.
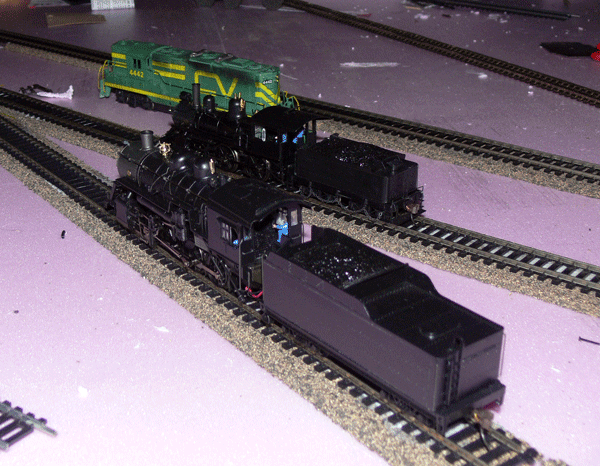
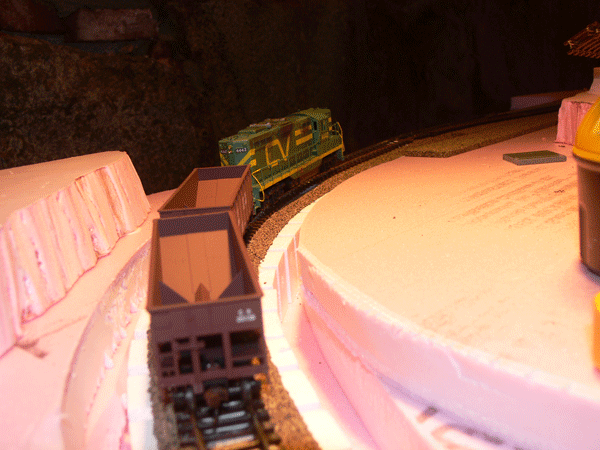
Besides the DC CV 4442, I am also running these two DCC Bachmann Spectrum Locos - in the back is a 4-4-0 steel cab American, and in front, a 2-8-0 Consolidation
And the two DCC locos earning their keep.
Well I got the package I was waiting for from Walthers, so I could attack that bad join on top.
I ended up tearing out this entire piece of flex track, and cutting back the other piece to move the joint from dead center.
I tore out everything you see here, and ground down the top of the foam and the top of the foam riser with a rasp. I replaced the straight turnout with this curved one, and the join is perfect now, no kink or jump. The trains run very smoothly over it.
The other side also had a bit of a jump, but I really didn't want to tear this apart, although I probably should have. Instead, as it just needed a 1/8 inch decrease at the join, I injected glue in between the foam sheets underneath this area, and clamped it down to the frame. Lo and behold, this actually worked, and this join is a lot smoother. Trains are much happier.
I've seen some real benefits from using the foam, the compression and shaping just two of it's advantages. However, I'm been considering adding powered turnouts for the far three, but with the foam bottom, there is nothing to mount the switch machine to. While I could add some more wooden structure to the bottom (and I've considered that for this case), I think instead I'll mount a walk around cab on the back side, and stick with manual throws.
Well that's it for the construction, lets move onto Scenery!