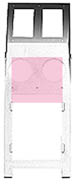
Space Marine Razorback
Gun-forward conversion
![]()
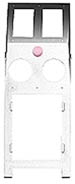
This is a simple, easy conversion for the Warhammer 40K Space Marine Razorback that requires no extra parts, just a sharp modeling knife, and a flat file. By simply moving the gun turret forward to the front of the model, your Razorback will have a different, unique look, without disturbing the overall effect or usefulness of the model.
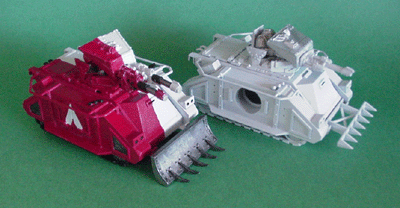
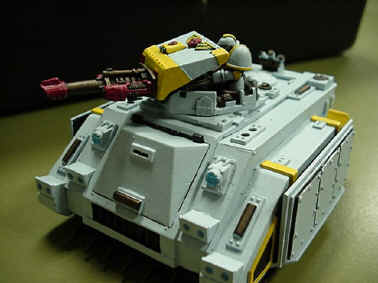
The photo above are two razorbacks that I have modified for my Storm Lord unit, and give you a good idea of how they look, even uncompleted.
The only drawback that I have noticed so far is that you may not use the stock copulas for the mounting of an extra pintle mounted storm bolter.
Here we go.
![]()
|
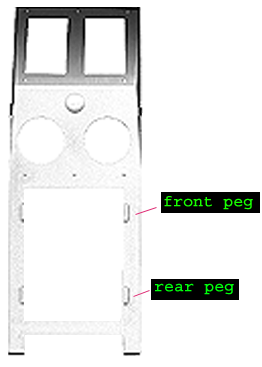
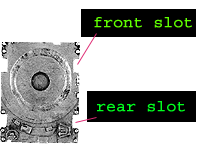
Step 1. Before assembling the chassis, file the small dome (shown in the below, the dome is marked in red) on the front flat.
|
|
|
Step
2.
Use a sharp modeling knife and remove the area shown in red in the figure below. Use the metal turret base piece to judge how much material forward to remove; the goal is to have the back notch on the turret base fit the front peg of the chassis half neatly.
|
|
|
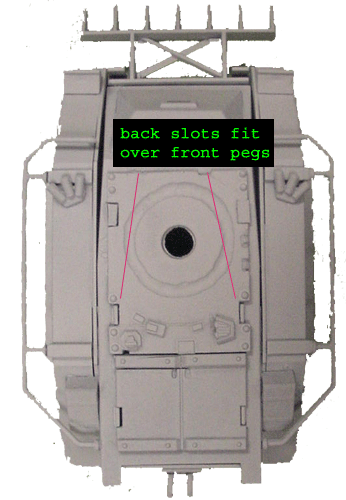
Step 3. Test fit the turret base. Once you are happy with the fit, glue it in place.Do not assemble the halves yet.
|
|
|
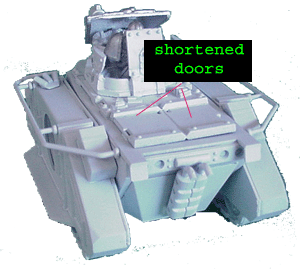
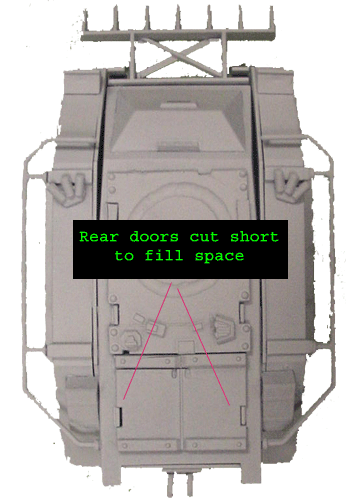
Step 4. Carefully cut the door edge strip from the double chassis doors. Set aside.Measure out the new length, and carefully cut the double chassis doors to fit the remaining gap. Remember to factor in the door edge strip! Glue in place. Do not assemble the halves yet
|
|
|
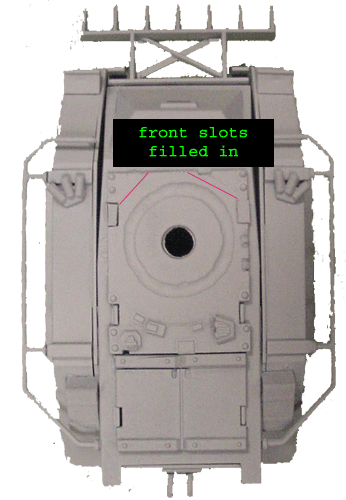
Step 5. Fill in the font slots on the metal turret base with either putty, or extra plastic. Use extra plastic to fill in any unsightly gaps. When dry, you may now assemble the razorback as normal. If you wish to use the exhaust modification, please see step 6, otherwise, complete the model as normal.
|
|
|
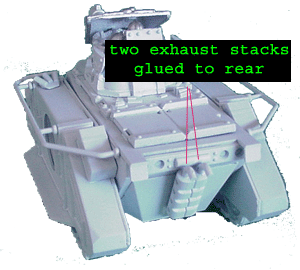
Step 6. Exhaust modification. in order to make your model look even more unique, take two exhaust stacks from the sprue, and remove their mounting pins. Glue these two stacks together as shown. When assembling the lower chassis, use the sloped door option for the back as it makes a perfect place to start the exhaust from. Glue the combined exhaust stacks to completed model as shown. That's it! |
|
![]()
Credits:
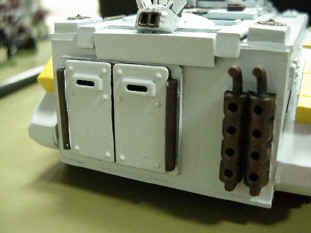
I got the idea from a web site you might know if called Dakkadakka. The original model was apparently designed by Craig Gallant. His modification is admittedly cooler, but as this one requires no extra components, it is easily doable by the average modeler.
Here are shots of his modification that I copied from Dakkadakka. Be sure to check out their site!
If you have any questions or comments, please feel free to write me at storm_lord@giak.com
Warhammer 40K and Space Marines are registered trademarks of Games Workshop