|
Warboss Bobz Killa Konvictz
|
|
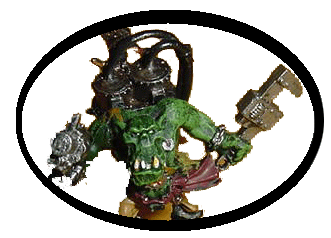
Ok listen up ya gits. Dis here's a way to make a lobba for da boyz dat will cost you no more than a tooth ($1.25). Not countin' grots. | ||||||||||
|
|||||||||||
|
I'm gonna get what out of dis junk?? | ||||||||||
|
|||||||||||

|
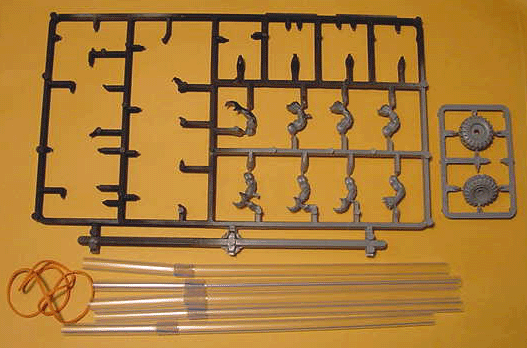
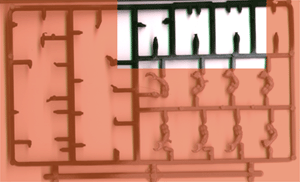
Take the ork boy leg sprue (shown left) | ||||||||||
|
The parts we need are shown in the clear. Basically cut these out and trim off all the tabs. The sprue has flat nobs that poke out (towards the viewer), you wan to cut the long side just under these | ||||||||||
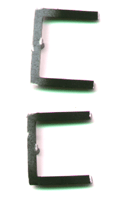
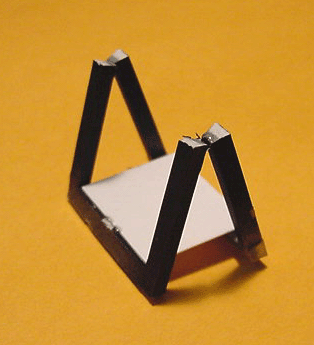
here are the two parts we need for the chassis cut out. |
After you have cut out these two pieces, cut a small piece of card or plastic
wide enough to fit inside the "u", and about 2 cm long.
|
||||||||||
|
Glue the two pieces in an "A" frame, with the card on the bottom. A completed frame is shown to the left. | ||||||||||
|
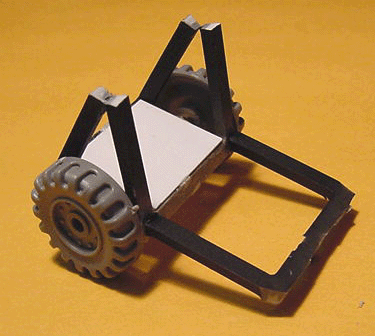
Take the wheel set, and cut another piece of straw to use as an axel.
Glue 1/2 of each wheel to each side. I find it easier to glue the axel to
the base with one wheel off, and than glue the whole shebang together.
Take another of the U pieces from earlier, and run it parallel from the back of the chassis - see the picture. This makes a tow bar/back stop for the rokkit launcher. Let the whole thing dry for a while. See the completed chassis to the left. |
||||||||||
|
|
|||||||||||
|
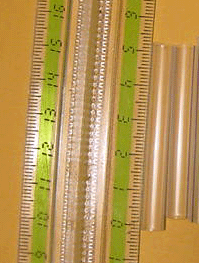
Cut out sixteen 5 cm long pieces of straw for the rokkit tubes. (or however long you like them - straws are cheap, but I found this to be a good length. | ||||||||||
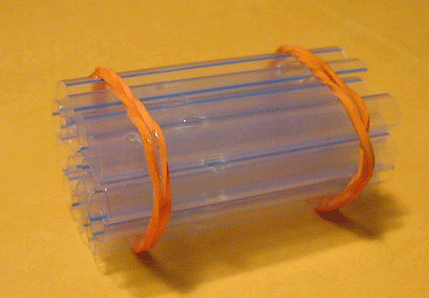 Completed rokkit tubes |
Gather the tubes together, and using a rubber band, gather them all. Use
a second rubber band to collect the other end. Do not glue them until the
whole thing is together, and your happy with the tube and rubber band placement.
I tap the whole thing together on the desk, in order to line them up neatly.
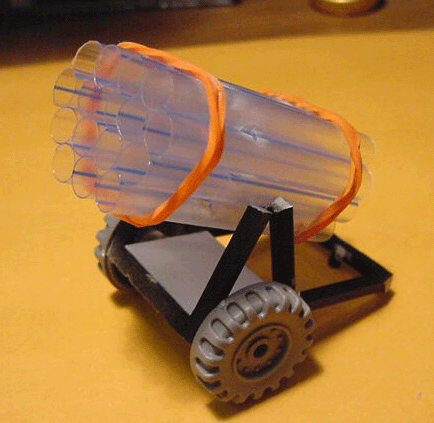
The pattern that I found that works well for me with the tubes goes like this 0000 Once your happy with the alignment, use superglue between the tubes and on the rubber band to hold the whole thing in place |
||||||||||
|
|
|||||||||||
|
Once everything is dry, will just stick the tubes on at an angle that you like, and glue it in place! | ||||||||||
|
|
|||||||||||
|
I spray painted the heck out of mine with flat black spray paint, and than drybrushed boltgun over the black when it was dry. I added old wet transfers from a buggy kit, and touched up the drybrush a little. your done! As you can see they look pretty good for a buck worths of materials. | ||||||||||
Final notes:
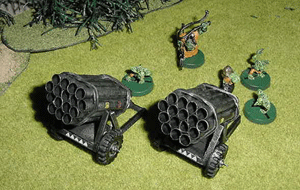
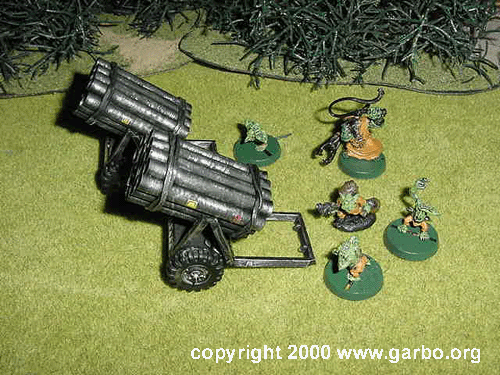
I really like the GW lobba model, but I was trying to save money, and using the same set of grots to run all my 'eavy guns. These can be dressed up easily with extra bits, and if you make your own wheels, the cost really drops (the GW wheels are about a $1.00 a sprue I think). If you make one, let me know, and send me pictures!
Make sure you visit the full 40k site for bat reps, more conversions, and complete rosters!!
contact Scarpia
