 Battle
Fortress Conversion 1.0 - Da Dakka-Lith
Battle
Fortress Conversion 1.0 - Da Dakka-Lith Battle
Fortress Conversion 1.0 - Da Dakka-Lith
Battle
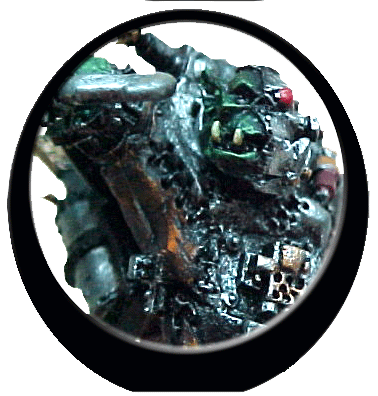
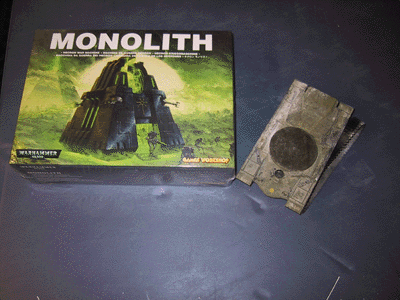
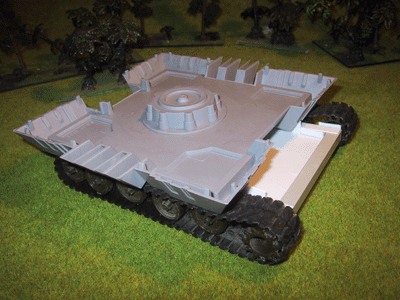
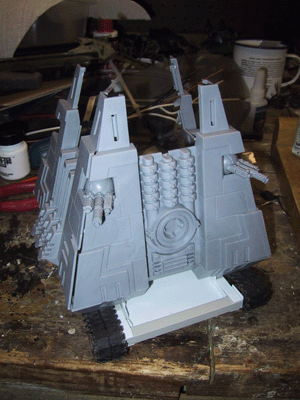
Fortress Conversion 1.0 - Da Dakka-Lith- COMPLETED 26 MAY 2004 - Warboss Bobz Killa Konktikz are notorious looters, and their next victim was a Necron Monolith that Bob swatted from the sky like a fly with his powerklaw. Well Gooba chewed on this one for a bit, and finally came up with a great idea - Battle Fortress!. I brought this to the Golden Deamon at Gamesday 2004, but came up empty in the open competition.
 |
 |
 |
 |
 |
 |
If you have time, check out the rest of the site too - including the ork army list, and the other conversions.
Some have said that a Monolith is un-lootable. It is made of living metal, it phases out, blah, blah. blah. Any Deathskull worth his weight can loot anything - and this is no exception. Here's how it happened.
Big Mek Gooba, second in command of Warboss Bobz Killa Konviktz, and a few of his most trusted mekz easily cut down the metallic warriors as they left the hovering pyramid, the ork burnaz leaving large scorch marks along the fallen bodies. The number of metal 'eads issuing forth lessoned, and Gooba's bionicly enhanced eye picked up a slight shimmer surrounding the pyramid. Having fought the Necrons consistently for the past few weeks, the big Mek knew exactly what that meant.
"Quick ya gitz, fire da chain gunz!" Gooba shouted at a group of Meks on the back of his nearby wrecka. Two strange weapon mounts, each resembling a large spear launcher, turned and fired their payload over the Monolith, each spear trailing a length of heavy cable followed by even heavier chain. The spears flew true, landied behind the Monolith, and imbedding themselves securely in the ground. The cables and chains draped over the Necron construct, and tightened securely as the wrecka's engine raced, pinning the Monolith in place.
A struggle between ancient technologies and basic physics took place, the technology winning as the wrecka began to be pulled backwards by the straining Monolith, its wheels tearing up earth as they spun. The shimmering became more pronounced as the living metal of the Monolith paused momentarily in its phasing, trying to identify the source of the restrictions on its movement. Gooba shouted again, resulting in large a mass of grotz leaping onto the wrecker, and the physical effort of the 100 gretchen changed the direction of this tug of war.
Knowing he only had moments, Gooba ran forward, his one natural eye fixed on the homing beacon, its internal light radiating brightly. Climbing up the side, and he adjusted the nozzle on his burna to its most focused setting. With a whoosh of compressed flame, the crude ork tool cut through the homing beacon's base, removing it from the top of pyramid.
Immediately the shimmering reversed itself, as the phaseing processed hallted, but the machine’s struggles increased as it shook itself violently against its restraints. Gooba almost fell from the pyramid’s top, but was able to sink his bionic hook into a support structure at the last moment. Bracing himself, he kicked out with a maniacal glee, smashing the glowing power crystal with his steel encased foot. A horrific explosion resluted, blowing him off of the Monolith and throwing him meters away from the machine, his bionic arm left behind and still anchored.
Grunting in satisfaction, Gooba picked himself off of a smashed grot. Ignoring that the smaller creature had padded his landing, he swatted at it, only to miss horribly due to the missing appendage. His foot connected, however, and he gave it a good kick. A grin straight from a child’s nightmare appeared on the flesh side of Gooba's face, and he turned to observe the Monolith sitting securely under the restraints, no longer shimmering, its struggles weak and impotent.
“Iz knew if it werkz fer a squggoth, dan it muzt werk on anyting” Gooba muttered to himself. His bionic eye returned to the violently glowing homing becon, still clutched in his natural hand. Gooba's grin grew wider as his gaze shifts to the now rising git. Gooba thrusts the homing device into one of the gitz hands, and hauls it to its feet, the wretched creature still reeling from being squashed and kicked. Reaching behind him, Gooba grabbs a superstikkbomb, engages the fuse, and shoves it into the grot's other hand. .
Standing dumbly, the shaken Gretchen looks confusedly at the items in his hands, and than at the Big Mek before it disappeared in a shimmering wave of light.
‘Dat otta be a nize surprise fer dem metal ‘eadz – now letz get goin’ on dis ding – Bobz gunna want hiz new fortrezz soon!”
 |
One part Monolith, one part old M60 main battle tank, and a bucket load of expensive bits willl hopefully = battlefortressl! |
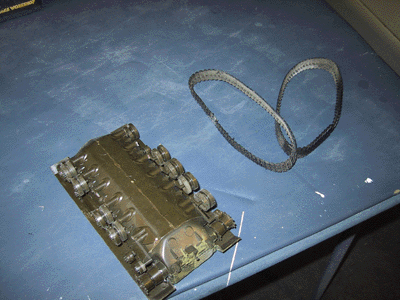 |
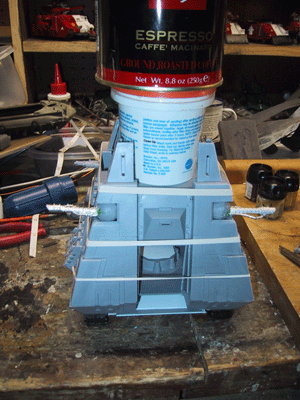
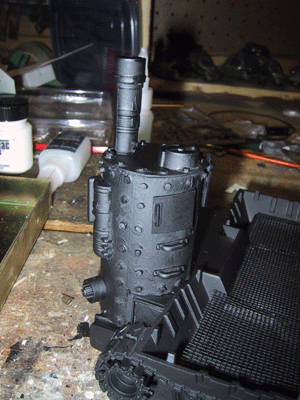
All I wanted off this model was the propulsion, I stripped off the trakks and carefully (read broke) off the main wheels. |
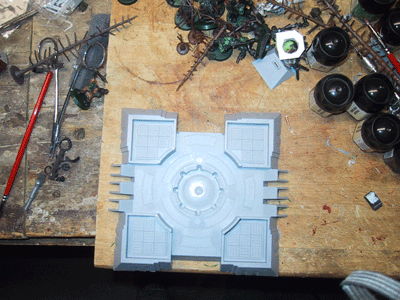 |
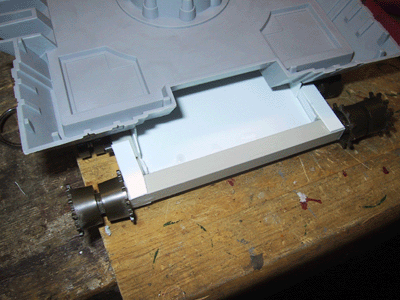
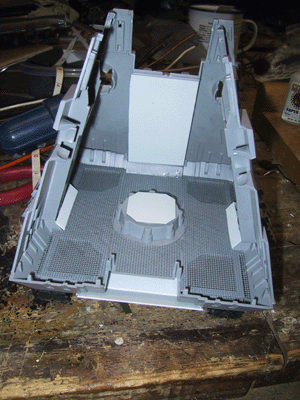
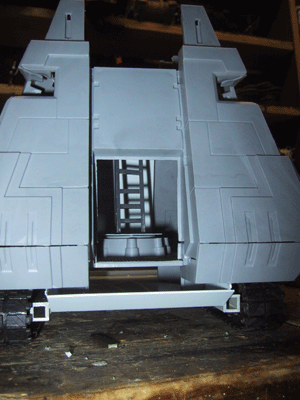
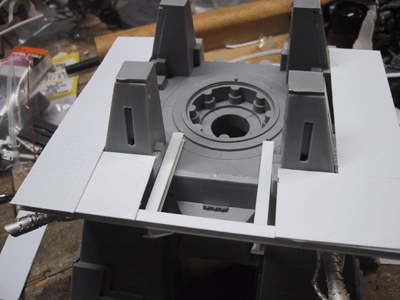
This is the underside bottom of the monolith. The first challange is how to get the trakks to fit.. |
 |
Two pieces of plasticard were cut, notched to fit the ridges and edges of the monolith base. Note that they run tight against tall center tabs (visual back center). In this case they run along the sides of the monolith (the front being where the door/ramp opens) |
 |
Once they were dry, a flat piece was cut to provide a smooth undercarriage. Note the overhang, this will be necessary for the rear drive sprocket mount. You may have also noticed the slope cut in the front on each of the side pieces of plasticard. Not shown in this picture is another piece of plasticard cut to fit that shallow slope. |
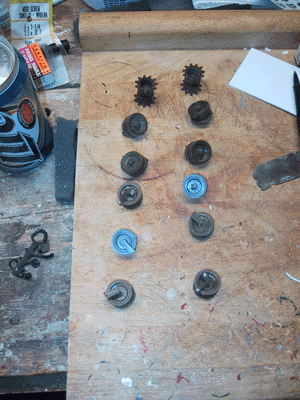 |
Here are the M60 wheels, laid out to get some idea on how many per side I will mount. The first problem arose, in that the clearance is not great enough, requiring the wheels to be mounted away from the side of the plasticard by at least 1/8 inch, if not more. The current solution is to stop by the hobby shop, and pick up some plastic channel (I wanted some I-beams anyway). |
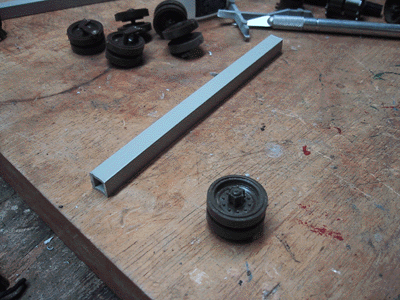 |
So I managed to pick up a length of plastic rod - this is about a 1/4 in width, and a rod of sufficent length cost all of $1.50. |
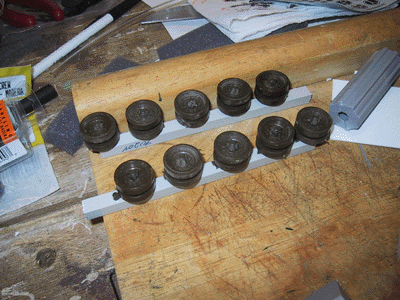 |
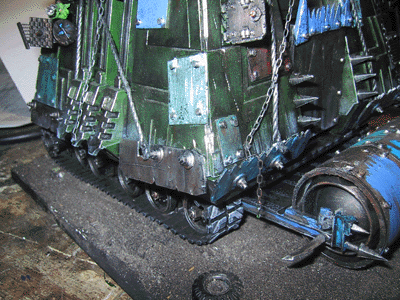
The wheels were mounted along one edge, at one inch intervals (measurement taken on axel centers) with the first (front) wheel tight to the rod's front bottom edge. Note that if you try something like this you will almost have to adjust your configuration to match the tank rollers that you have - just aim for some kind of consistant and decent looking result |
 |
I mounted the wheels to the plastic rod, and when dry, mounted the wheel set to the bottom of the plasticard box. I found that I needed to add a single layer of thin plasticard as a shim along the entire length of the model in order for the rod to fit straight (vertically). |
 |
Here's a frontal shot, with a good cross section - plasticard base (with front slope), shim (hard to see), rod, and wheels. I am not going to fill in the rod fronts; this seems like a good mounting point for the roller. |
 |
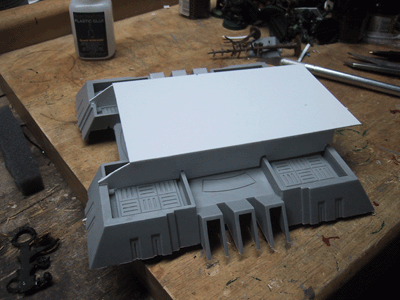
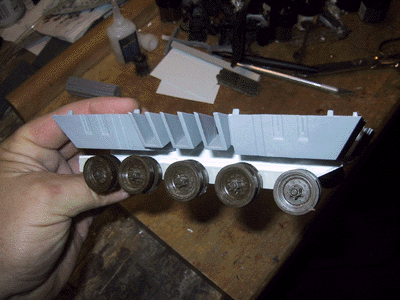
Once everything had dried, I slipped on the trakks for a dry run, and one final clearence check. Looking good! Next on the list is to mount the rear drive sprockets. |
 |
I
used another piece of the rod for a rear axle; This spans the rear end
of the Fortress. |
 |
Simply
glued on wasn't good enough - I discovered much to my dismay that the
gray rod does not melt with the plastic glue like the rest of the stuff.
Wheels popped off, etc. Finally, I broke out the classic superglue, and
that held everything tight. Because I do intend on using this model, and
because the plastic rod did not melt, I added some splice plates to the
top and bottom. These will be hidden when done, and add a lot of strength. |
 |
Here's
a good shot of the lower splice plates (white plastic) |
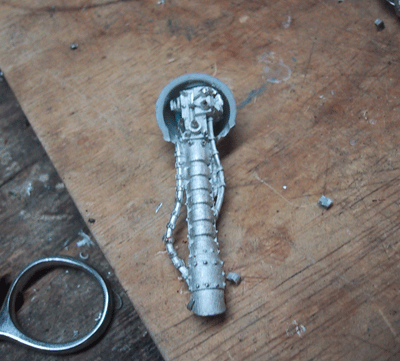 |
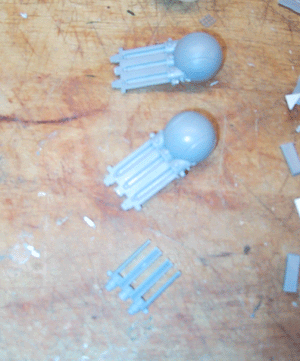
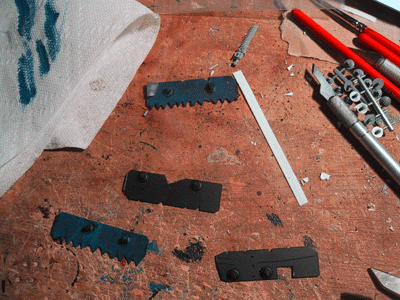
While
the chassis dried, I started work on the two front Zzap guns. I wanted
to use the ball mount, so a lot of the metal ZZap gun had to be cut away
for the weapon to fit. Cut away the plastic ball weapons, and notch the
top and bottom for the gun to fit. |
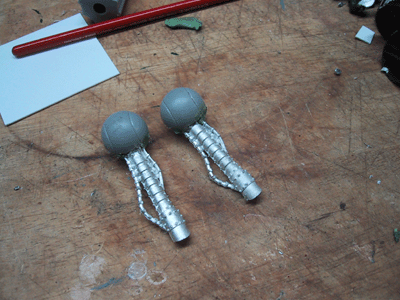 |
Here
are the two completed Zzap ball mounts; a little blue stuff holds the
gun in place while the glue dries the two halves of the ball together.
Green stuff fills in the left over gaps, and as a final step when on the
model, I will mount some small blast shields. |
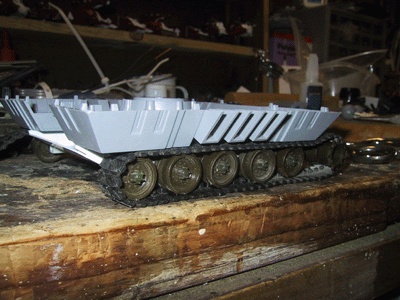 |
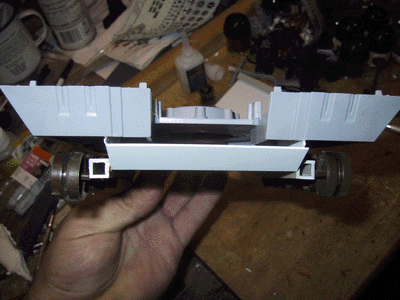
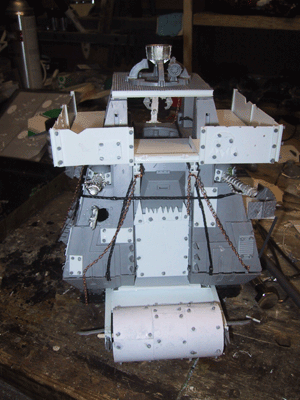
Back
to the chassis - one side trakk assembly is complete, one more to go. |
 |
Both
trakks are on now. Here's a rear shot. |
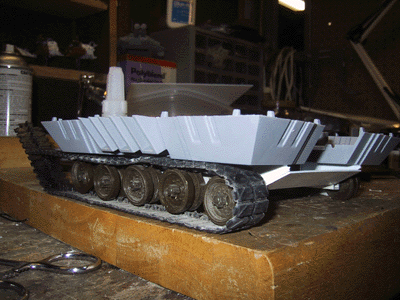
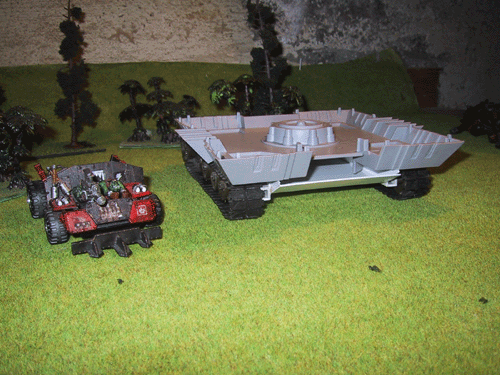 Size
comparison! Size
comparison! |
|
 With
t With
t |
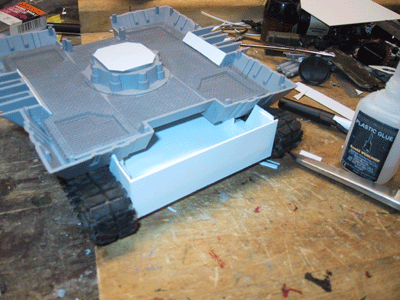
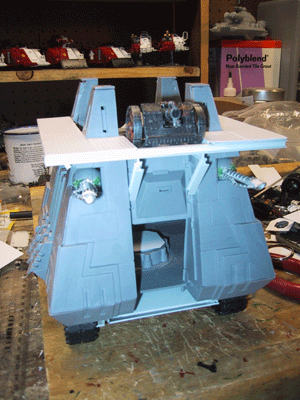
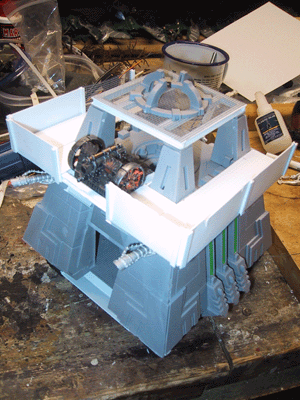
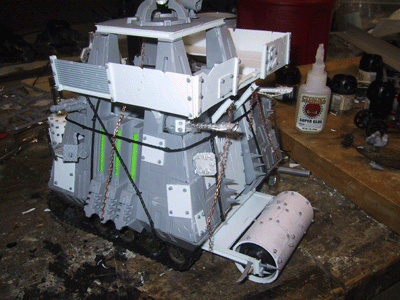
With the trakks mounted, I am considering doing some modeling on the inside
of the dakka-lith, the yellow highlighted area represents the available
space. |
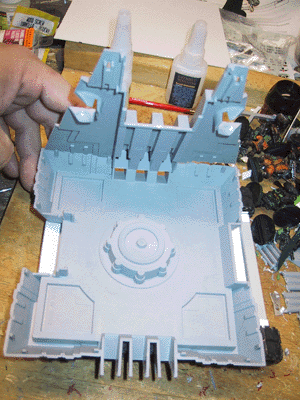 |
The
problem is that the sides slope in; reducing the usable space. |
 |
Also,
this is probably the only part that will be visable; through the front
door. Due to these reason, I will probably put down safety tread or mesh
flooring, and a couple of ladders and gitz, but not a whole bunch of stuff.
(unless I can leave the top loose.....hmmm.....) |
 |
A
dry fitting with a zzap ball mount in place. |
 |
A
single layer of plastruk mesh went over the bottom floor of the 'lith.
The front piece is left out for your illustration. |
 |
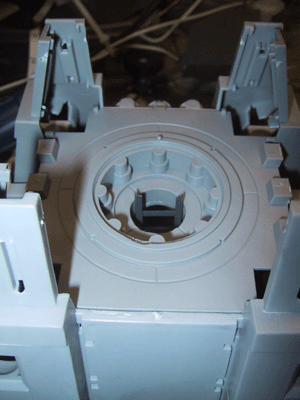
This
is the piece that the crystal sits in; I'm not going to use the crystal,
but this piece offers structural strength to the pyramid. |
 |
So
I drilled out the center with a very large bit on a drill press. Don't
sweat it if you don't have access to a drill press, while that makes things
easier, you can always put a lid over it (say from a Russ) and call the
hole closed. |
 |
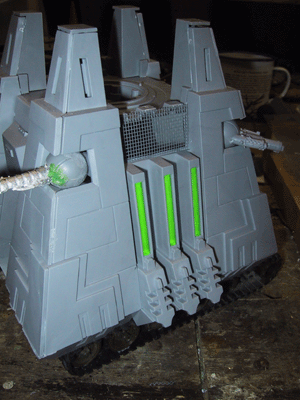
Now
it was on to the rear gunz. Big shootaz here, so I assembled the balls
first, and cut off a fair amount of the weedy necron weapon. |
 |
Big
shoota time! here's the big shoota assembly line - if you are reading
this, making big shootaz should be old school for you by now! |
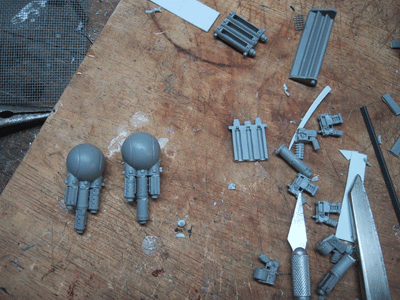 |
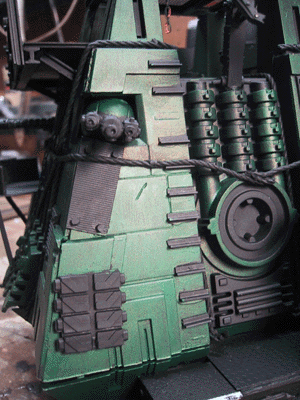
Check
out the big shoota ball turrets - I had first envisioned dual, than tripple
barrels, but I came back to the one large and two smaller barrel look.
Sort of like the middle finger thing going on there too. Very orky. |
 |
Here's
a dry run, butt side, with the big shoota ball turrets. I think these
are sufficently modeled. |
 |
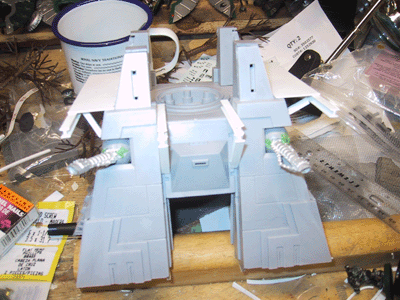
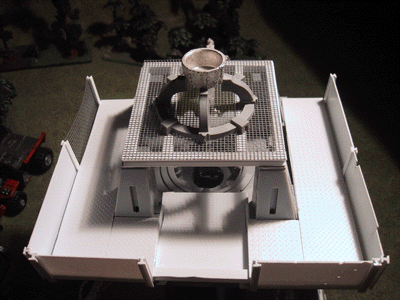
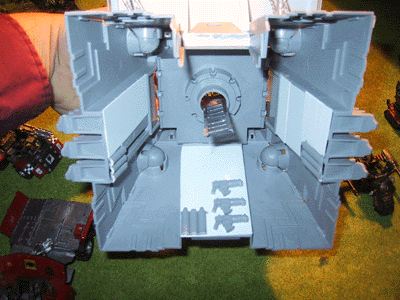
This
is an inside view of the beast. Note the mesh floor, the plasticard over
the center section, the side holes, and the back piece. I have decided
to decorate the innards to a degree, and try and make the top completely
removable. |
 |
This
ladder goes up to the new hole up above, and will ultimatly be fixed to
the top art of the machine. |
 |
Oh,
and here's the top end (hard to see, but I think you get the idea. Normally
this is where the crystal sits. Now, it's an access hole for da boyz! |
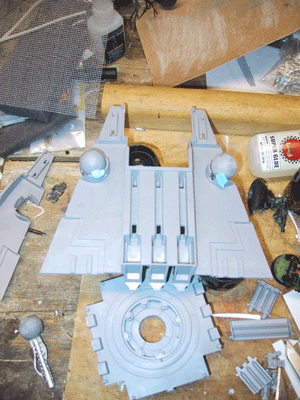 |
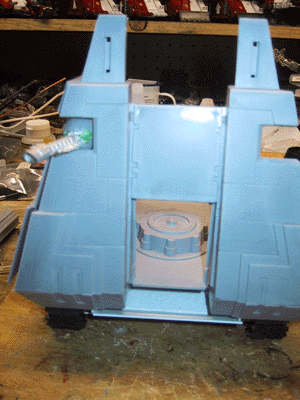
It
was time to assemble the top, and a dab of blue stuff held the ball mounted
weapons in place on the side pieces of the monolith. |
 |
Before
assembly, I covered the holes down the sides with plasticard bitz. |
 |
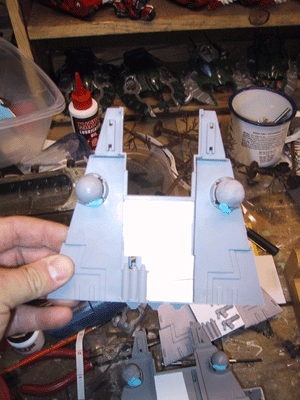
Here
it is drying. No laughing at my clamps - you can't beat rubber bands and
a coffee can full of nutz and boltz! |
 |
Side
view. I did put these green rods in to fill the holes, but they, like
everything else, will be painted. |
 |
With
the top drying, I turned back to the engine compartment. It was boxed
in with plasticard. |
 |
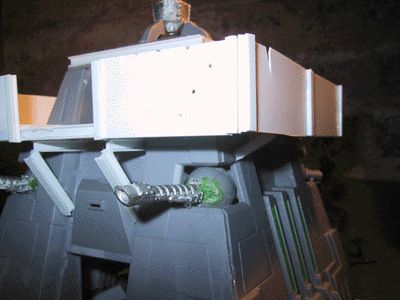
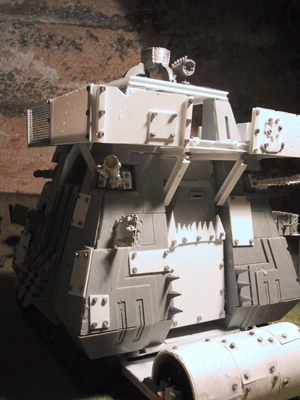
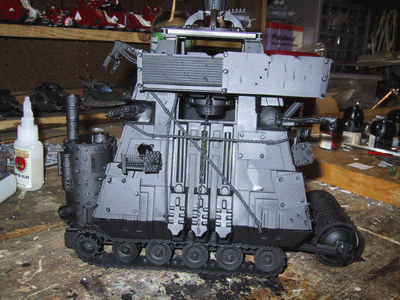
Back
to the top. I began construction on the top firing step. Plastruk I-beams,
and plasticard. Note the driver's spot; the old rhino piece was just calling
out to me from the bitz box. |
 |
A
close up of the firing step. The traction plate was applied over the regular
plasitcard. The center area fitz any ork heavy weapon - zzap, kannon,
or lobba, adding a little flexability. |
 |
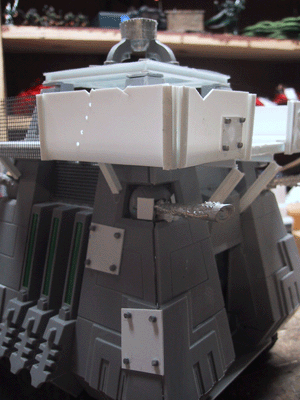
Here
it is together with the firing step bottom in place - oh, and a Kannon
to boot! |
 |
Side
view. |
 |
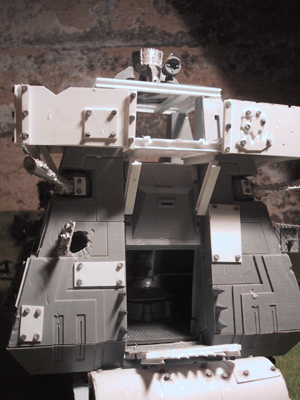
In
the back I added a ladder, and put on the side frames for the firing platform. |
 |
In
between the I-beam side frames, plasticard was glued in place. The top
mesh grid was added, as was the crystal support from the monolith kit. |
 |
Now
the crystal support holds a crows nest. |
 |
Rear
view. |
 |
A
close up of the cage roof, and crows nest |
 |
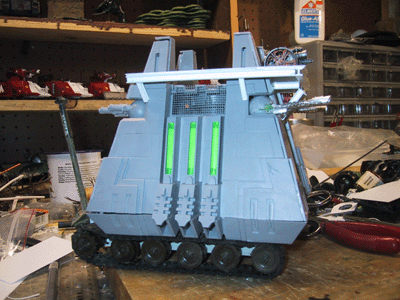
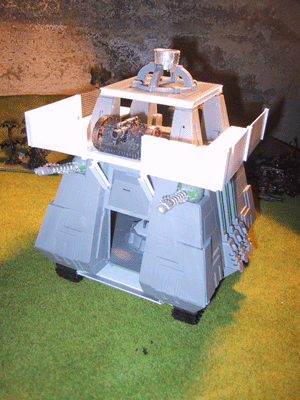
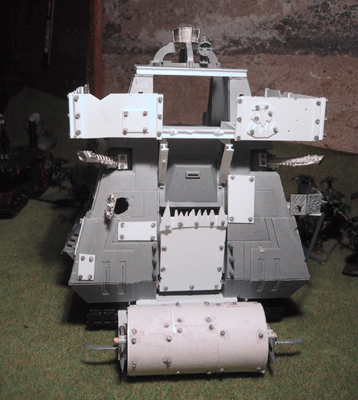
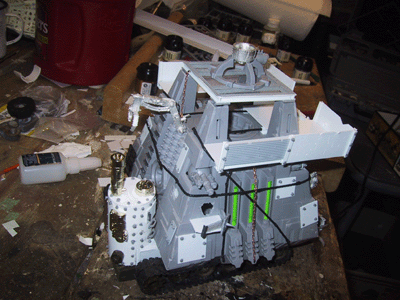
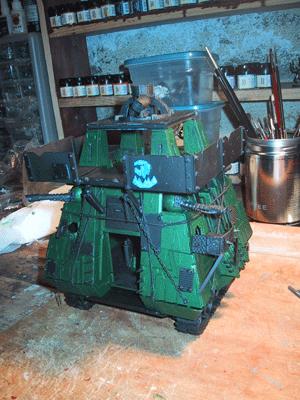
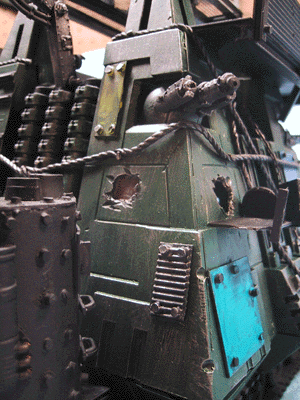
I've
started to add battle damage; it's hard to see here due to the reflection
of the flash. Now that the structure is complete (although I am going
to change out the exhaust stack), I can start gubbinzing it up. |
 |
More
battle damage, and extra armor and "fixes" are being added. |
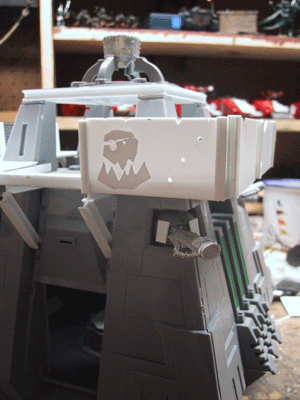 |
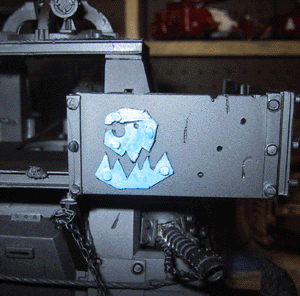
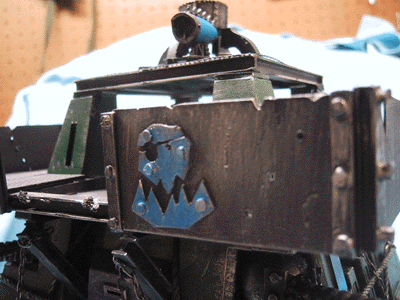
As
well as a large Deathskull emblem, hand cut from plasticard. |
 |
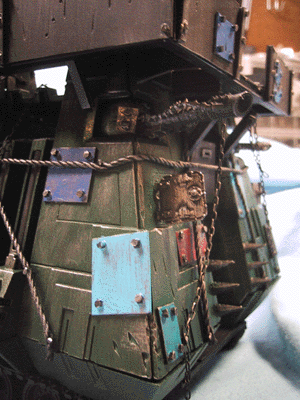
Interior
shot. The ladder is glued in place to the top of the machine. |
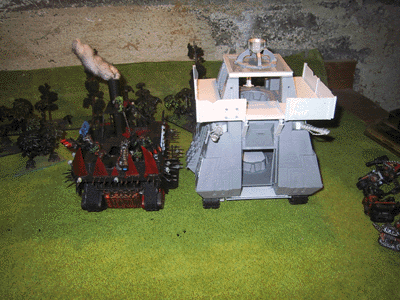 |
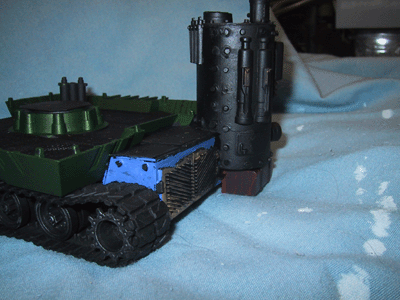
Size
comparision - that's a land raider based battlewagon next to it. |
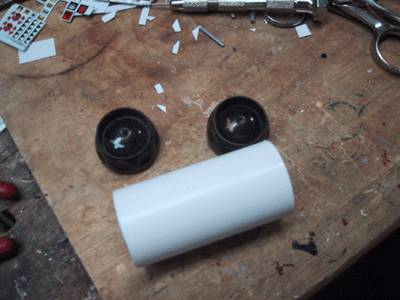 |
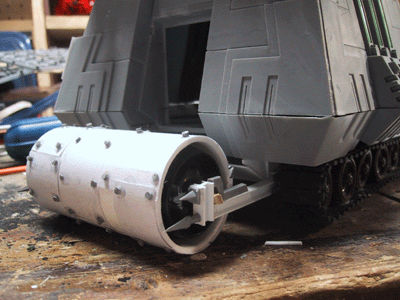
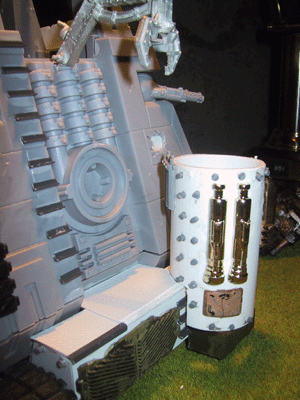
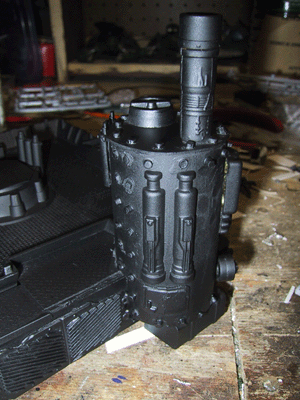
Krusher
parts. That's a piece of 1 1/2 plastic pvc pipe, and a couple of caps
from dried up citadel paint (I KNOW everyone has a few of these). |
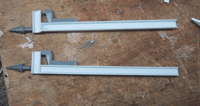 |
The
side supports - plastic I-beam, spear tips from a goblin sprue, and more
sprue, this from the Monolith kit. |
 |
The
caps go on the inside, and a hole is drilled though the center of each.
A small dowel is than run as an axel. Index card was cut, and superglued
to the top, than "rivited" with goblin spear shaft rivits. |
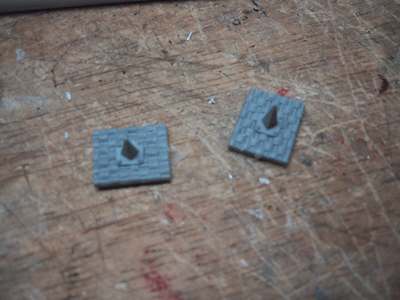 |
I
needed a top spike, and I spotted these on a goblin shield sprue. |
 |
The
superglue fumes started to get to me, and my fingers were sealed together,
so I stopped here for the day. Looking ok though! |
 |
I
picked back up by adding battle damage! This one will soon be the access
point for gitz. |
 |
And
some more up front. |
 |
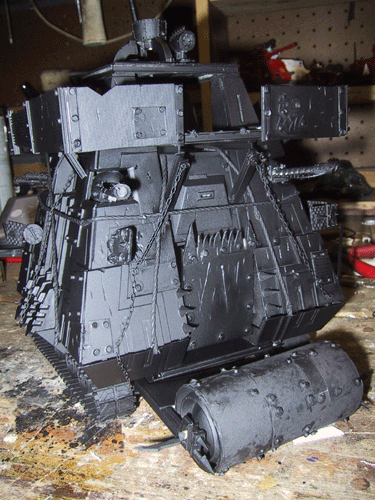
I
managed to finish the krusher. Note the side blades, not only does it
roll, but it is removable. The front ramp was also added to the model. |
 |
And
it works, too! (here in the lowered position). |
 |
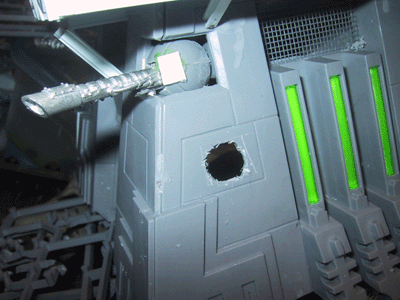
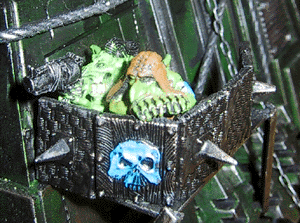
A
close up of the grot nest. I need to make some green stuff sandbags as
well. |
 |
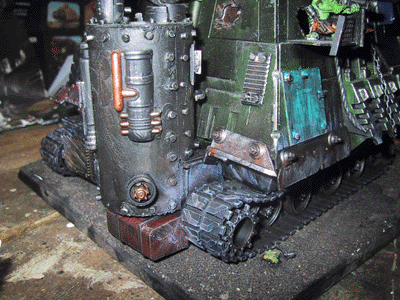
In
the back, we worked on the engine. A new, larger scale boiler was added. |
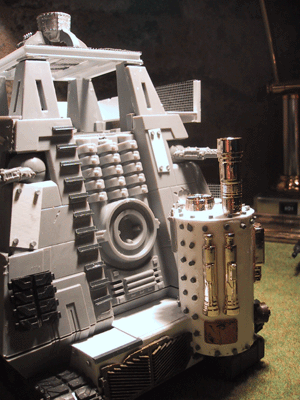 |
After
those bitz dried, the boiler was topped off and a smoke stack was added.
You might be wondering what the gold stuff is; well the mek boyz in my
employ don't restrict themselves to any singlur sci-fci universe; that's
part of an X-Wing fighter I look for this to show up again in future models). |
 |
Here
is the other side of the back. Note the smaller "grotz nest"
on the right side. |
 |
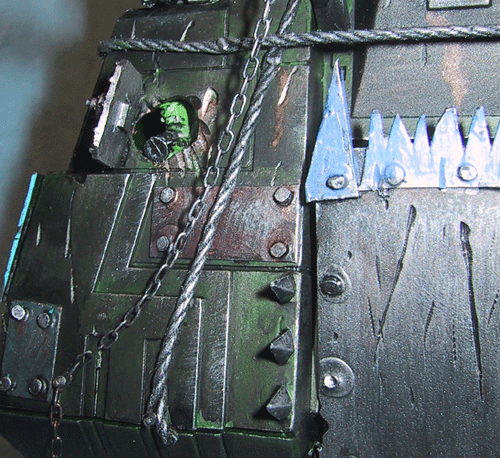
The
front ramp was "orkafied" with battle teeth. |
 |
And
again, the ramp works. Spikes were added to either side of the door, and
note the battle damage on the front right of the machine- it's hard to
see but there is a hatch over the impact zone. When finished, there will
be a grot shooting out from that hole. |
 |
I
spent the rest of the day working on the crew; construction is halted
until the chains show up in the mail. I may continue to detail the inside
though. |
 |
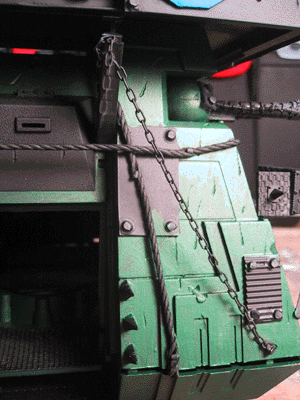
Well
the chains showed up, and they were much smaller than I had anticipated.
So I ran the "steel cable" around the model, pinning it in place
by drilling a small hole, sticking a model railroad spike through the
cable, coating it with superglue, and than inserting the spike in the
hole. I did add another cable wrapping around the entire model after this
picture; next is some chain on the sides, and than I think she'll need
to be primed. |
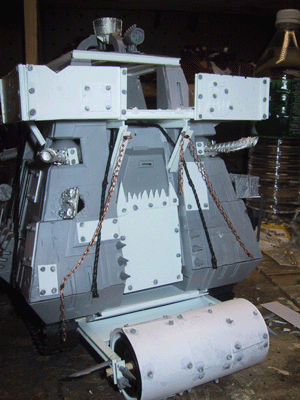
 |
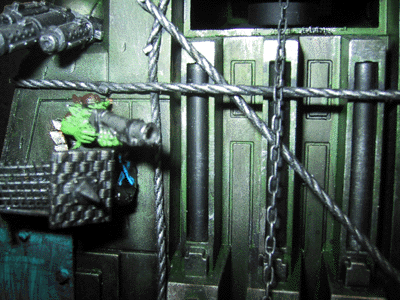
The
side chains were added |
 |
And
the front ramp "scuffed" up a lot. |
 |
This
is the final, pre primer shot. Enjoy! |
 |
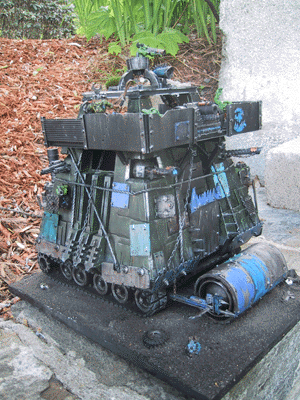
Here's
why I think primer is a good thing. Look how much better the boiler looks
with a coat of primer. |
 |
and
the other side. Wow, that even looks like a hatch (it's supposed to be!) |
 |
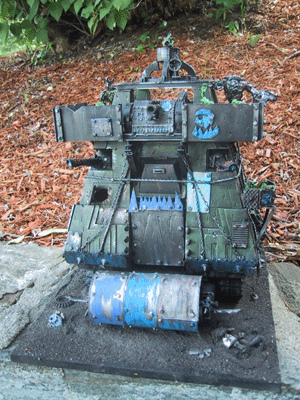
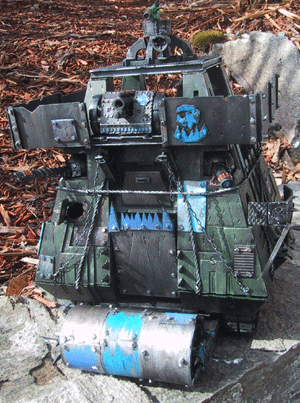
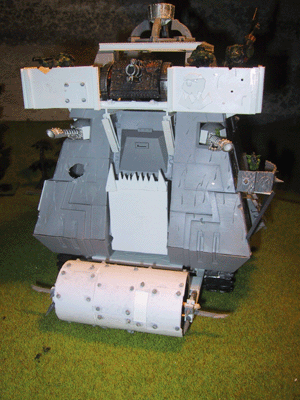
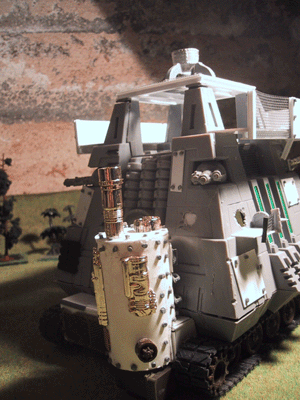
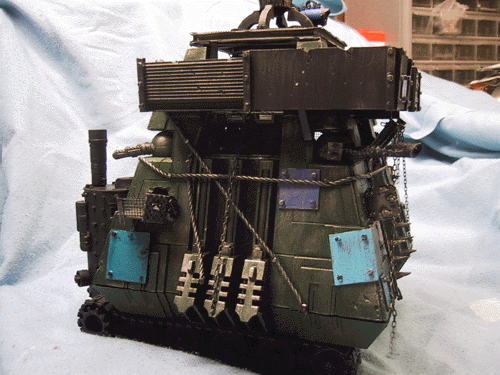
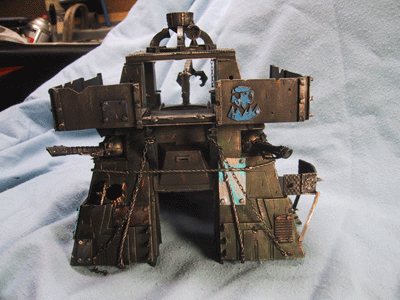
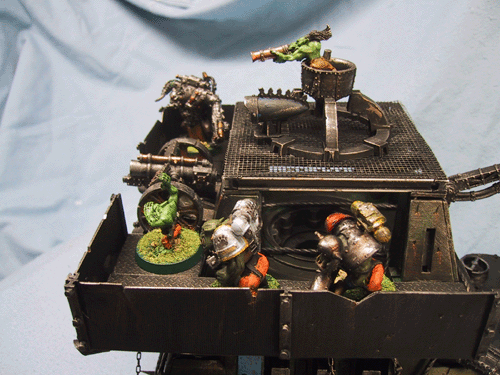
The
business end of the Dakka-Lith. Note the battle scars and damage. Does
it look restrained enough? |
 |
Side
view. |
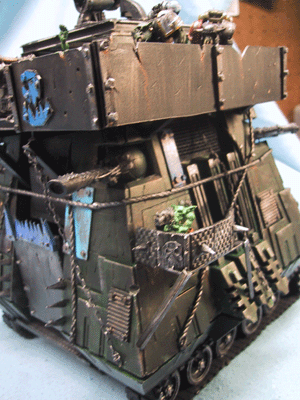
 |
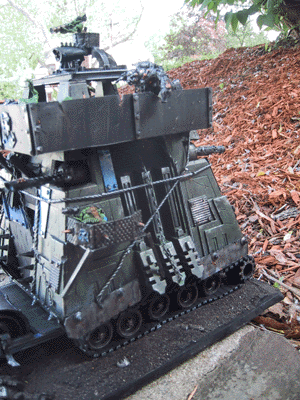
Rear
shot... |
 |
We
couldn't keep da damn gitz off of it! |
 |
da
lookout. |
 |
The
FIRST thing to get painted is the Deathskull! |
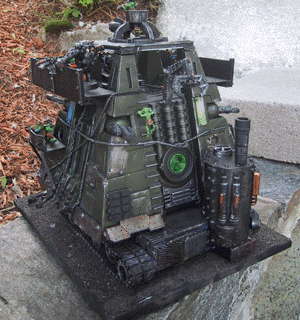
 |
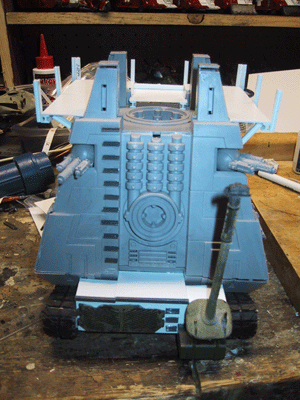
A
necron player recommended 1 part dark angels green, and one part gold.
I added some water to the mix too. Note that I painted all the original
monolith parts the green/gold mix. |
 |
Close
up of green gold paint, rear |
 |
Close
up of green gold paint, front. |
 |
The
first boltgun metal drybrush was added to the top. |
 |
Note
that I decided to paint the added plates in many colors, but primarily
blue (for the Death Skulls, of course). I tried to use as many different
shades of blue as possible though. |
 |
Death
Skulls Rock! |
 |
Close
up |
 |
Close
up. Next on the agenda is a rust wash over the entire model, than more
rust, than another boltgun drybrush! |
 |
This
is the rust application. The small panel in the middle got it, the bottom
long one didn't. I like my looted stuff grubby. |
 |
For
comparison purposes, the top half has the rust wash, the bottom does not. |
 |
While
the rust dried, I slapped some lucky blue to the back motor area. |
 |
Here's
the front with the dried rust wash. |
 |
After
the rust wash dried, I lightly drybrushed boltgun again over the model,
and added brazen brass rust strips from rivits, bullet holes, etc (see
the top metal). I did touch up the Death Skull emblem, as me boyz would
keep that somewhat nappy. |
 |
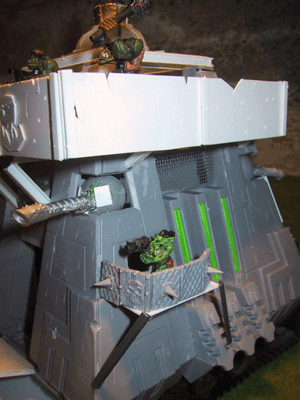
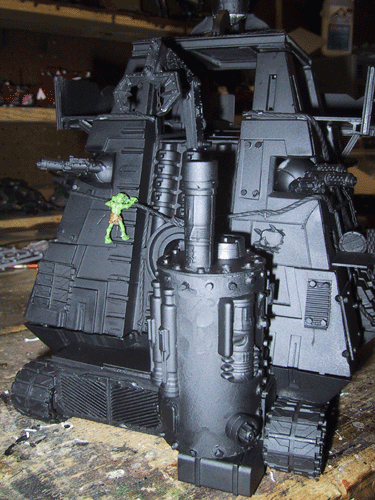
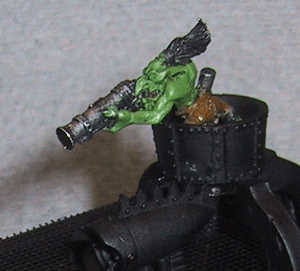
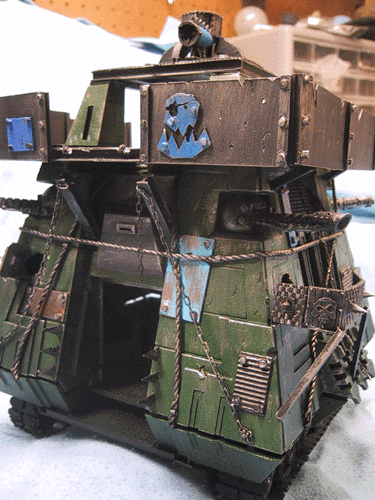
A
close up of the front, and the grot peeking out. |
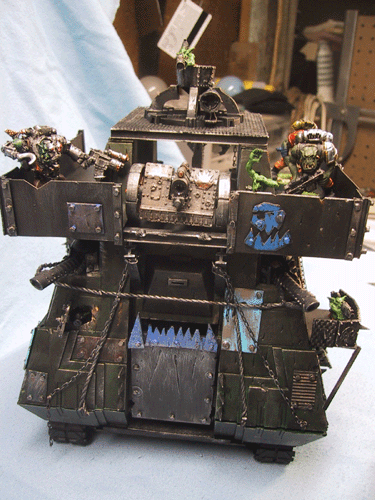 |
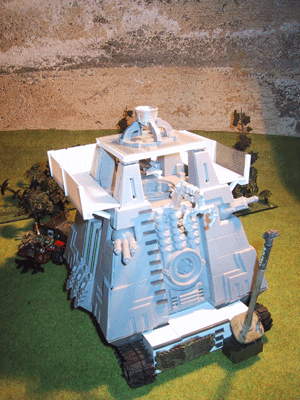
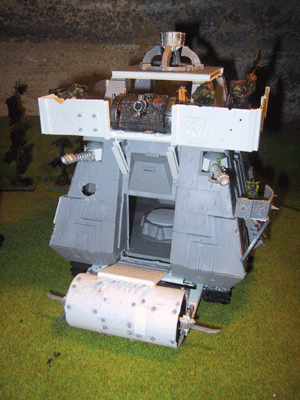
A
full frontal view with some boyz, and thte kannon installed. |
 |
The
top deck. |
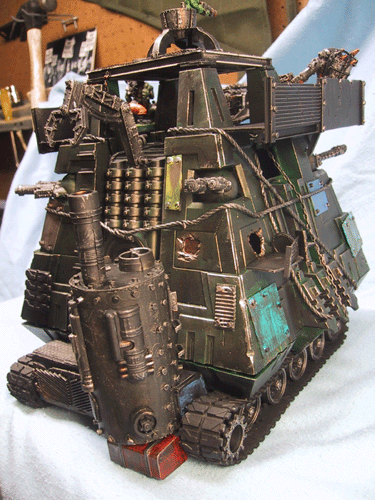 |
The
rear end. Well that's it for now, I'll add small details, but for the
moment this pig is ready for WAAAAAGH! |
 |
Here's the mekboy/slaver modification. |
 |
And
the dakka-lith in daylight. Note that the cannon got a repaint, and I
finished the krusher. |
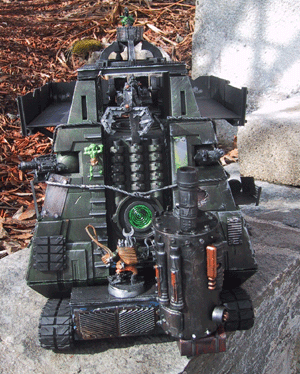 |
Rear
shot. Still more detail work to do. |
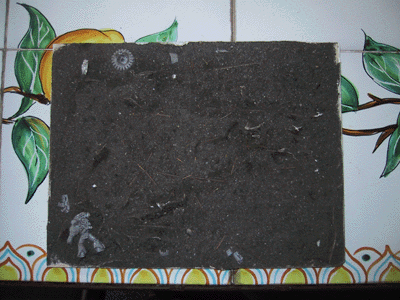 |
I began construction on a scenic base. Wallplaster on a piece of tile
lie underneath the dirt topping. |
 |
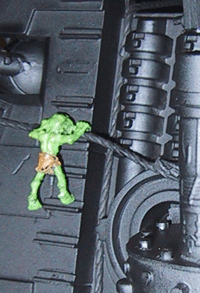
More
model details are being added, such as these grot crewmembers on the port
side grots nest. |
 |
And
this one ta starboard. |
 |
Here's
the base finsihed and ready for the model |
 |
And
trying on the dakka-lith for size. |
 |
There
were gaps between the upper and lower hulls, and I decided to add some
more armor plates to hide them. |
 |
A
close up of the front plates. The large bolt fixtures are from Grandt
Line. |
 |
And
a rear shot. Note the "weathering" drybrush of earth. |
|
Voila! |